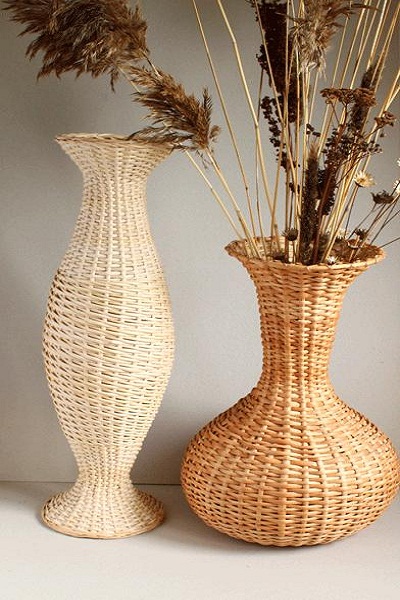
The floor vase will fit well into any interior, regardless of its style and inhabitants, but here's the ill luck: a good outdoor vase is worthless money, and the fragile materials of which it is made are unacceptable in the home with a pet or a small child. How to make inexpensive and unbreakable floor vases with your own hands, you will tell our photo master-class.
How to make an outdoor vase?
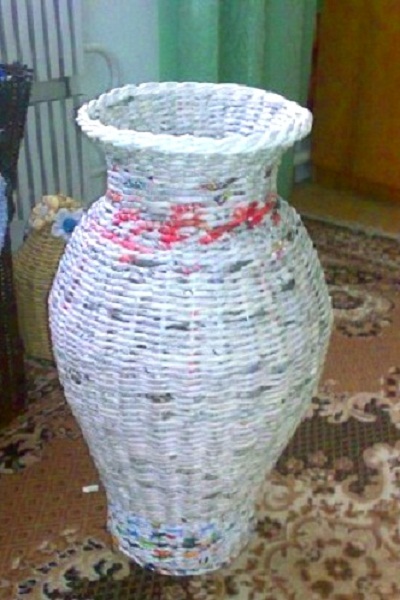
Make a vase, let alone a floor, with your hands from scratch is always difficult, but a few hours spent will save you a lot of money, and the result will please and make you proud of yourself! So, today we are making a vase, woven from the newspaper, with our own hands.
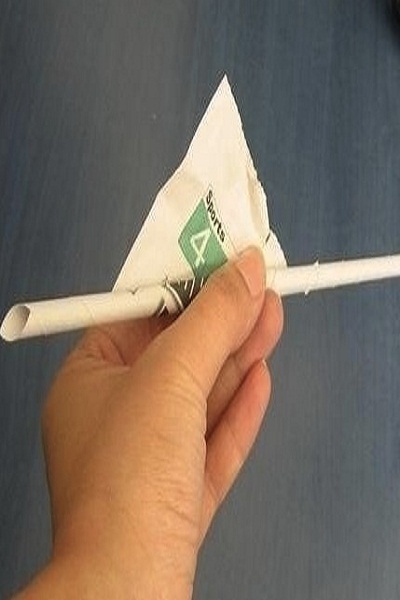
All we need for this master class is just: a stack of old newspapers, PVA glue, a lid from a pot and a pair of hands.
- We begin to weave with the formation of bundles from newspaper sheets, it is extremely simple: just roll the newspaper sheet into the tube from one corner to the other.
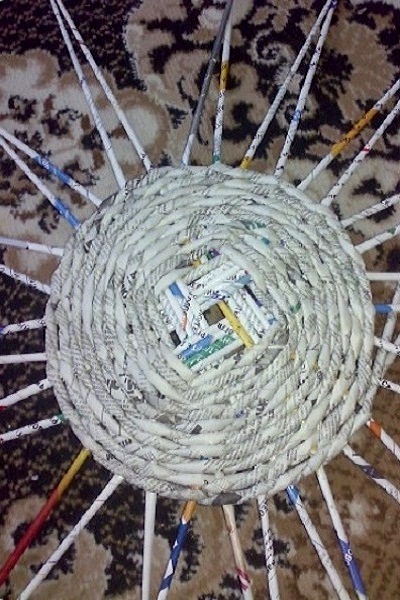
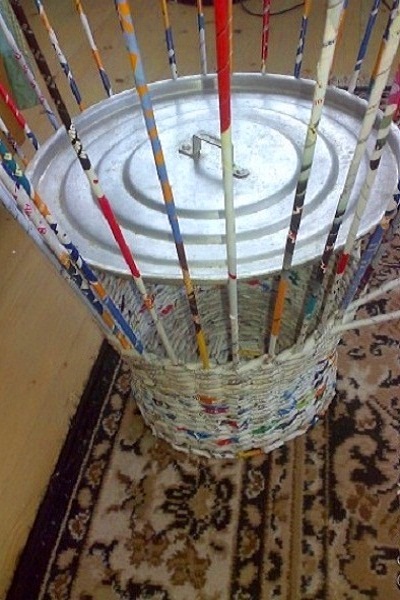
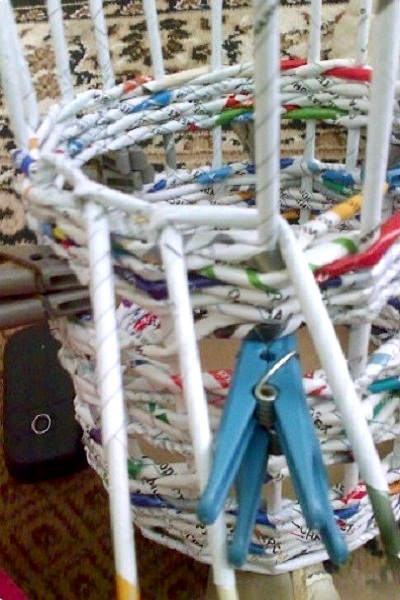
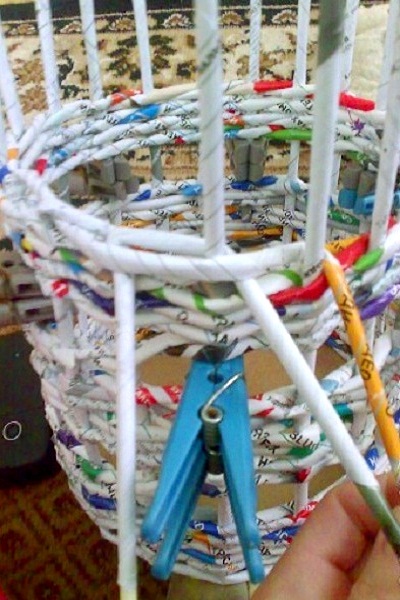
- The bottom of the vase is best cut from cardboard. This technique will greatly reduce your time. However, if you still want to weave the bottom manually, you need to form four bundles of four bundles, and fold them crosswise, alternately each of the bundles should be run in a circle, wrapping each of the four beams. Thus, the first three rows are weaved, and then a quartet of tubes is divided in pairs and braided in the same way three more rows. Having finished, we have already 6 rows of weaving and now wrap each of the tubes separately. And we get here is such a bottom:
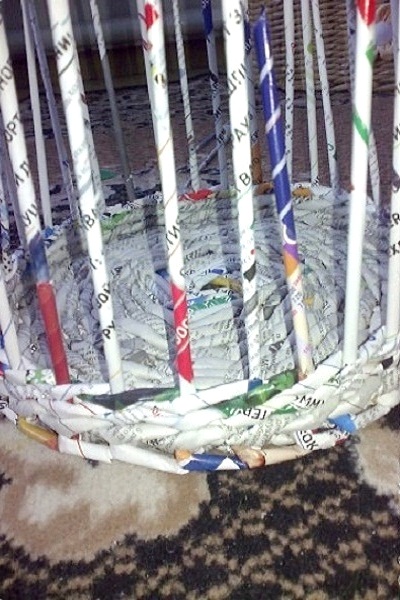
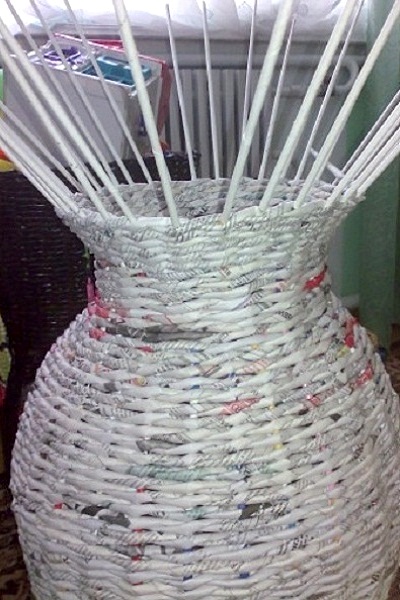
- We pass to weaving the walls of the vase: bend the protruding bundles upwards and each of them is braided with a rope. Thus, we form the leg of the vase, its width depends entirely on your wishes.
- Now in the course there is a cover, or a plate, or in general anything disc-like and in the area wider than the bottom of the vase. We insert the lid between the struts of the harnesses, at the point where the leg of the vase will expand, respectively, the lower you place the lid, the wider will be your vase, and vice versa.
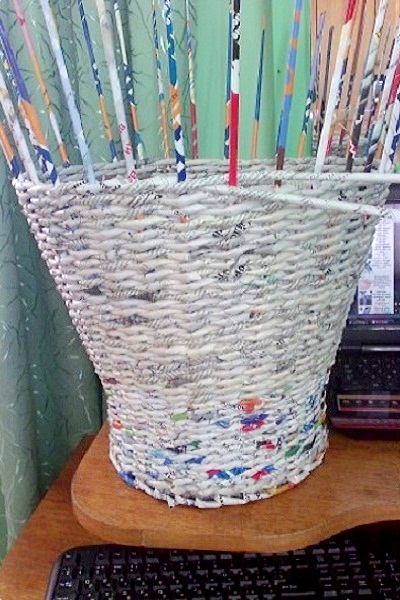
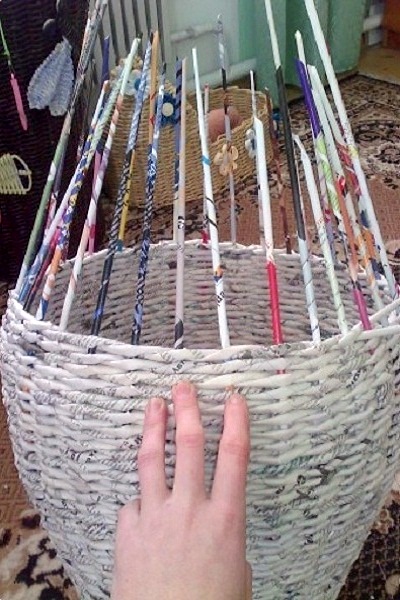
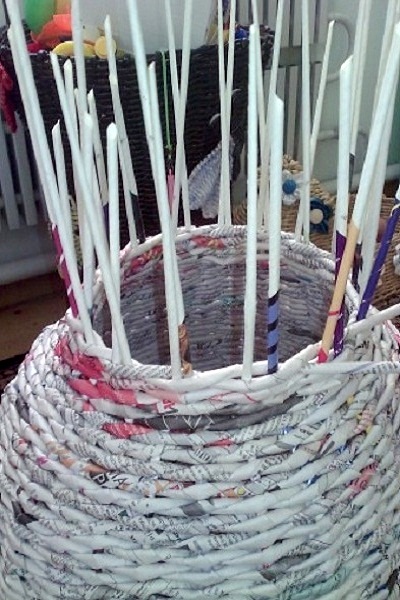
- We continue to weave in the same technique 10 more rows.
- Then, with the help of elastic bands, or by our own hands, we gradually begin to bring the edges of the strands together, that is, we turn to the weaving of the narrow neck of the vase.
- We twist the narrowing neck up to the time, until we have to braid two harnesses-struts, instead of one.
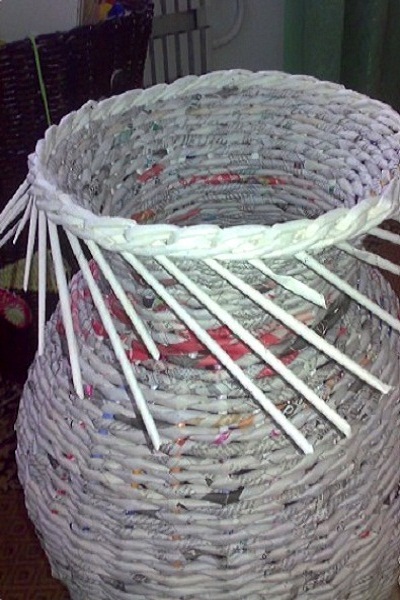
- We again plant the bundles in the sides and we weave the border of the vase.
- Alternately, bend one rack after another.
- After reaching the fifth rack, again go back to the first and bend its tail under the heel of the rack, and then fix the fourth. Next, in the same scheme, bend the second post on the seventh and cover the sixth, the third under the eighth, and so on.
- In the windows that appear in each binding, let's skip one rack until the spit resembles a shape.
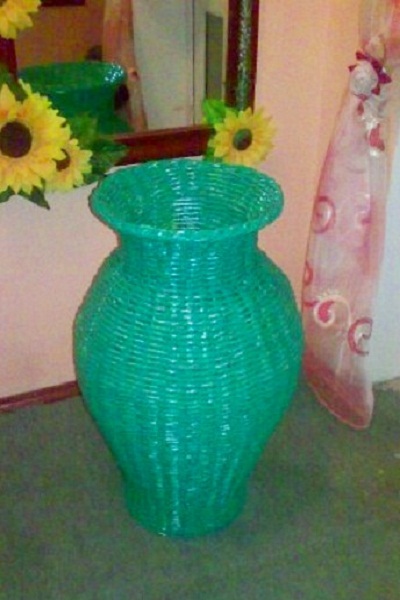
- We stick out the sticky remains of the tubes and our vase is ready! Cover it with PVA, or clear varnish and, if desired, paint.
| | | |
| | | |
| | | |
| | |
| | |
And so we learned how to make an outdoor vase from the newspaper itself. If you want, using the same technique, you can weave a vase out of twigs, rattan, rubber tubes, cloth and anything. Vases made by themselves, from a variety of materials suitable for any home. This detail of the interior can be woven with the use of different techniques, vary the size, expand and color it in absolutely any colors. Covered PVA vases are not afraid of moisture because of this they are easy to wipe from dust, and the shatterproof materials of which they are made do not hurt you and your relatives.