With our little inventors, we always want to create and create something. Any kind of applied art develops the child's abilities, improves motor skills and coordination. We suggest you get acquainted with the new direction for children's creativity - crafts from napkins. This is a very fascinating and interesting activity, as a result of which beautiful hand-made napkins are made, which can decorate more than one shelf.
How to make crafts from napkins?
First we will prepare the necessary:
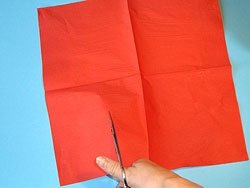
- color cardboard-base;
- napkins of different colors, cut into squares;
- glue and brush for glue.
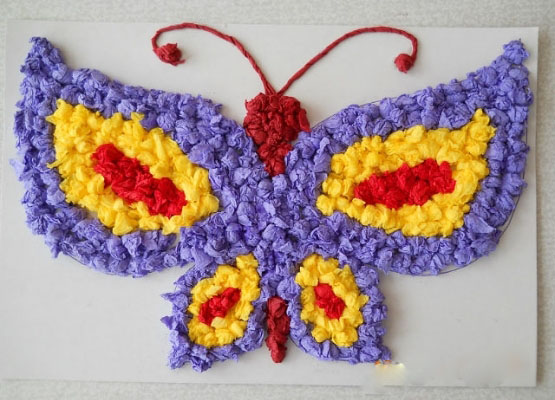
To get a closer look at the technique of work, we suggest you work on a picture of a bright butterfly. To do this, draw a butterfly on the basis of it. Mark in advance what color and where should be the wings. After that you can start working. Sliced colored squares must be twisted between the fingers in the balls and glued to the marked places. In this way it is necessary to glue the entire butterfly. That's all. In this way, you can come up with many different pictures, gradually complicating the plot.
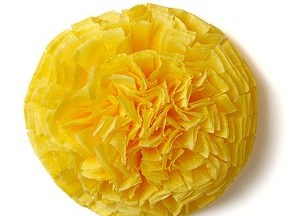
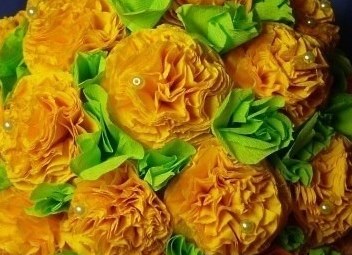
Crafts of flowers from napkins
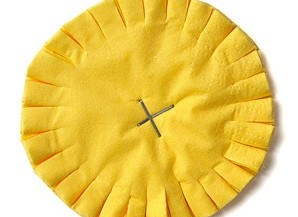
For the manufacture of colors you will need:
- dense and thin colored paper;
- three-layer napkins for flower buds;
- a stapler.
Let's get to work.
- We divide all layers of napkins.
- We take two separated layers and add each of them 4 times.
- Then these layers are folded once again.
- Carefully overlay the folded layers on top of each other and fasten them in the middle with a stapler, so that the staples are positioned with a plus sign.
- Now cut out of our multi-layered circle a circle.
- Around the circumference we make many cuts, the depth of which is about 1 cm.
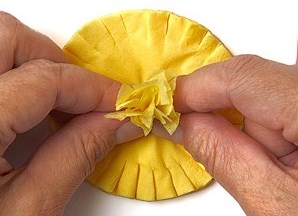
- After all this, raise the uppermost layer and press it with your fingers to the center.
- You also need to work on all the other layers. Sometimes instead of one, you can take two or three circles.
- In the end, you should get a magnificent flower. This way you can make a beautiful fluffy bouquet, and you can make a regular applique. You will only have to think through the leg.
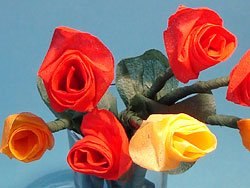
From napkins you can make a "long-playing" pink bouquet. To do this you will need:
- three-layered green napkins for stems and leaves;
- napkins for pink buds, colors at your discretion.
We proceed.
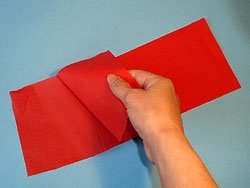
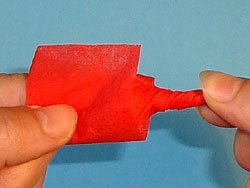
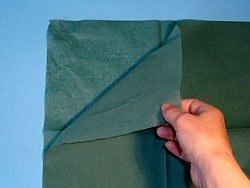
- Straighten the napkin-bud and cut from it 1/3. We work with the cut off part.
- Fold the napkin in half. After that, bend from the top about 1/3 of the piece.
- Place the napkin on the index finger of the left hand with the folded top and freely twist it.
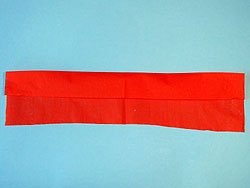
- On the bottom edge, tighten the napkin as tightly as possible.
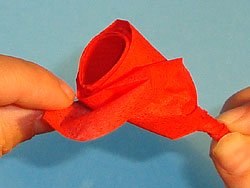
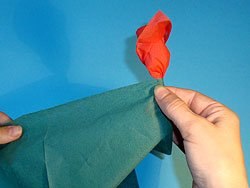
- On the top of the napkin there is a prominent corner, gently pull it up, and then sideways.
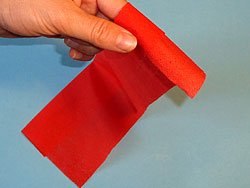
- Carefully spread out your rose.
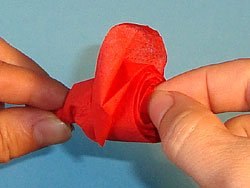
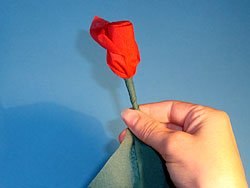
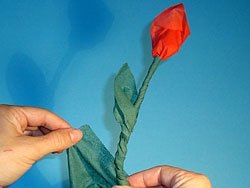
- We begin to work on the stem. Separate one layer of green napkin and very tightly wrap it around the end of your rose.
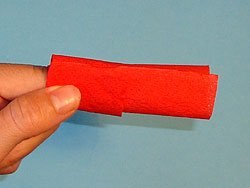
- Tightly turn the green napkin down, turning it into a stem.
- When you decide that it's time to already appear a leaf, pull one edge of the green napkin up and make a paper from it. Then continue to twist the stem again. So you can make the leaves as much as you want.
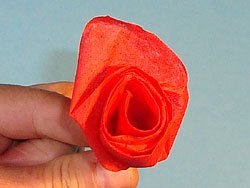
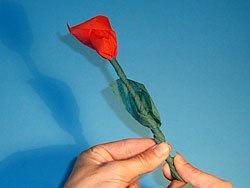
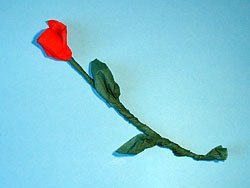
One rose is ready. Now it's time to decorate it with a ribbon or sprinkle with varnish.
| | | |
| | | |
| | | |
| | | |
| | | |
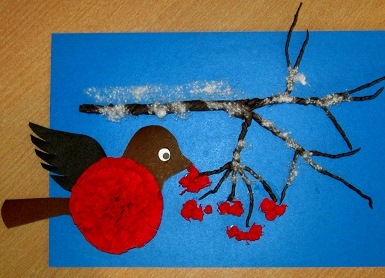
Crafts from napkins to Easter
Using just a few of the above methods, you can make a beautiful postcard with a bullfinch for Easter.
- On the cardboard base of the blue color, mark out what and where should be.
- From black or brown paper, cut out bullfinches, and from red napkins make a lush red breast.
- Slightly fantasizing can come up with a twig with berries of mountain ash, to which your bird flies. Everything, the Easter card is ready.
Crafts made of napkins for children are not only a great way to spend time, but also an opportunity to develop, creating amazing works and gifts with your own hands.