No matter how many drawers there are in the house, one more shelf is missing. So why not build such a directly under the ceiling? Making mezzanines with your own hands will not take you much time, or resources. Of course, if you are planning a solid construction with a powerful frame and full doors, you have to fork out. We propose to consider the option of constructing mezzanine in the corridor from the available materials by myself.
Manufacturing of mezzanines by own hands
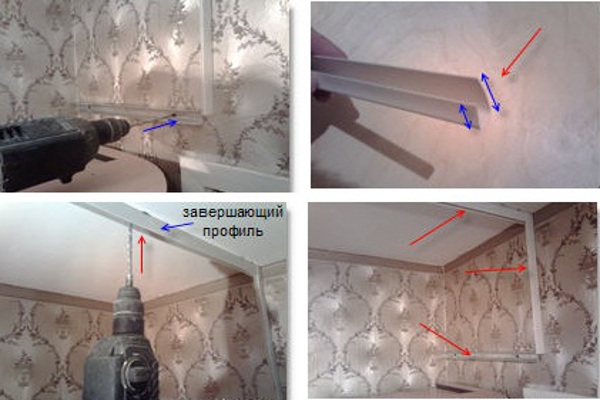
From the materials we will buy in the building market a pair of rails from the aluminum profile, fasteners, plastic panels used for sewing the ceiling and walls, as well as corners with guides under these panels.
- The first thing we do is determine the layout of the cabinet. Next, at the desired level, fix the guides from the metal profile, it will hold the bottom. It can be made from a thick sheet of plywood or similar material.
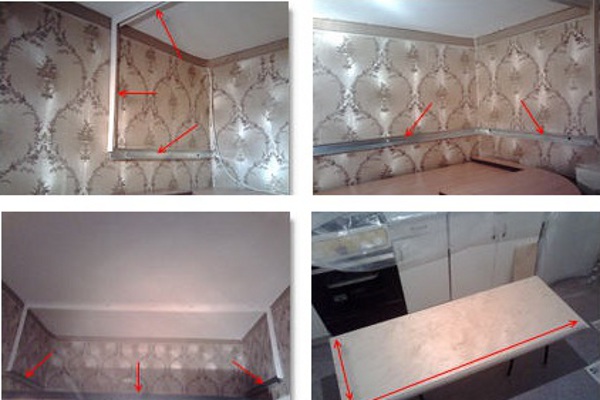
- Next, cut off the desired width of the corner and attach it to the ceiling. In exactly the same way, cut off part of the corner under the side pieces.
- For reliability and rigidity of the structure, manufactured by own hands, along the back wall of the mezzanine in the corridor we fix one more guide from the metal profile. This will prevent the plywood from curving under the weight of the load.
- Cut out the plywood itself. On the outer edge we attach the profile with the groove, where our doors will go from the plastic panel.
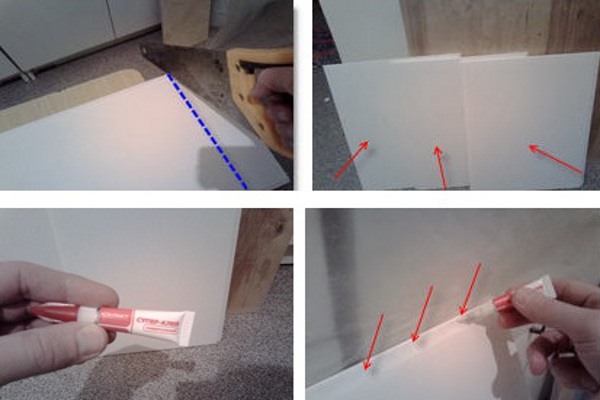
- We pass to the finishing line of the process of building the mezzanine in the corridor, and we begin to make doors with our own hands. We cut off the desired length from the plastic sheet. We fix the parts together with glue.
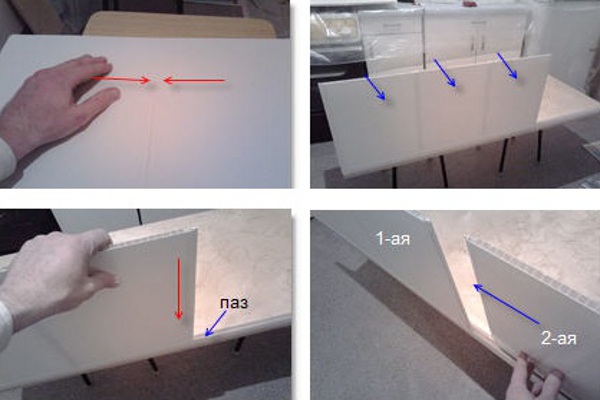
- We paste into the slots on the plywood the blanks for the doors and check how they move.
- The last stage of the mezzanine creation is the assembly by oneself of all the blanks into one whole in the corridor already on a permanent place. First we do not completely insert the plywood, then we set the edges of the doors in the grooves on the top and bottom.
- For convenience, we attach the handles and our design is ready.