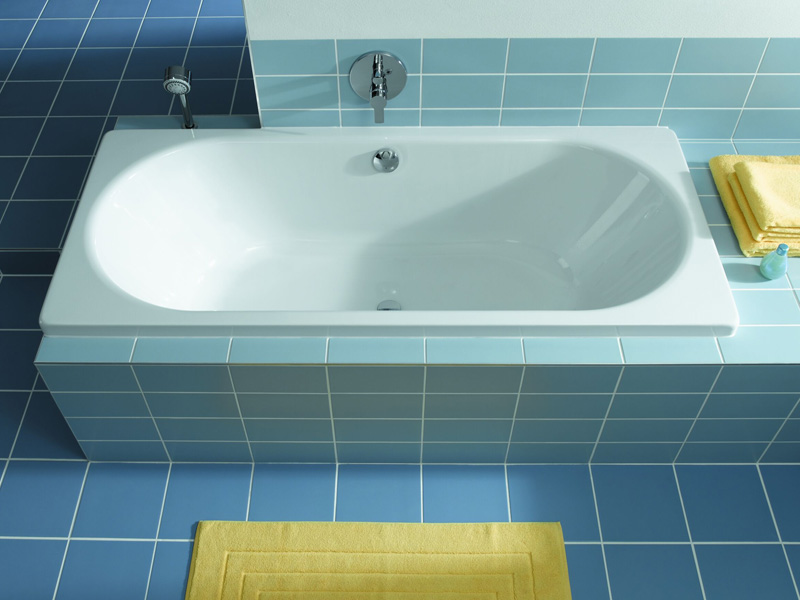
Acrylic baths are very popular recently - they are lighter than cast iron or steel, they do not lend themselves to corrosion, they have excellent thermal insulation characteristics. And yet - very convenient to install. Even beginners in the repair issue "how to install an acrylic bath yourself?" Should not be at a dead end. After all, with modern materials it is much easier to work than with "old". And if you install a cast-iron bath yourself - a task beyond repair, then with light acrylics one person can cope. It is important only to study the instructions and become acquainted with the basic nuances of the process.
How to install an acrylic bath?
First of all, of course, it is worth paying attention to the quality of the bathroom itself - cheap products are inconvenient to install. In addition, all efforts spent on the installation (and at the same time - all the savings) will go wrong, when in a couple of years the bath will leak.
A good acrylic bath is hollow, reinforced along the edges with a thickening along the perimeter and a hard, thick bottom. Also, do not choose models with the lowered edges of the bottom - this will make water flow more difficult, it will collect in the depressions.
In order to put an acrylic bath, you will need:
- skeleton or legs (may not be supplied with the bathtub);
- cement or cement + bricks for a pillow;
- liquid glass or PVA adhesive;
- mounting foam;
- tiles for external cladding and mortar for masonry;
- trimming wood, plywood or self-adhesive sealant.
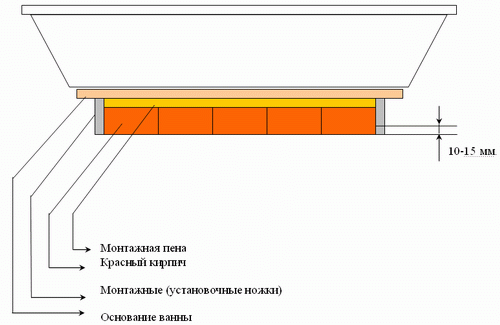
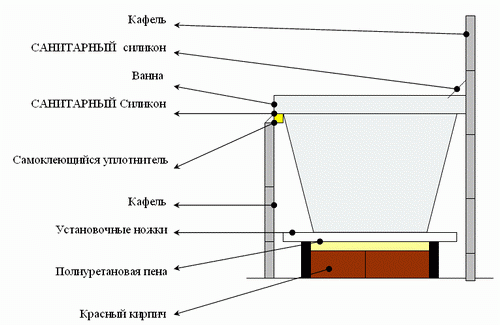
Here is the scheme for installing an acrylic bath.
| | |
Well, we'll look at everything step by step:
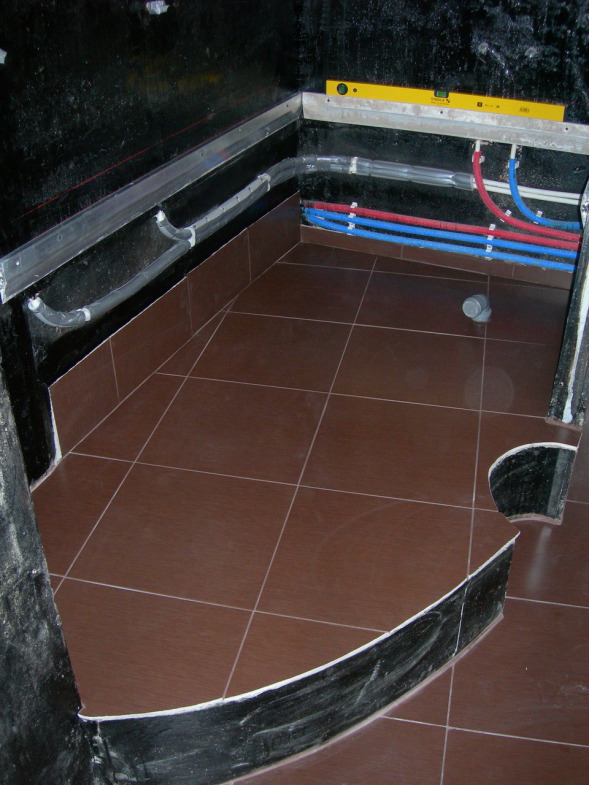
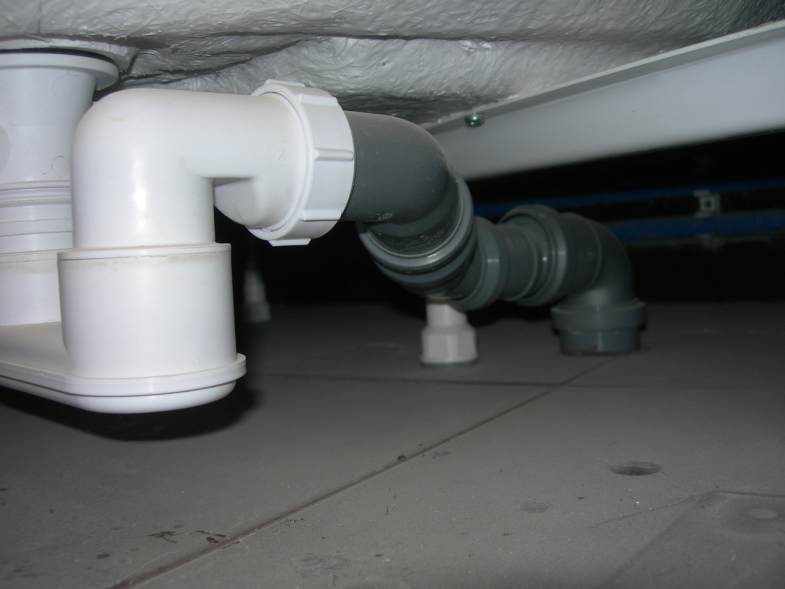
- Before installing the bath yourself, check the condition of all communications, make sure that the pre-equipped drainage works properly. If everything is in order, proceed to the equipment of the base for the bathroom - they should be a cement cushion or a raised bricks cemented with cement mortar. In the solution for installing the bath it is worth adding PVA glue or liquid glass for elasticity.
- Then put the bath on the legs or frame - it should stand flat and close to the wall. To install an acrylic bath on a frame, you need to buy or build a suitable metal structure yourself. Between the edge of the frame and the side of the bath you should leave a gap of several centimeters, which then need to be filled with a lining of scraps of wood or plywood. Also suitable for laying self-adhesive sealant.
- If the bathroom is equipped with a hydromassage installation, install all necessary equipment, connect it to the network. Make sure the insulation of the wires is secure.
- After setting the bath, completely fill it with water (to lower it to the desired level), fill the gap between it and the concrete pillow with mounting foam. Do not let water run out before the foam solidifies.
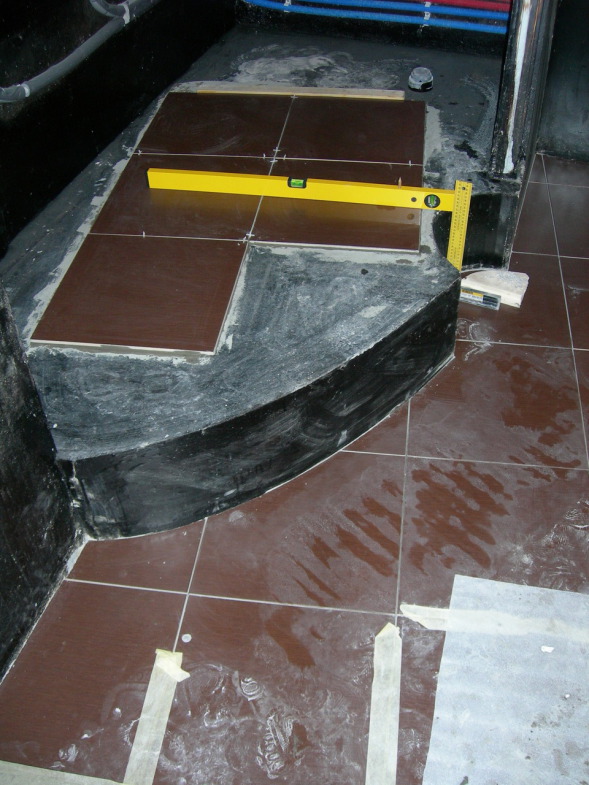
- Fills that formed when installing the bath, fill with silicone. Then again, put water in the tub, check the entire structure for leaks. After that, proceed to laying the facial tiles. Use a standard mortar for laying tiles.
| | |
| | |
If the bathroom room is small, then it's worthwhile to think about installing a corner acrylic bathroom. It is quite comfortable and takes up little space, and the installation process does not differ from the standard one. It is important only that the structure of the carcass is proven - therefore it is better to buy it in building stores, and not try to do it yourself.
If some of the moments in the process of installing an acrylic bathroom seem to be unclear to you, we recommend that you turn to video master classes for help - visual examples are always effective.