A warmed balcony keeps the home warm, in addition, it becomes a place where you can store vegetables in the winter. Not all have a cellar or a garage for this. How to properly insulate the balcony with our own hands, our article will tell.
How to insulate a balcony - stage one
All the walls that do not border the living room, as well as the corners of the walls, are adjacent to the "warm" walls. Having determined them, you need to calculate the amount of insulation. When choosing a heater, proceed from the region of residence, but in any case the fire safety class should not be lower than G1.
| | |
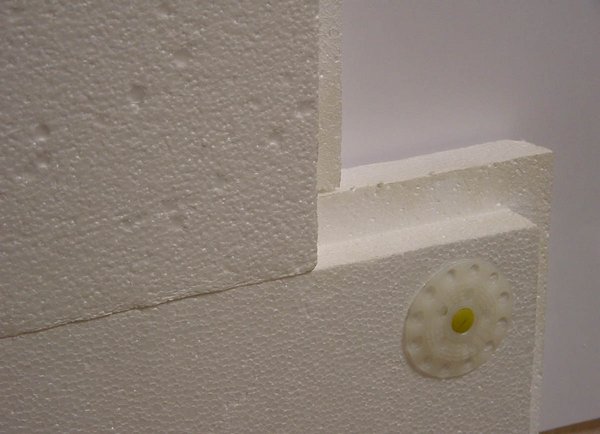
If the role of insulation you will play foam plates with the selected part (grooves), they will get rid of cracks in the joints. If the plates without the selected part, you need to stack in two layers with an offset, so that there are no through cold bridges.
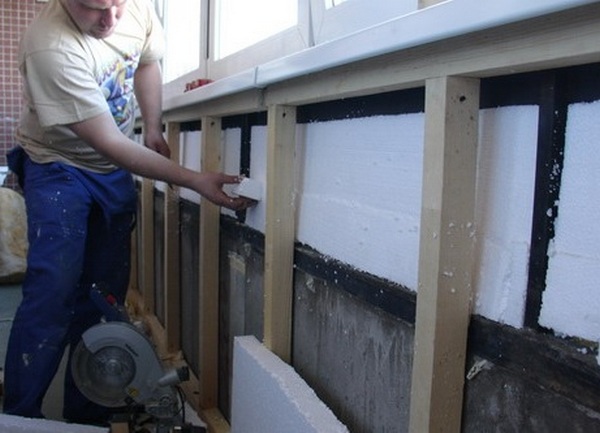
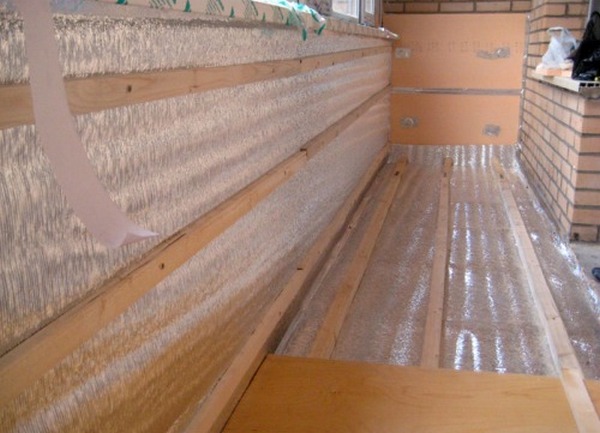
But before the beginning of stacking of foam plastic it is necessary to prepare a skeleton from aluminum or wooden racks. In our case it is a wooden frame.
When the frame is installed, we begin the laying of the foam. First we heat the vertical surfaces, starting from the outer wall under the glass part of the balcony, then we pass to the side walls, and then to the adjacent corners.
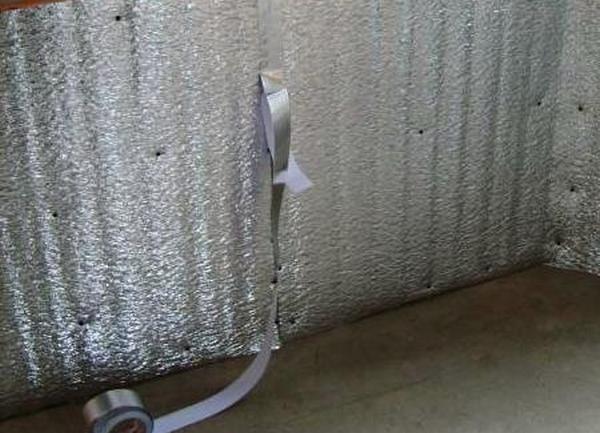
For additional heat and waterproofing over the foam, we seal all vertical surfaces with penofol (thin foil roll insulation).
How to properly insulate the balcony - stage two
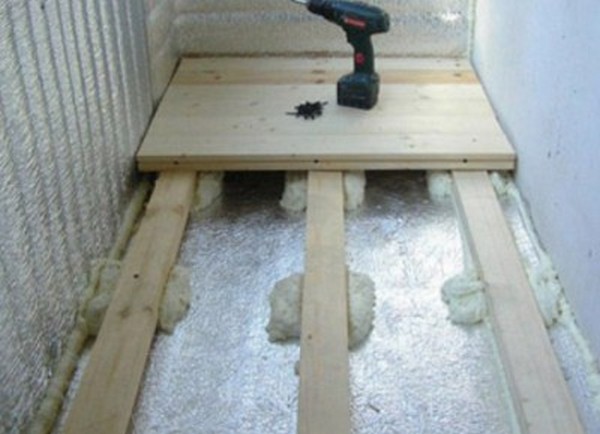
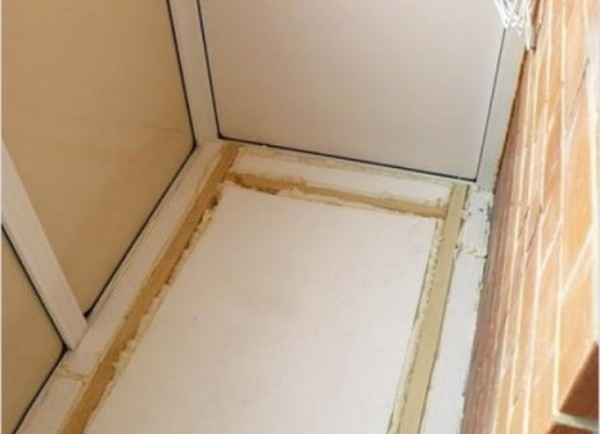
We pass to the floor and ceiling. There are three options for warming the floor. The first - using all the same penofol. You can use either one-sided or two-sided material. Its thickness can be from 3 to 10 mm. An important advantage of this option is space saving (the level of the floor will hardly increase).
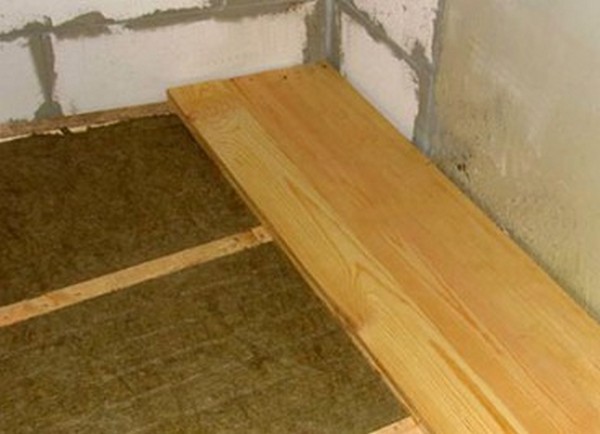
Another option for flooring is polystyrene foam. It is excellent for such purposes, can have a thickness of 20 to 100 mm. In this case, the pieces of foam should be placed between the floor lags, all the cracks should be well fused, then the top coat should be applied over the top.
The third option is extruded (foamed) expanded polystyrene. It is convenient, easy to use, chemically inert. It has practically standard heat-shielding properties. Of the minuses - more expensive than other heaters. Sheets can be from 20 to 50 mm thick.
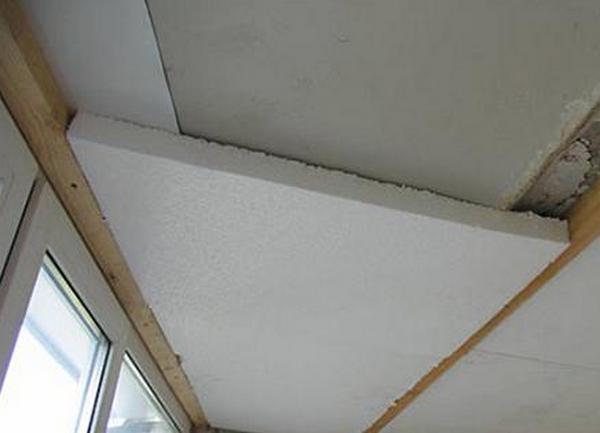
If you do not know how to better insulate the ceiling of the balcony, start with fixing the rails from the beam or galvanized profile. In the layer of insulation, small holes for hanging must be made, then fasten the plates to the ceiling mechanically using plastic dowel-mushrooms or on a mounting foam.
How to insulate the balcony yourself - the third stage
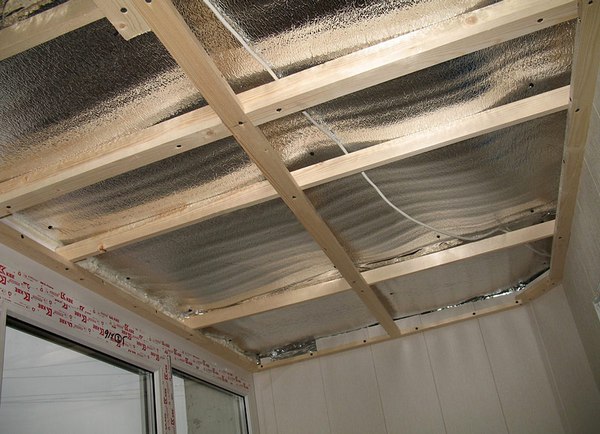
When all surfaces are insulated, you need to sew them. To do this, you must choose one of the options for the finishing material, for example, plastic or lining. To make an additional air layer between the heater and the cladding, you can set the guide rail from the timber along the foil layer of the heat insulator. At this stage, you need to take care of conducting electrical wires and sockets.
| | |
The paneling of the balcony is a very important stage, since this will determine the visual effect of the room. If you choose a lining, you first need to trim the ceiling, then the walls. Each next board gently leave in the groove previous and fix the studs. The last two boards are set in a special way: one of them is cut in width, while the second cuts the tongue groove by 2/3 and round it. Both boards put a "house" at the wall, connect the grooves and press in the center - the boards should snap.
Another option for plating is plastic panels. The result is also quite presentable.