Gel nail extensions are a popular form of artificial nail extensions and give them a beautiful form, which, unlike acrylic build-up, is considered more sparing. The material in this case is a special substance of gelatinous consistency, which solidifies and polymerizes under the action of ultraviolet rays or special compounds, creating a strong plastic coating.
Types of building
There are two types of techniques for nail extensions with gel: on tips and on forms. The first technology involves gluing to the natural nail tipsy - a plastic plate, which is then applied to the gel. Gel extensions on forms include the use of paper, Teflon or other removable stencils for modeling, fixed on the fingers.
In gel nail extensions, three-phase gels are usually used on the wizard's molds, which are three different materials - basic, constructing and fixing. They are applied and dried separately. In this case, nail extensions on the forms include three stages of applying and drying the gel. But at home, one-phase gels can be used to simplify the process, combining all three functions in one product.
Step-by-step instruction for nail extensions with gel on forms
Here is a standard master class on nail extensions with gel forms, which gives an idea of the sequence and some rules of the procedure:
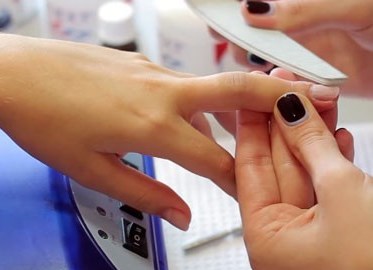
- The preparatory stage involves disinfection of the hands, removal of the cuticle and nail cutting with a nail file to give their surface roughness.
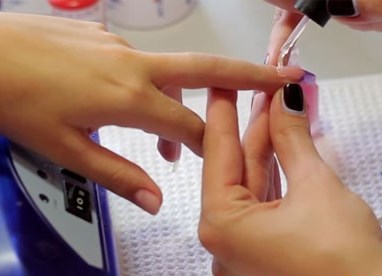
- Then the dust is removed, the nails are degreased and a primer is applied which disinfects, dries the surface, and ensures a strong adhesion of the gel to the nail plate.
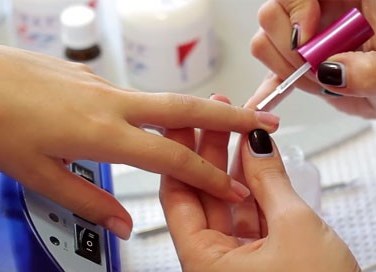
- The next step is to install the mold and apply the base layer of the gel. It should be borne in mind that the shape should be set exactly in relation to the phalange of the finger, the middle of the natural nail should strictly correspond to the middle of the shape. After setting the shape and applying the gel to the natural nail, it is dried in a UV lamp for 3 minutes.
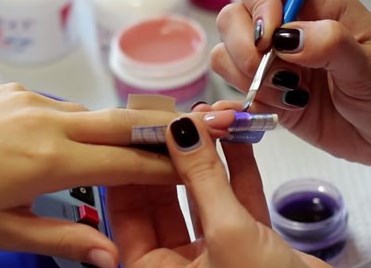
- After that, the second phase is applied: first on the natural plate, and after drying the tip (free edge) of the nail is formed. The constructing gel can be applied in several layers. Do not forget about drying in the light of the lamp after applying each layer.
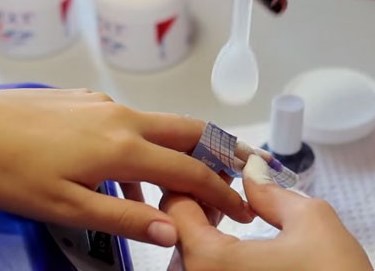
- At the next stage, the nails are ground with a bass , the free edge is simulated with a saw blade, the shape is removed.
- At the end, the nails are covered with the final layer of gel, dried, then a special oil is applied to the cuticle.