If you decide, when making repairs, to decorate the walls of your room with wall panels, then this choice is really true. After all, wall panels have many advantages in comparison with other types of room design:
- no preliminary preparation of walls is required;
- installing wall panels with a frame, the gap between the wall and panels can be used for insulation, as well as for laying various communications: antenna, telephone cables, etc .;
- installation of wall panels produce both vertically, horizontally, and diagonally;
- the variety of color palette of wall panels allows to embody various design ideas;
- installation of decorative wall panels is possible in any room: in the kitchen and in the bedroom , in the bathroom and the hallway.
Installation instructions for wall panels
Works on the installation of panels for walls do not require special qualification, even a novice master can cope with it. To install the panels you will need such materials and tools:
- a set of wall panels with skirting boards, fillets, kleymers, platbands, etc .;
- wooden bars for the crate;
- a hammer;
- level;
- roulette;
- drill;
- nails;
- self-tapping screws.
The installation of internal wall panels begins with the installation of the crate. According to the technology of wall panels installation, the laths of the battens should be located about 50 cm from each other.
- With the help of roulette we carry out the marking of the walls. If you have chosen a vertical method of installing wall panels, then the bars for the battens are installed horizontally. And, on the contrary, with a horizontal method, the carcass planks are fixed vertically. Well and in case of diagonal installation of panels the lath should have both horizontal, and vertical bars.
- Wooden blocks to the wall are attached by screws.
- The first panel is set strictly vertically. Along the panel in 4-5 places are fixed klyaymery (staples) in the middle of the corresponding laths.
- Staples should be nailed.
- We install the first panel, with the groove on the panel to enter the mounting clay gauge.
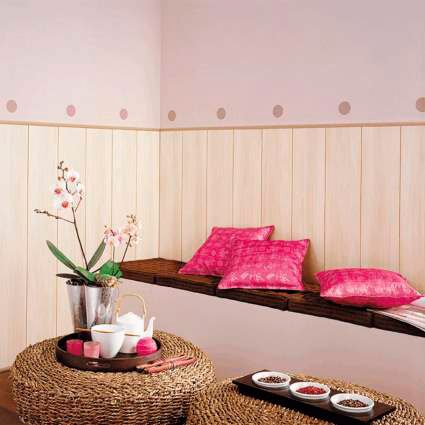
- We set the crest of the next panel in the groove fixed, connect the two panels along their entire length, fix them with clamps and so continue to install all the panels. The finishing of the wall panels is completed by installing fillets to help smooth the transition between the ceiling and the wall, the skirting boards between the floor and the wall. For sewing joints of walls a folding corner is used. This is how the room, decorated with wall panels, will look.
| | |