With a problem, like lying around the hallway shoes, many face. As a rule, in the evenings, when all members of the family return home, the hallway is filled with shoes, which are lying underfoot and occupy a lot of space. To avoid this, you need a floor shelf for shoes .
But what if the shelves offered by the market are too expensive or do not like the owners? There is an exit! Homemade shoe shelf will relieve such inconveniences, help solve the problem of storing shoes , save money and decorate the hallway.
What do we need?
Our shelf for shoes will be small and functional. In a small hallway, the bulky design is inappropriate, so we will choose the wooden shelf, which will not be difficult to do. Do not forget that the advantage of wood in its accessibility, environmental friendliness and cheapness.
Shelves for shoes with their own hands is quite simple. We will need the most common tools: a saw, a plane, a hammer, a screwdriver and a grinding paper. Also you need to purchase in the building store the following materials:
- wooden bars measuring 16 x 40 mm, the length of which is 220 cm, 6 pieces;
- universal screws with a diameter of 3 mm, length of which is 25 mm;
- wood screws;
- varnish on wood.
How to make a shelf for shoes with your own hands?
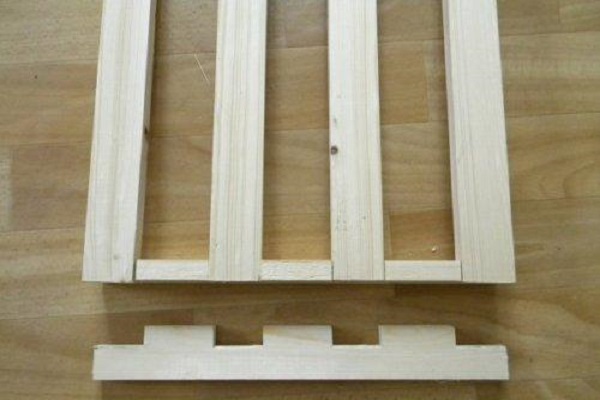
- Let's start with the side panels for the shelf. The depth of our shelf will be equal to 33 cm. For this we cut six pieces of 33 cm. On one of the blanks, we must evenly distribute four bars. Having arranged them correctly, we will make a drink to the depth of the bars.
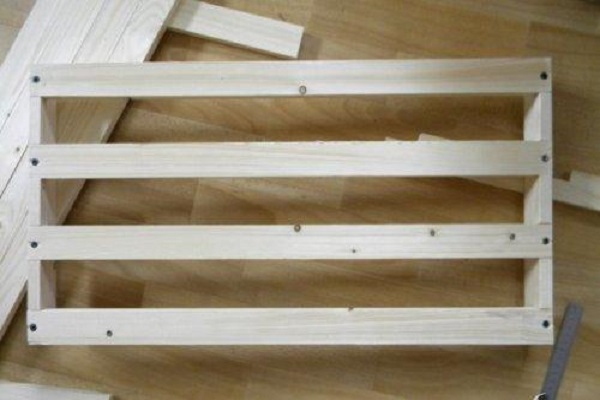
- The width of each of the three shelves should be equal to 62 cm, then we can place here three pairs of shoes. For each of the shelves, we cut out four blanks of the required length. We insert our workpieces into the cut-out embankments of the sidewalls and fasten the structure with self-tapping screws.
- Repeat this operation for each shelf. After that, using the rough sandpaper round off the top of the sidewalls.
- The height of our construction will be 80 cm. The lower shelf can be installed at a distance of 25 cm from the floor, so as not to put too dirty shoes on it, and also to make room for such high shoes as boots.
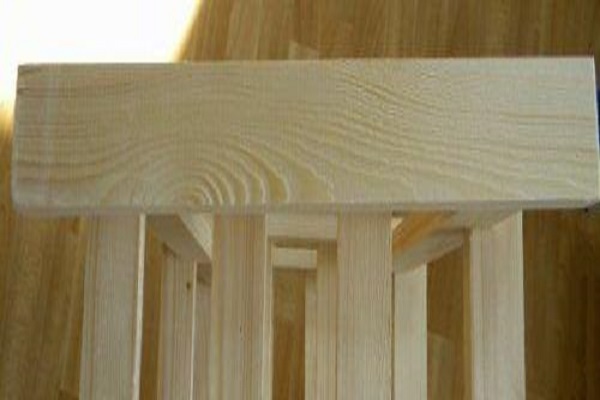
- Next, from the remnants of the material, we make the top of the structure. To do this, we cut two pieces of 33 cm. Using sandpaper, we trim their upper part so that small roundings come out.
- Having finished making all the details of the design, we process them with sandpaper, and if possible, then the grinding machine. After that, we cover with two layers of varnish.
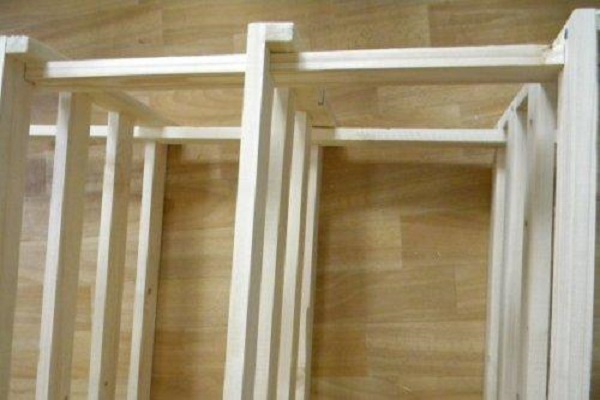
In order to make racks, a bar of 80 cm in length is cut to the depth and thickness of the bar (16 mm) every 25 cm. About 10 cm from above should remain on top of the structure. We will make four such racks and insert them into the cut out sections of the shelf.
Before collecting the shelf for shoes, we must wait until the varnish dries completely. We fix all the details of the construction with screws. We need four self-tapping screws for each shelf, and two for the top.
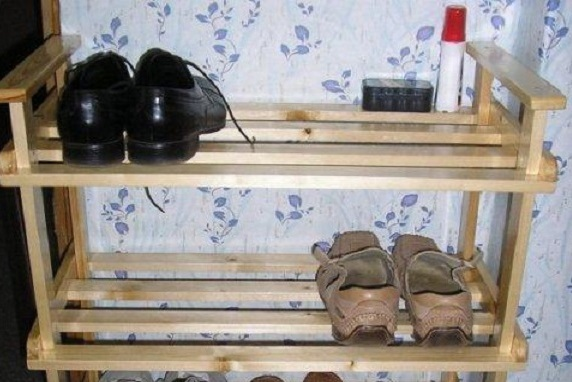
So quickly we made a compact, roomy and comfortable shelf for shoes with our own hands! Now the hallway is clean and orderly.
Some recommendations
If the hallway is very small, it will fit into the corner shelf for shoes.
For a large family, it must be multi-storey, which will save space. The upper shelf can be made even and used as a stand for keys, an umbrella or a bag.
The independent manufacture of a shelf for shoes makes it possible to realize any design solutions in reality, as well as using a wide variety of materials. Such a shelf will be a real decoration for your hallway.