Whether it's our children, for them the New Year has a special significance. Kids with trembling wait for magic, gifts, sweets and a mysterious guest with his beautiful granddaughter. Boys and girls decorate the Christmas trees, cut out snowflakes , write letters to Grandfather Frost, learn songs and rhymes. In this festive turmoil there is something special and unforgettable. So help our children prepare for the holiday, fill the expectation with joy and boundless happiness. To later years, they were able to return to childhood and convey these feelings of family warmth and love to our grandchildren.
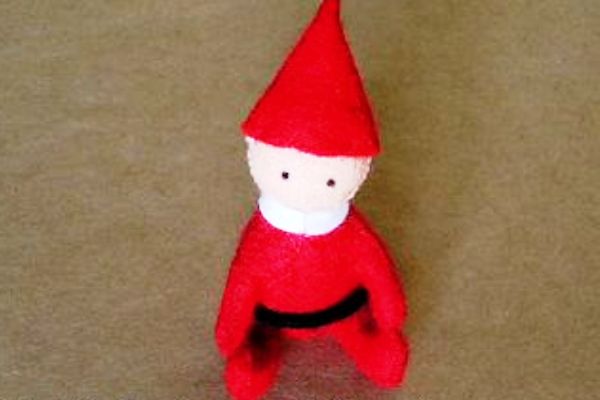
And start with the simple: decorate the apartment, put and decorate the Christmas tree and add our New Year's interior toy of the main culprit of the celebration - Santa Claus, made by himself.
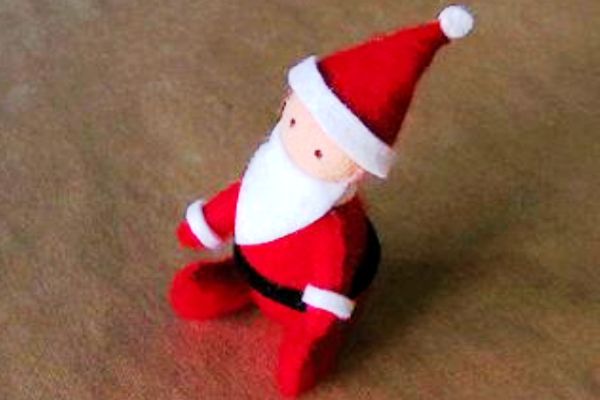
How to sew Santa Claus with his own hands?
Smasterim little Santa Claus on a sleigh with deer, who hurries to us for a holiday. It does not take much time, but the process and result will give a lot of positive emotions to you and your child.
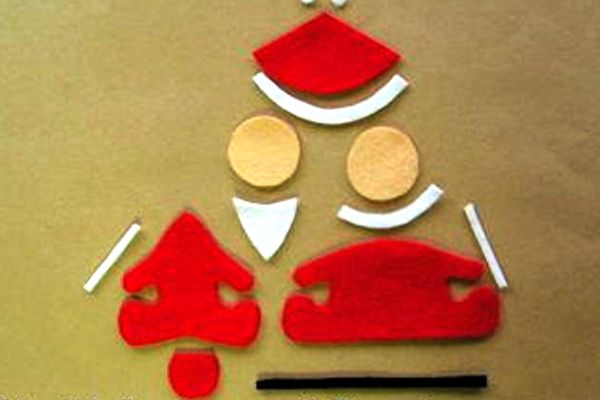
Let's start with the main thing - to sew Santa Claus with our own hands, we will need: felt (red, white, beige, black), sintepon, thread, needle, scissors, glue, two beads or a felt-tip pen.
Now consider step by step how to sew Santa Claus under the tree:
- Cut out the blanks.
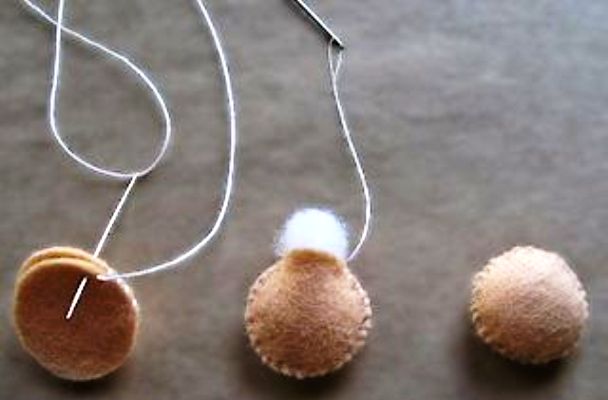
- We sew two beige circles, inside we add sintepon - this will be the head of our toy.
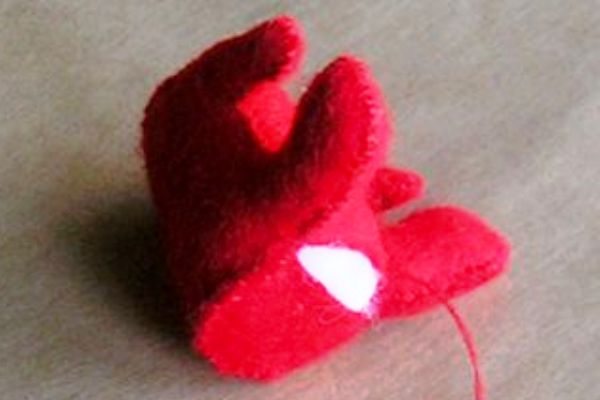
- Next, proceed to the trunk. Grandfather Frost sits on our sledge, so the front and back parts of the body differ from each other. Sew them around the edges, into the inside we add the sintepon.
- Sew our head to the trunk.
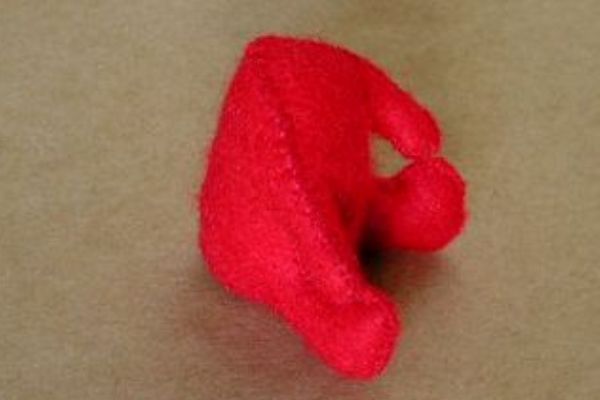
- We put a hat on Grandfather, it can be glued or sewed.
- On the cap, collar, sleeves glued white felt stripes, imitating fur. Do not forget about the beard.
- Instead of a belt we glue a black strip of felt (it is possible from any other fabric).
- Sew the beads in place of the eyes, or draw them with a felt-tip pen.
| | |
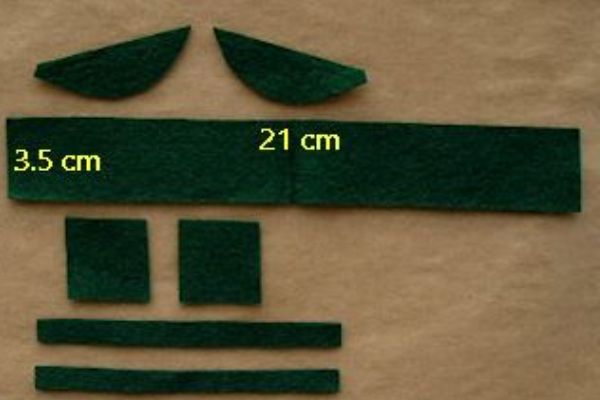
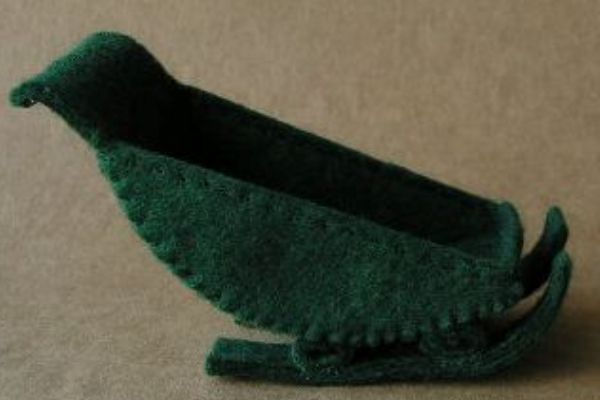
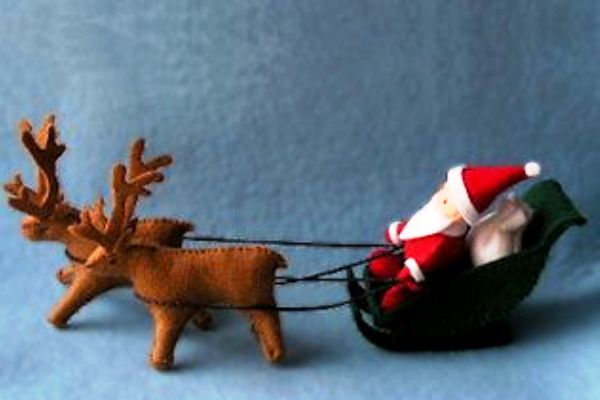
Here, in fact, Grandpa is ready. Now let's turn to step-by-step instructions on how to make a Santa Claus sleigh . For саночек it is possible to take felt of any color, at us will be green, glue, a thread and an iron will be also useful.
- We make workpieces.
- The longest strip 3.5x21 cm is folded in half and glued together. To give the sitting the necessary deformation, carefully iron the strip with an iron.
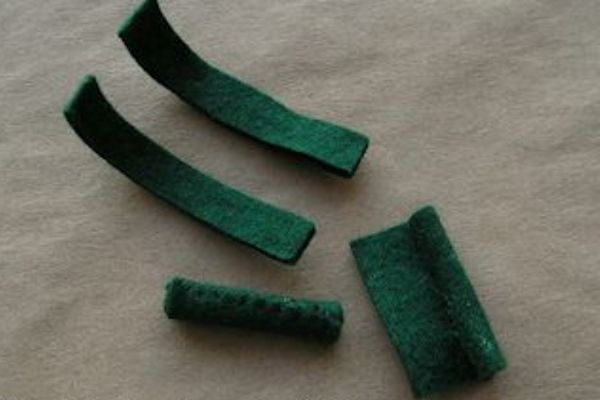
- We sew sledges on the sides.
- Similarly to sitting, we make skids: fold in half, glue and iron.
- Of the remaining squares roll rolls, they can be glued or sewed.
- We glue the parts together.
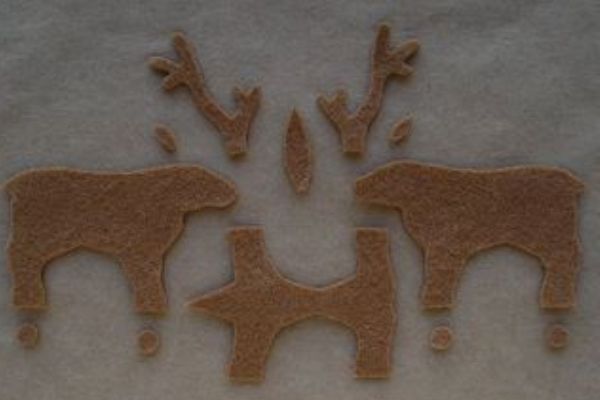
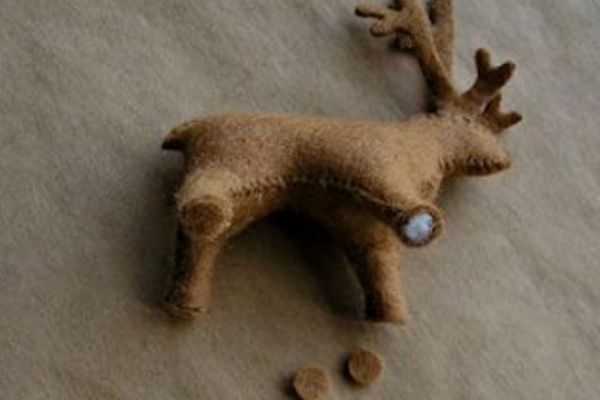
Well, the sleigh is ready, now it's up to the deer . Prepare brown felt, thread, needle glue and sintepon:
- Cut out the blanks.
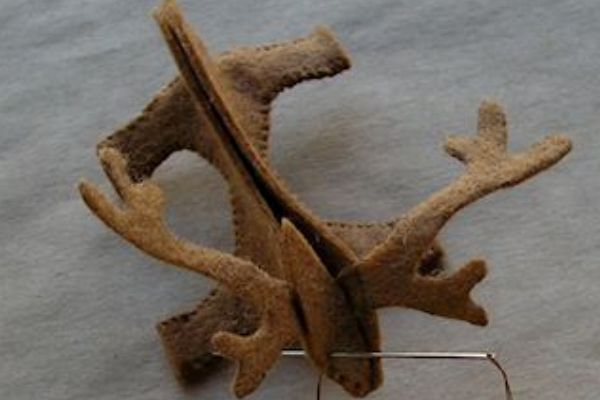
- At the edges we sew the lateral and lower parts of the trunk. The upper part of the trunk and the lower part of the legs do not need to be stitched at this stage.
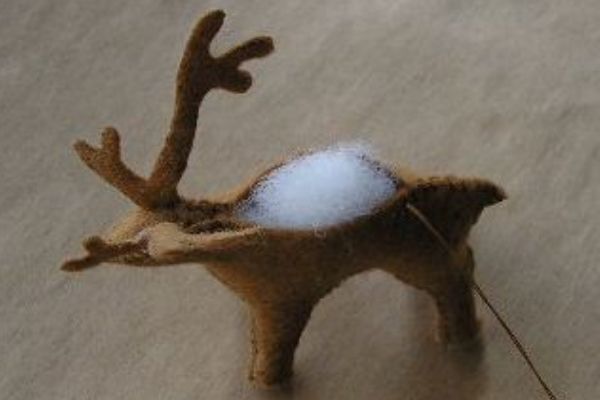
- We glue on the top of the horns, as in the photo. Sew the upper part of the head, add the sintepon and completely sew the trunk.
- From the bottom to the legs we sew the hoof. We glue the ears and draw eyes.
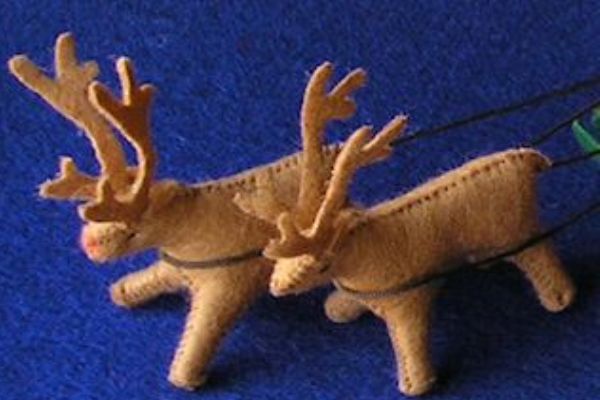
- To look more beautiful, you can do several deer.
| | |
| | |
It remains to seat our Santa Claus in the sleigh, add reins to the deer and a bag with gifts.