In furniture stores today, a huge selection of all kinds of products, but it does not always suit our landladies. For the most part, it is the same type, either in size or design, does not fit into the interior. You can make furniture to order, but then its cost is not everyone can afford. The way out in this situation is to create a closet, bedside table or sofa with your own hands. For example, we take a small cute nightstand, equipped with drawers.
Manufacture of furniture by own hands
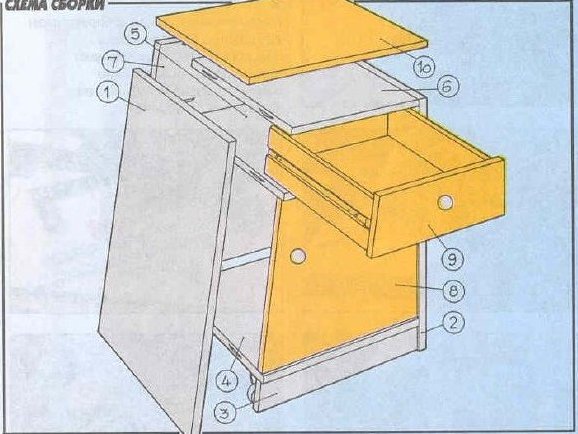
- First of all, you need to determine the size of the bedside table or other product that you want to do for yourself. We begin the creation of cabinet furniture with our own hands by drawing up the drawing. It's ok if your drawing does not look very professional. The main thing that he helped you determine the size and calculate the approximate number of boards, accessories. Our bedside table has a height of 540 mm with a table top width of 560 mm, and the width of the casing is 540 mm. In addition, it will insert two boxes that have convenient roller guides. The rear wall can be made of plywood or fiberboard.
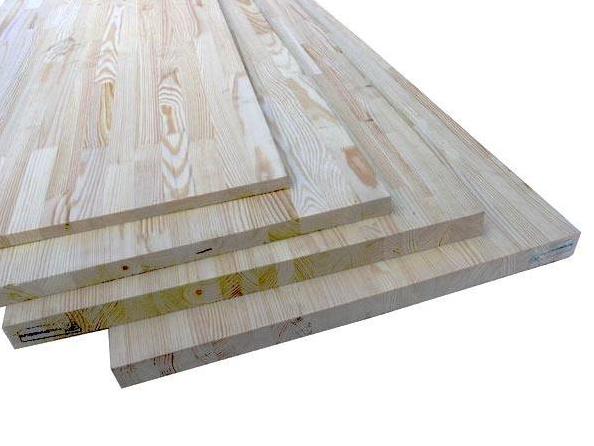
- Purchase material for the nightstand. You can use for this purpose chipboard, laminated chipboard, natural wood . We will take the usual carpentry boards, which can be purchased in a construction shop, the thickness of which is 30 mm. Although the thickness of the material can be a bit thinner - 16 or 20 mm. Everything depends on the master's desire.
- In order to make a nightstand you do not need to spend a lot of money, buying an expensive and sophisticated joinery tool.
Let's list what will be needed in the first place:
- screwdriver with nozzles for confirmations and conventional screws,
- set of drills,
- hacksaw,
- plane,
- clamps,
- roulette,
- pencil or marker,
- ruler,
- stationery knife,
- kiyanka,
- fine-grained sandpaper.
From the power tool, we called a screwdriver, but if you plan to continue the carpentry, you can additionally purchase an electric drill, electric jigsaw, hand milling, building hair dryer.
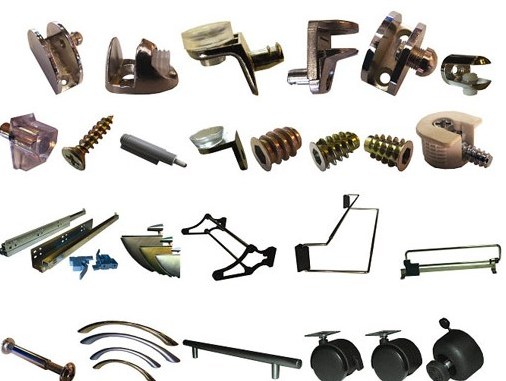
- Without a good hardware, you also can not do. It includes handles, legs, fasteners. Guides and other details.
- According to the drawing, using a pencil and a ruler, we put the markings on the material.
- We make wood sawing or chipboard for blanks. You can use a hand hacksaw, an electric jigsaw or a hand-held circular saw.
- The blanks are cut and you can imagine how they will look together. Let's combine them with each other, but do not twist them yet. We see that the bottom can be installed between the side walls or beneath them. There is also another option - to execute the bottom on the walls with the help of a quarter machine, and then connect them together from below with screws.
- In this case, we chose the latter method. The nightstand turned out solid, but the hammers of the screws can not be seen from the side.
- We fix the table top. It has a little protruding on its sides, about 10 mm, and behind it everything is flush. We fix it with the help of furniture corners and screws. Next, you can install the rear wall using small nails or small screws. Inside on the side walls we set the standard guides for the boxes.
- After we have finished the work on the boxes, we can collect our design together and see if any details are needed in the additional fit.
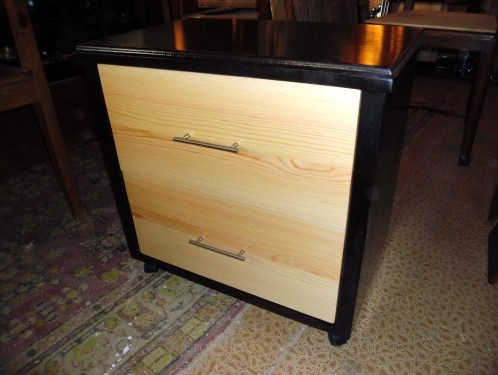
- After painting or coating the surface of the wood with varnish, our bedside table gets a completely different, more beautiful and finished look. The boxes were large and capacious enough. Their height makes 200 mm, at a thickness of laths of 16 mm. Thicker material to take is not practical - it will reduce the internal space and in vain weight the design.
A modern instrument is so universal, and it is so easy to use it that even a person who does not have a lot of practice can try to do it. We believe that it will not be very difficult for you to manage such a nightstand, and the skills will help the beginning master to create something more perfect and refined next time.