Technique of facing - a method of working with paper, which allows you to create amazing compositions that differ in unusual appearance and dimensionality of the picture. It is a synthesis of appliqué and paper wrapping - quilling, and at the same time it is simple enough to use the face in the kindergarten, for older preschoolers.
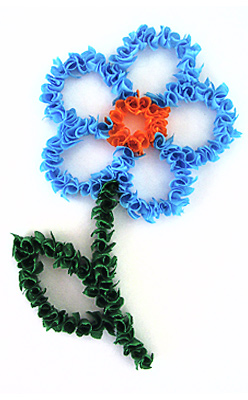
Crafts in the technique of facing are done with the help of small volumetric elements made of paper. For these purposes, it is better to use corrugated, but its color range is not too diverse, so you can use colored napkins and even two-layer toilet paper to create bright pictures by means of the face-to-face engraving. The volume element of the composition is a small piece of paper compressed in the form of a cone and is called "sticking out" or "facing". A lot of endings create a conceived image, filling the space of a previously traced contour.
Manufacture of hand-made articles by the method of facing is a simple work, but extremely laborious, it requires perseverance and accuracy. Finished works can become not only a wonderful gift, an ornament of the interior, but also a source of pride for small masters, as well as a source of inspiration motivating the creation of new masterpieces.
What do you need for the manufacture of the craft by the method of facing?
To create original handicrafts you need very little: the material for the base, glue, scissors and, most importantly, the so-called "trimming" tool. This is a long thin stick with a blunt end - suitable for these purposes is the rod from the handle, the orange stick for manicure, the stick for Japanese food and so on. For a base, the cardboard is most often taken, but it is possible to "coat" any surface to which a sheet of paper is glued: a wooden tile, a foam, and so on.
In order to help formulate a concrete idea of the technique of facing, we offer to your attention a small master class.
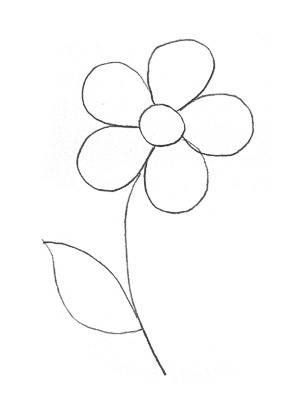
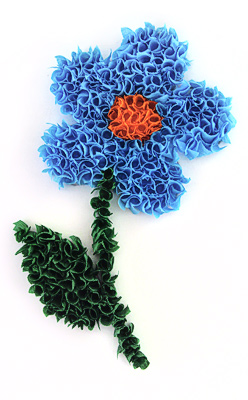
Arrangement by the method of "Flowers"
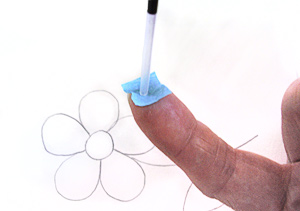
- We cut corrugated paper into squares approximately 1 cm² in size.
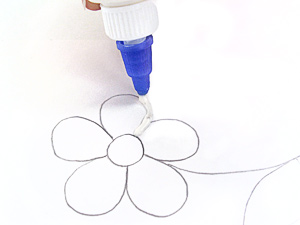
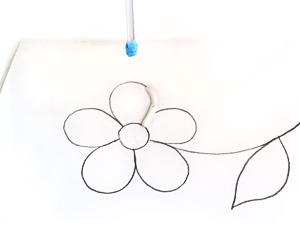
- On the basis of a flower draw.
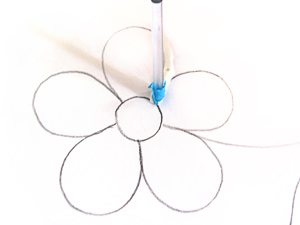
- A thin strip on a small piece of the contour is applied glue.
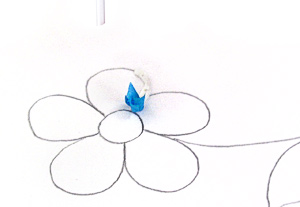
- We put the finishing tool on a square of paper.
- Paper crumple and roll the instrument between your fingers.
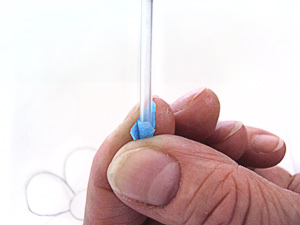
- The end-workpiece was obtained.
- We put it on the glue.
- The rod is taken out.
- Each next element is glued to each other so that no gaps remain.
- The pattern can be filled only along the contour, and can be filled with a continuous layer.
| | |