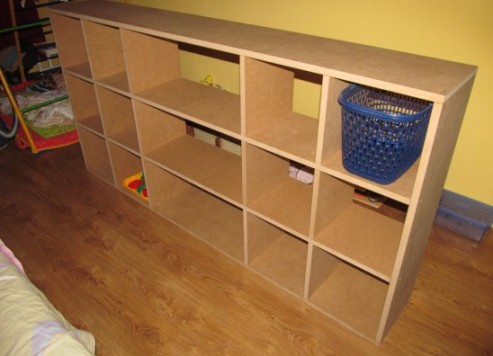
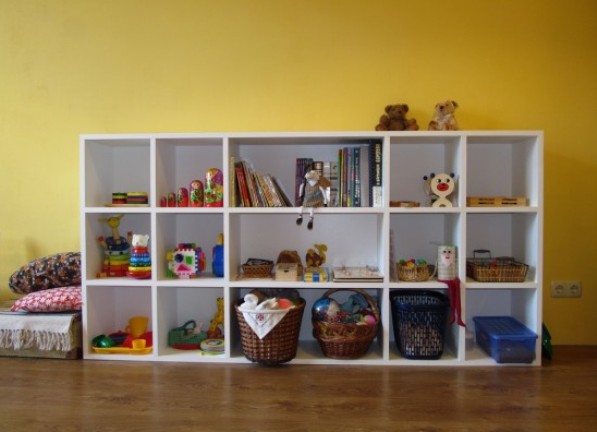
The rack is a roomy structure consisting of multi-tier shelves. Depending on the purpose for which the shelving is intended, the number of shelves in it can vary. On the shelves are stored dishes, clothes or shoes, toys or books, various accessories or hand-made crafts.
Shelving can successfully harmonize with any situation. In the children's room it is convenient for a child to retrieve any thing from an open shelving shelf and also easily put it in place. In the baby's room it will be easier to maintain cleanliness and order if all the toys lie on the rack. In the living room or the office on the shelf, you can store books, folders with documents, etc. The shelf can also be irreplaceable in the kitchen. Here on it are stored various jars with spices, food or even dishes: everything is in sight and easy to get.
Very convenient and mobile corner shelf, made by own hands, for a pantry , a garage or a barn. A plasterboard rack can also be made by hand, however it requires a certain skill and skill, and the process of assembling and assembling such a product is quite laborious.
Let's find out how to make a shelf for your own toys and various materials for creativity with your own hands.
Shelving: the order of work
For work we will need such tools and materials:
- MDF - 1 sheet;
- Fibreboard - 1 sheet;
- drill;
- angular clamp;
- cores, dowels, eurosurfaces, screws with washer;
- acrylic paint;
- acrylic lacquer;
- roller for painting;
- felt pads.
Master Class
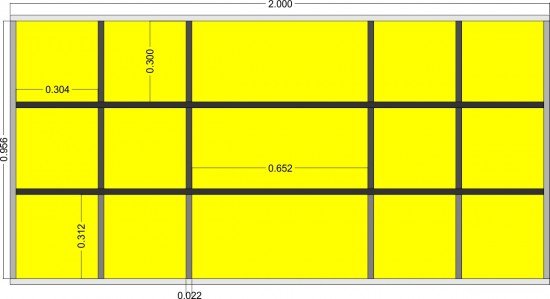
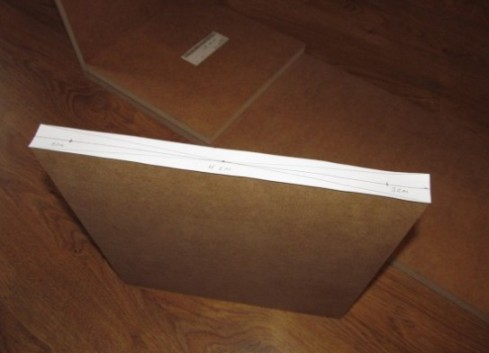
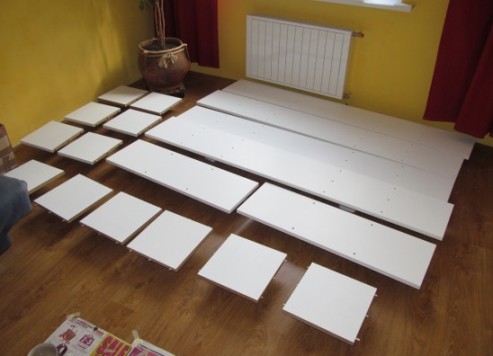
- Of the MDF and MDF sheets in the dimensions from the drawing, it is necessary to cut the corresponding parts of the future rack.
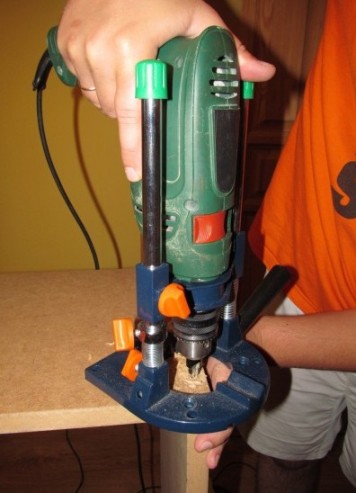
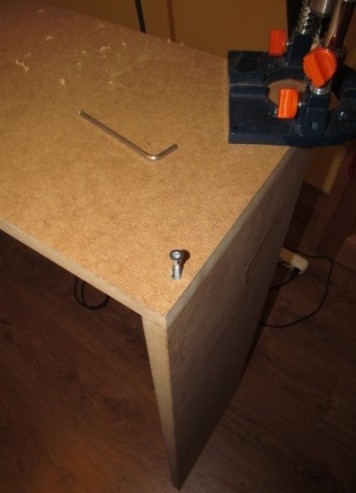
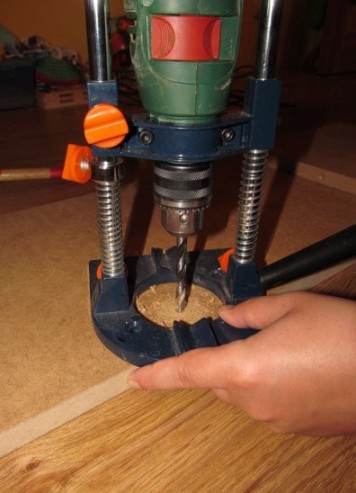
- We make a template for the holes, in which the confirmation letters or euro-screws will be screwed.
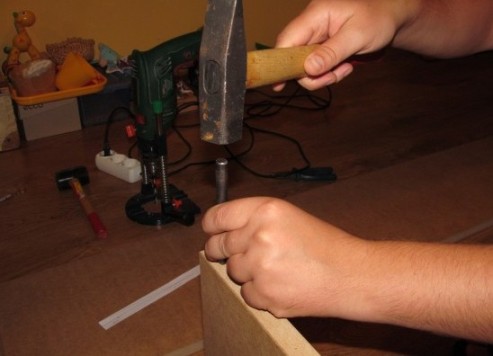
- In accordance with the received template, we drill two holes in the corners of the structure and twist the euro-screws in them.
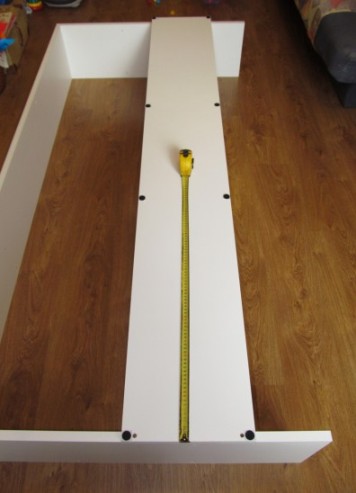
- Using a corner clamp, we fix the rack box for easy installation of the shelves. So our design will have the necessary rigidity, and it will observe the right angles.
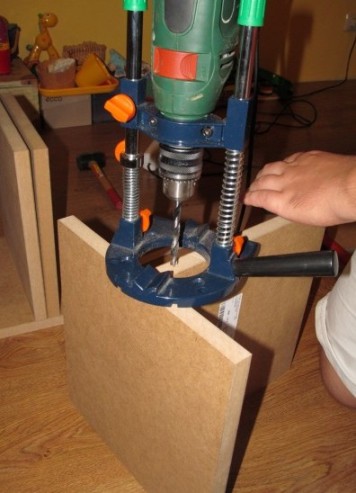
- We pattern the holes for the holes, use the core to deepen them and drill them. The depth of the holes in the end face of the part should be 25 mm, and in the plane - 10 mm.
- First, we insert dowel markers into drilled holes and use them to place holes for the holes on the adjacent part. Thus, the centers of the holes will ideally coincide.
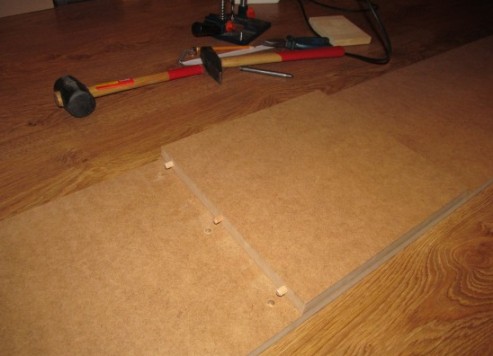
- We make a core on the marks of the groove and drill new holes for the dowels.
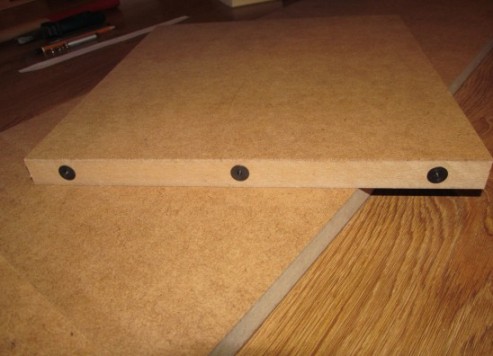
- Now you can hammer wooden dowels and insert the part into its place. In the same way, we make shelves for the entire first row.
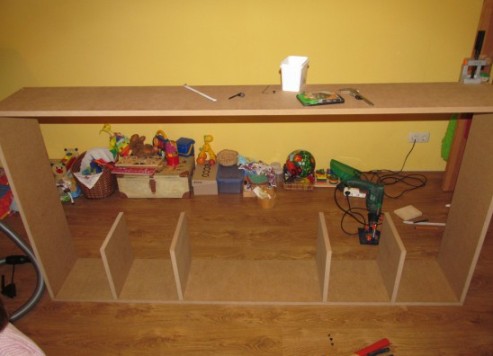
- We drill holes for the shelves of the second row. Each plate is connected here by two dowels. For them, in the upper parts we drill holes with a depth of 25 mm, and in the double lower ones - 46 mm. Thus do the shelves for the entire second row.
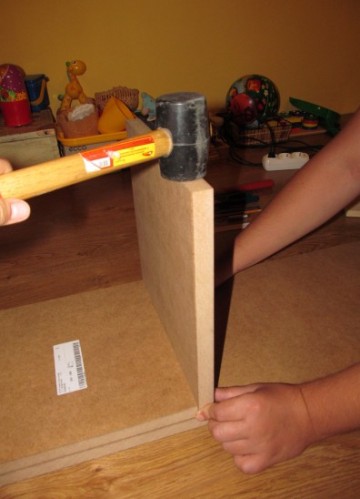
- In order to make the third row of shelves, you must first remove the top of the rack. Now we do the same as in the first row: drill holes, insert dowels and clog them. We fix the top part of the rack. In order to make the whole structure stronger, it is necessary to twist two Eurosurfaces per shelf.
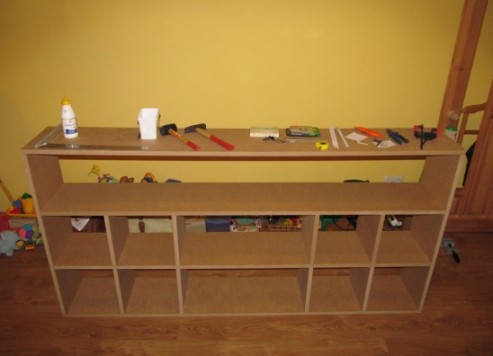
- It is time to paint our product. We dismantle the whole rack and cover each part with two layers of acrylic paint and one layer of varnish.
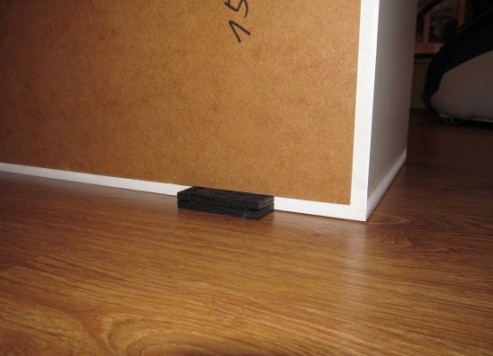
- After the paint and varnish are well dried, we collect the rack. On its bottom, it is necessary to glue the felt pads so that the floor is not scratched.
- We fix on the screws and washers in advance the painted back wall of our rack, which will add additional strength to it, and the appearance of the product will improve.
| | |
| | |
| | |
| | |
| | |