Having mastered the basic techniques of weaving simple bracelets from silicone rainbow bands , you can start more complex products. In this article, you will learn how to make a bracelet from the rubber bands "Bantik" on the machine and without it (on a slingshot, fork or fingers). He got his name for the fact that the resulting drawing is very similar to small bows, located along the entire length from two sides.
Master-class - braiding from the rubber bands of the bracelet "Bantik" on the machine
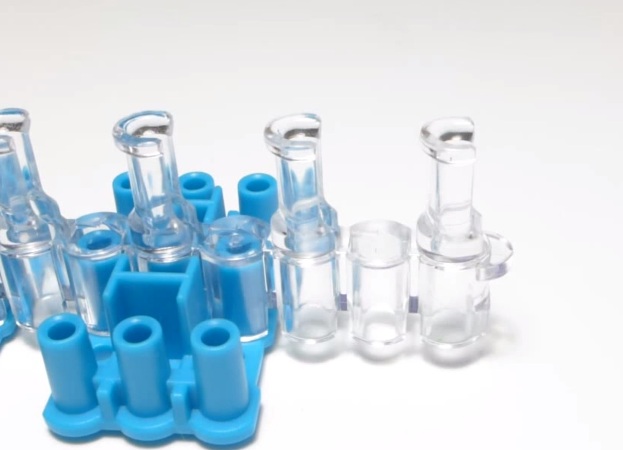
You will need:
- machine;
- hook;
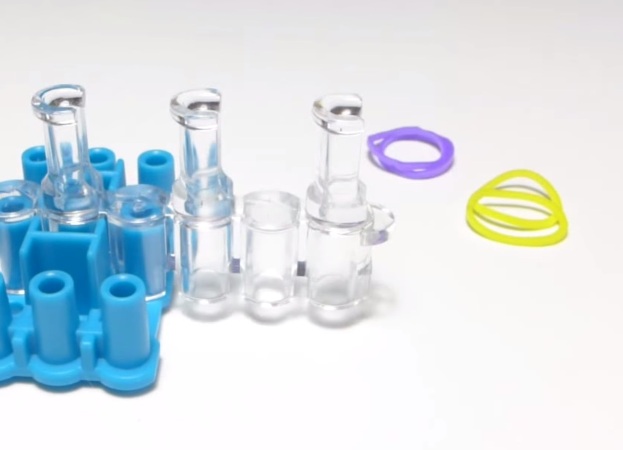
- silicone rubber bands of two colors: purple and yellow;
- S-shaped clip.
Progress:
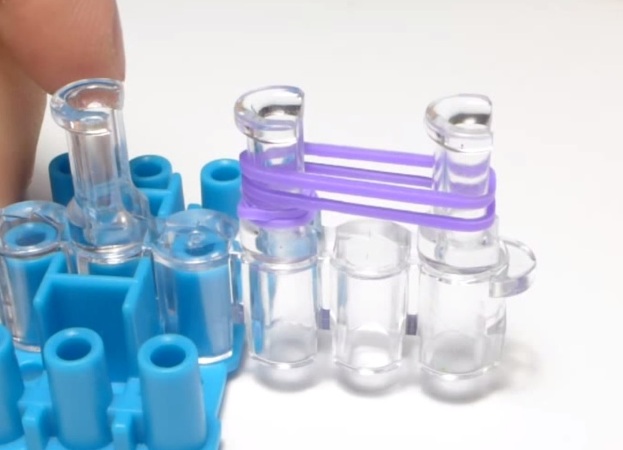
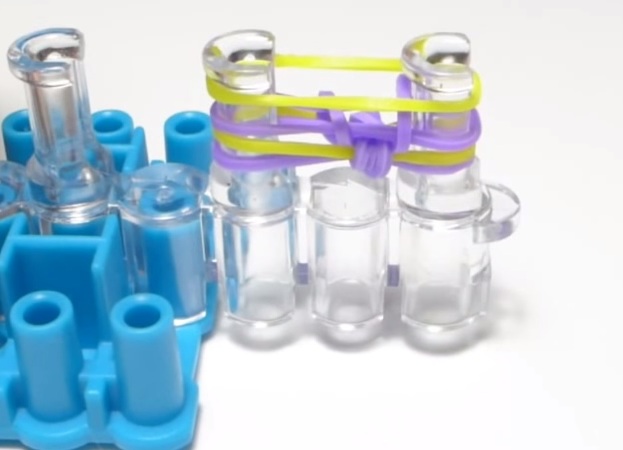
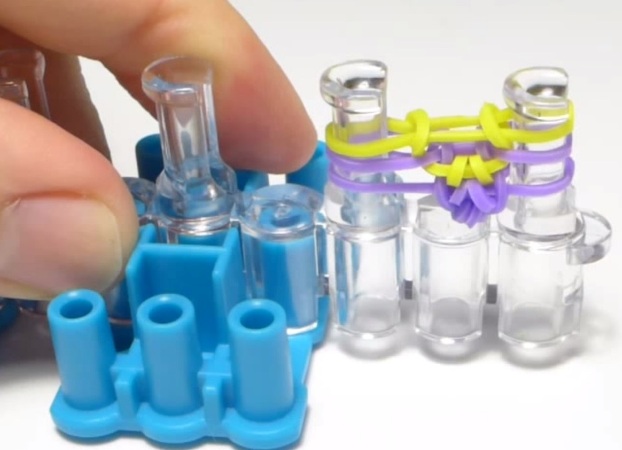
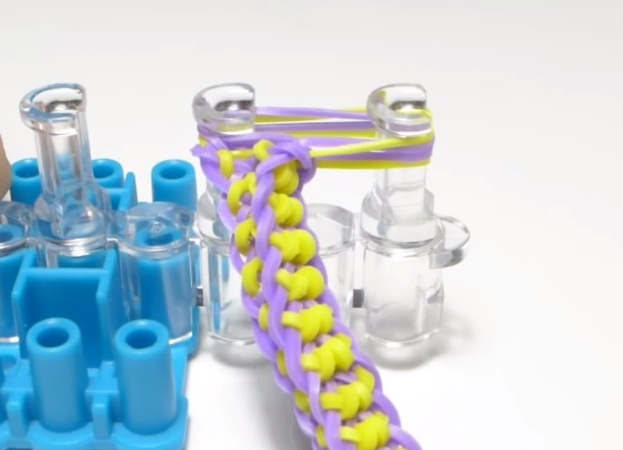
- On the working machine, remove the two extreme rows. On the remaining row, turn the columns so that they are directed to the right of us.
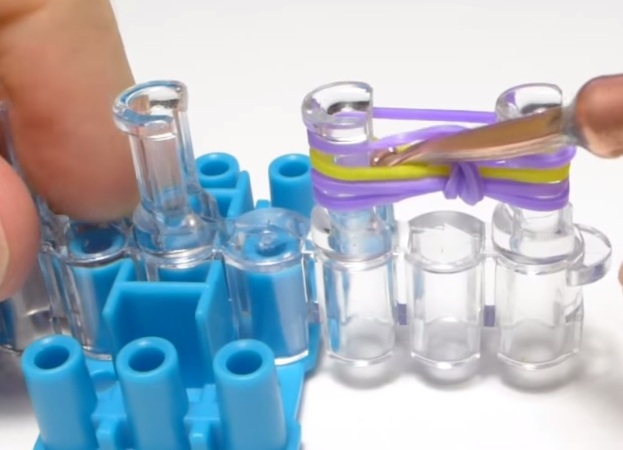
- We take three rubber shoes of the same color and one piece of the other. We put on the left column of purple, making around it 3 turns.
- The next two purple gum put on both pillars without any torsion.
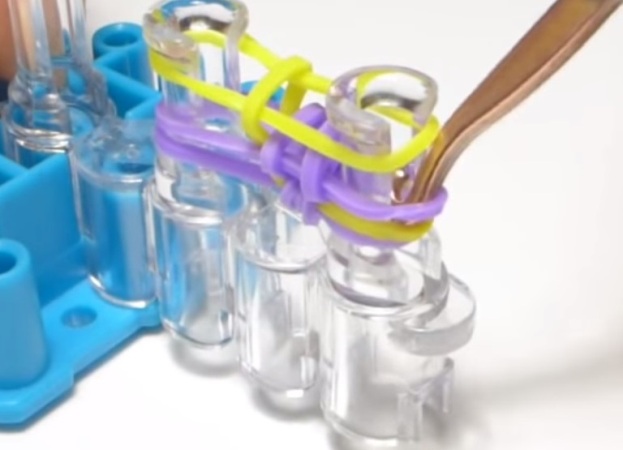
- Then we put on a yellow rubber band on both columns.
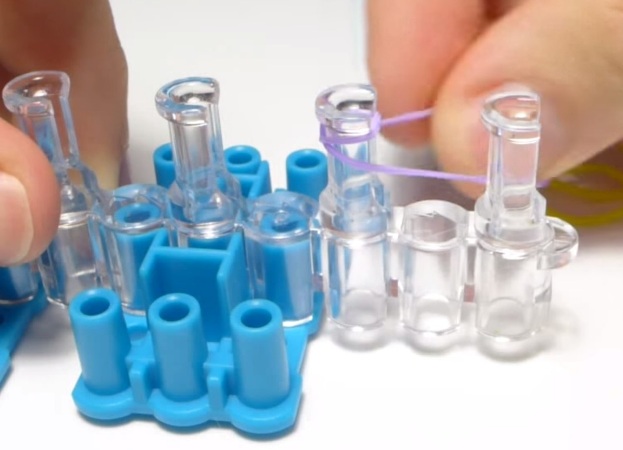
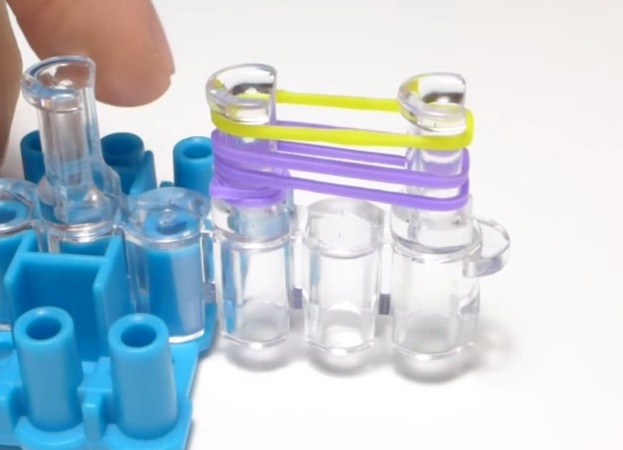
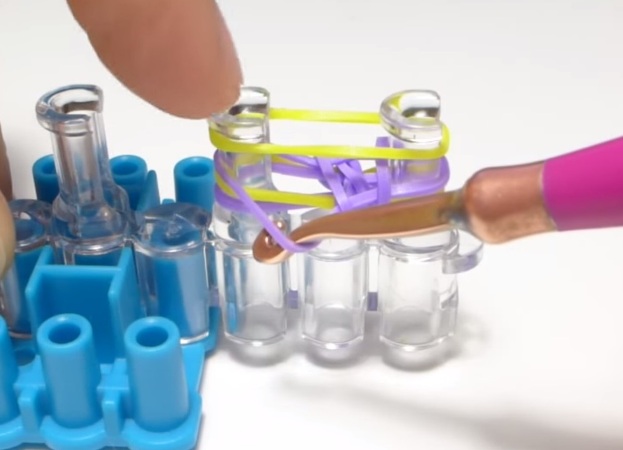
- Using the hook, the lower elastic band (wound on the left column) should be moved to the middle. All three layers must be captured immediately.
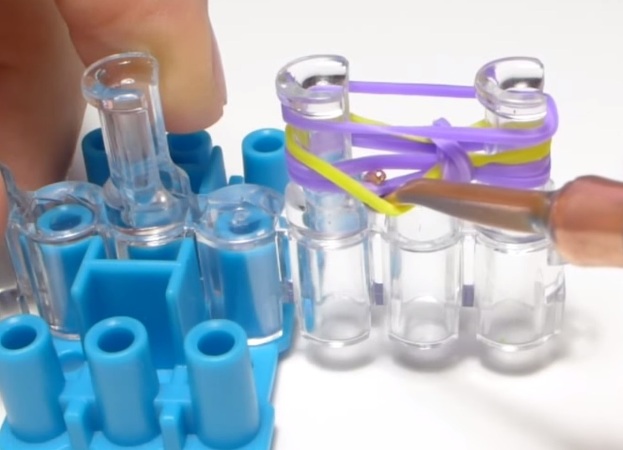
- In the future, you need to throw gum, alternating in colors. Therefore, if we have the last yellow, then we throw on the two pillars purple.
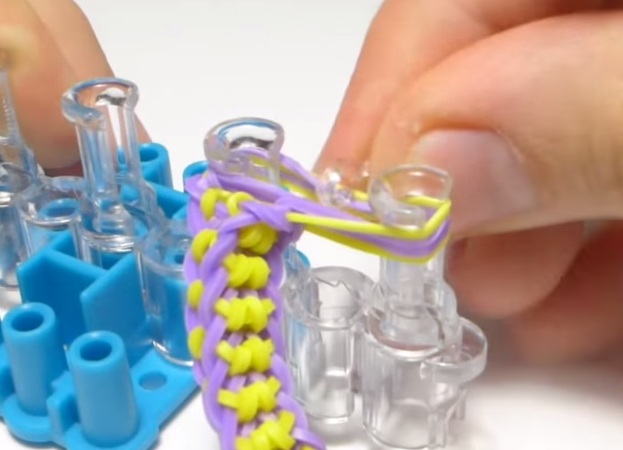
- On the left side we put the hook in the middle between the first and second elastic band, we push the second (yellow) elastic band to ourselves with the back side of the hook. Grip the lower elastic and pull it up to the middle.
- On the right side, we do the same.
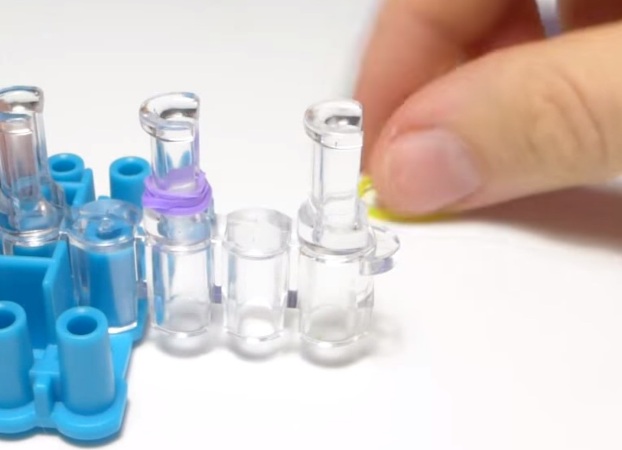
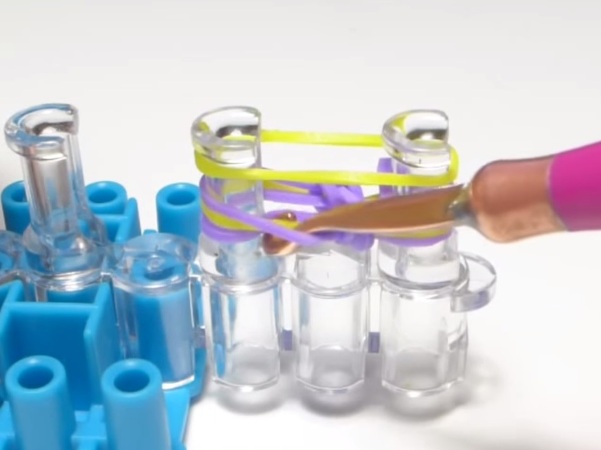
- After these manipulations it is necessary to check that the yellow elastic band remains on both sides in the middle. If it has moved, return it to its place.
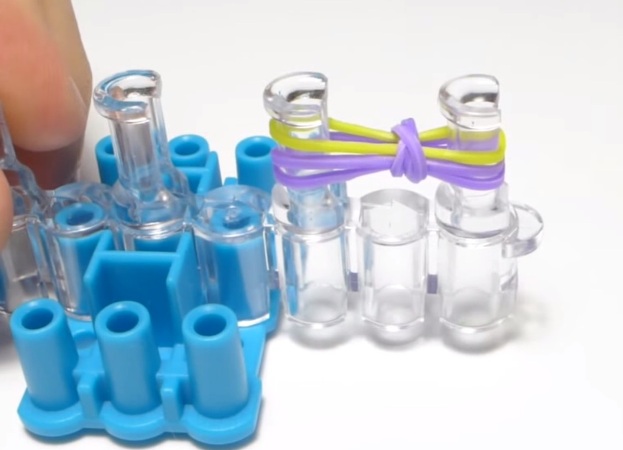
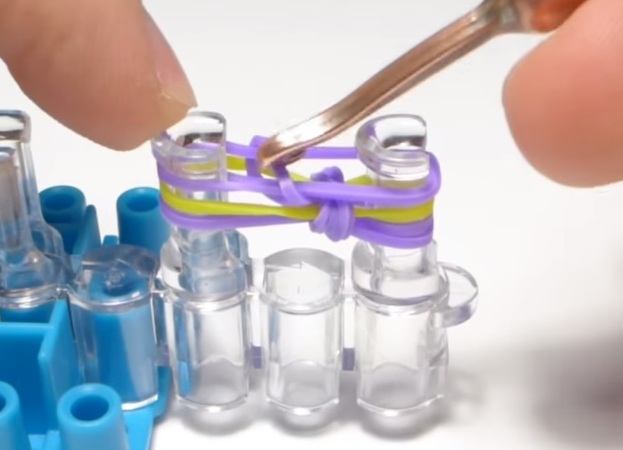
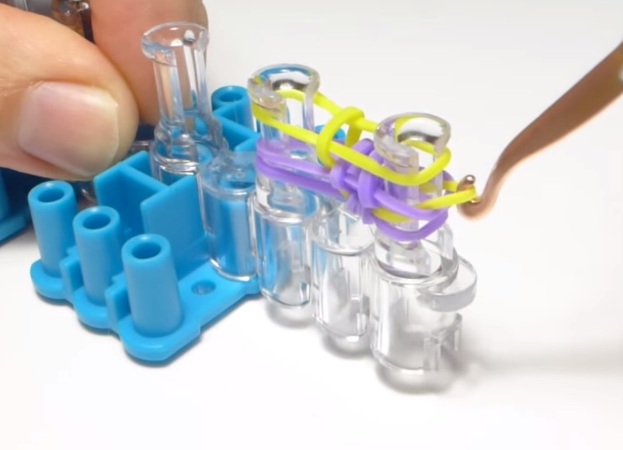
- Since the upper gum is purple, then we put on the yellow one.
- Again, we put the hook in the middle between the first and second, push it back, grab the third (yellow) elastic and bring it up to the middle.
- We do the same on the right side.
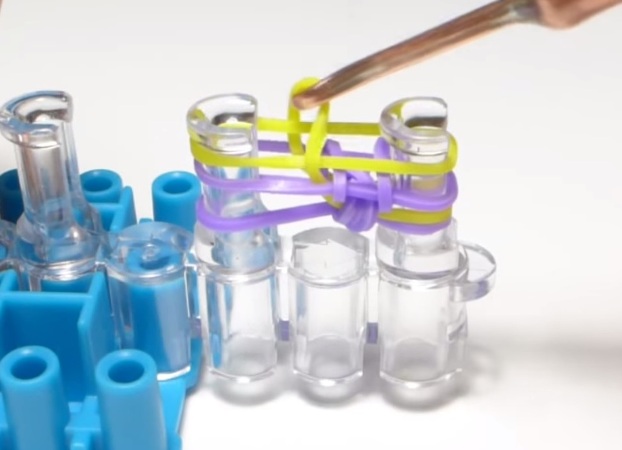
- According to the rule of typing rubber, after yellow we put on purple.
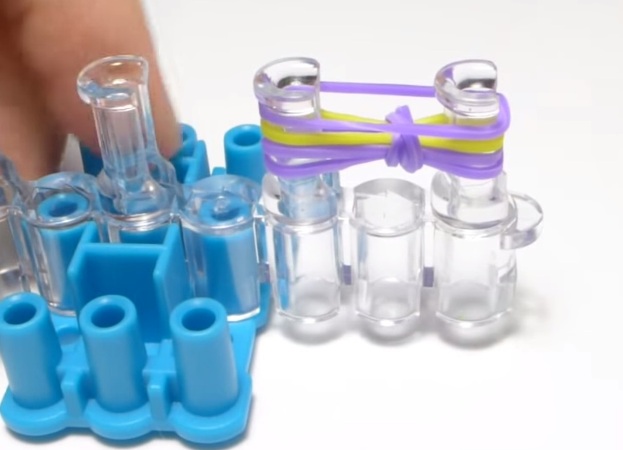
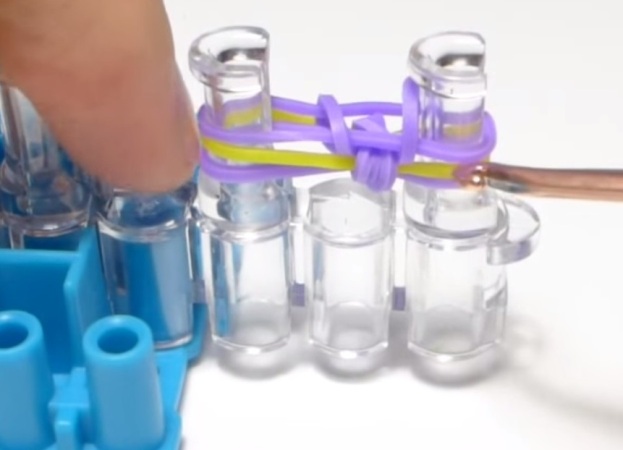
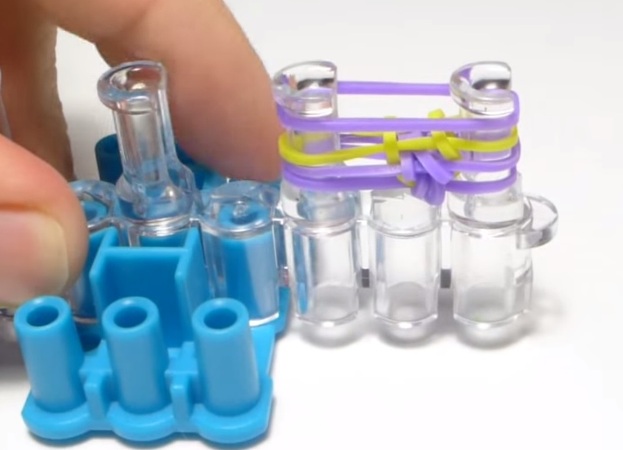
- Now we repeat items 7 and 8, we take off the bottom purple rubber from both columns in the middle.
- We put on a yellow rubber band, then repeating point 11 and 12, we bring the third (yellow) upstairs between the columns.
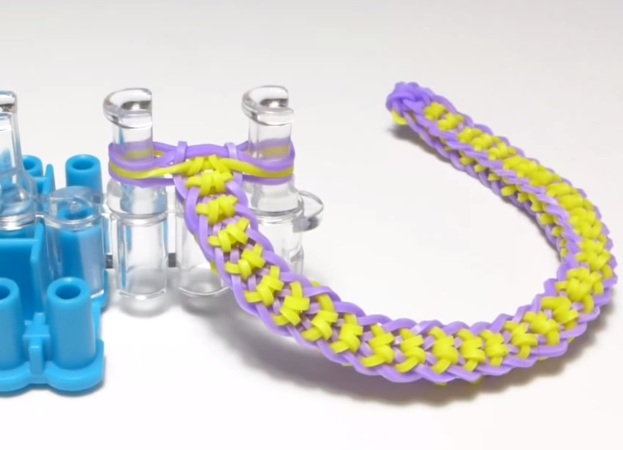
- Continue the weave until the length of the product will not match the size of the wrist. To get the right drawing, you need to remember that if we have a purple color on top, then we bring up the lower elastic band, if yellow is the third one.
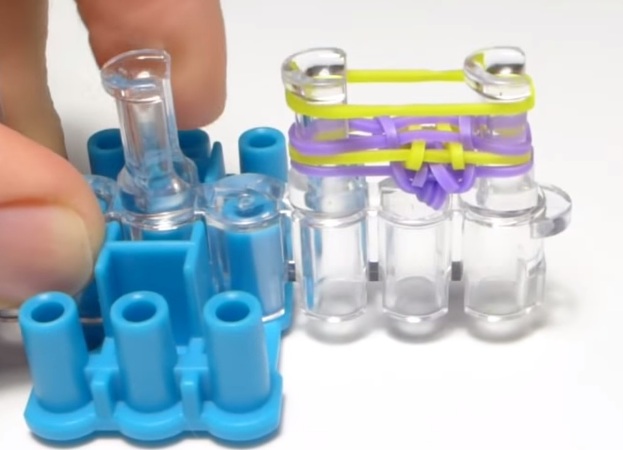
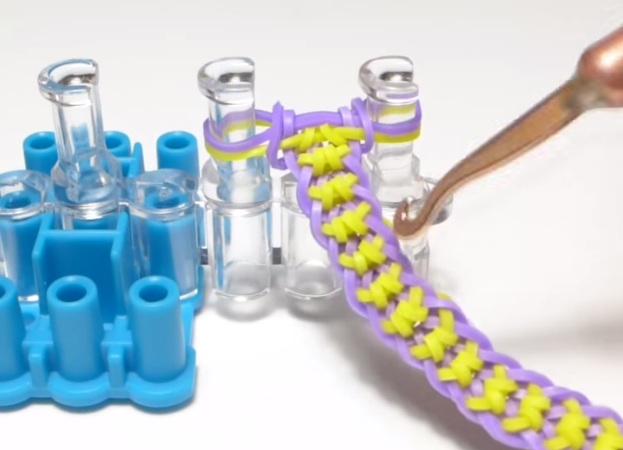
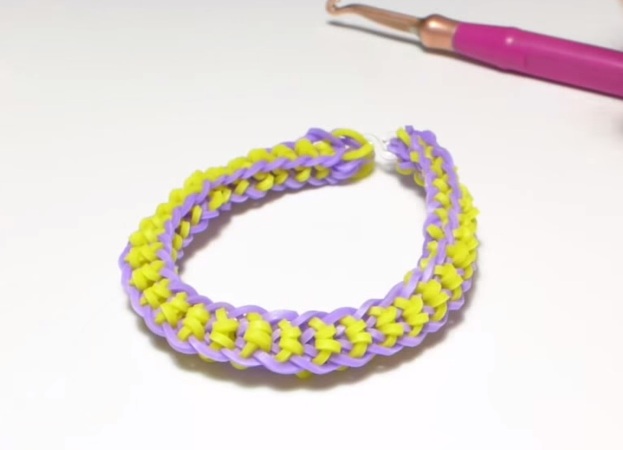
- In order to finish the bracelet, the lower elastic bands from both columns should be removed to the center. After that, grab both gums from the left column and put them on the right. Then, by crocheting, stretch all four bands on both posts.
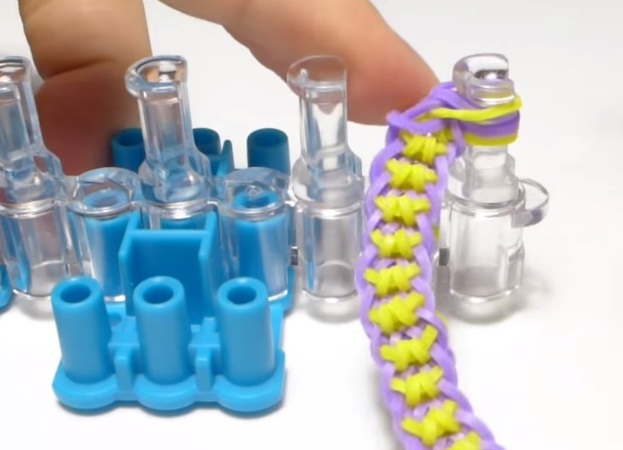
- We put one end of the clip on all four bands. After that, remove the bracelet from the bars and put the other end of the clip on the elastic band, which was wound at the very beginning by three turns. Bracelet "Bantik" is ready.
Since the braiding of the bracelet "Bantik" passes on two posts, it can be done without a machine. To do this, you can use a slingshot, connected with each other at a short distance pencils and even fingers . Only we will be less convenient to make an interlacing, since the notch will look in the wrong direction or it will not be perfect. But this is not the most important, it is more important to correctly follow the sequence of the actions and as a result you will receive the same beautiful bracelet as on the machine.