If you know how to handle a little with a tape measure, a marker, a level and a simple household electric tool, then if you want you can try to make simple furniture made of wood , chipboard and other improvised materials. This will give you a chance to save some money for your home budget. In addition, such products may look unusual and quite original. Designer furniture made by own hands was always appreciated highly. This chair, ottoman, sofa or locker is unlikely your descendants will quickly be thrown to the dump, even if they are already out of fashion.
How to make furniture yourself?
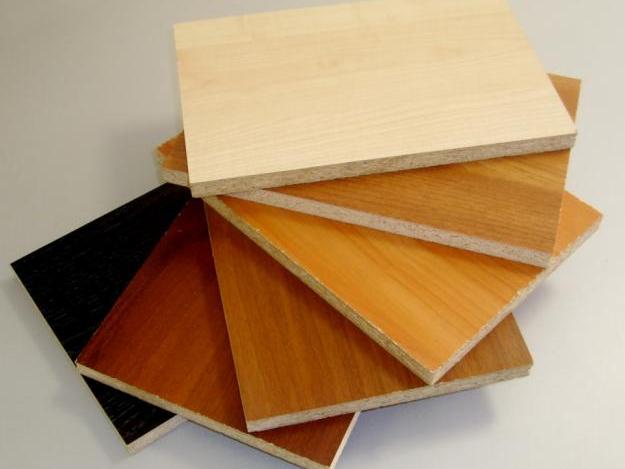
Particleboard or laminated chipboard is a very convenient material for such a case. It is easy to handle at home, even you do not have a sophisticated joinery tool. The main thing is to make a cutting, but it can be sawn in specialized workshops. If you have a hand-held circular saw or electric jigsaw, then you can do it yourself. Only you need to do this carefully so that strong chips do not form on the cut line. After sawing the slices must be ground, having processed the edges of the file and zatortsevat.
An example of manufacturing furniture from the chipboard itself:
- For work we need tools, materials and fasteners. To make the frame, we take a laminated chipboard. Buy it is not difficult. In addition, if there is a workshop for assembling furniture next door, then you can try to buy the leftovers, which are usually sold at a lower cost than the whole sheet. Small non-standard pieces, which are often simply burned, may well come in handy for assembling a homemade chair, shelf or locker.
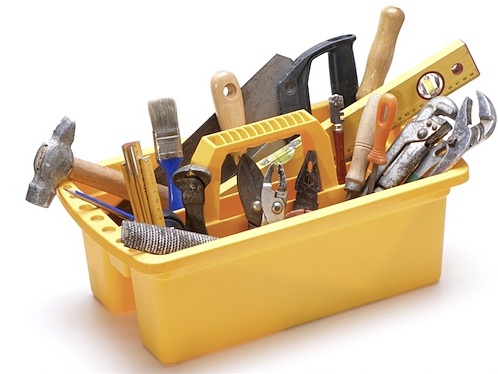
- One of the most versatile cutting tools is an electric jigsaw that can successfully handle even steel sheet and plastic. Well, also to have slaves with wood disc electric saw, electric drill, electric drill, screwdriver, grinder. They are always needed on the farm and will be useful for any repairs. In addition, we will need a hand tool, namely: an ax, a hacksaw, a hammer, a plane, a chisel, chisel, kiyank, roulette, clamps, screwdriver, pliers and tongs.
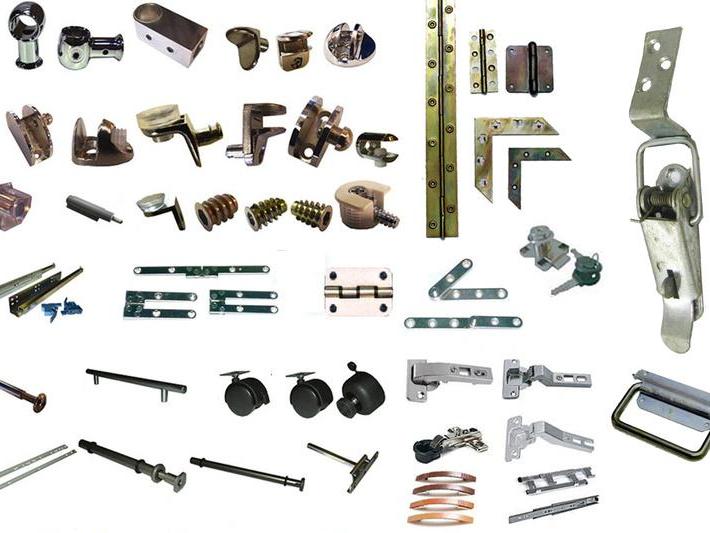
- For fixing parts, you will have to buy special connecting products, which are used by carpenters - corners (metal or plastic), confirmat or eurovint, ties (eccentrics). Everything here depends on which connection method you prefer. Also we will need different accessories - hinges, handles, guides, euro screws, hooks and other products. Before you start, make a drawing and try to calculate as accurately as possible their number.
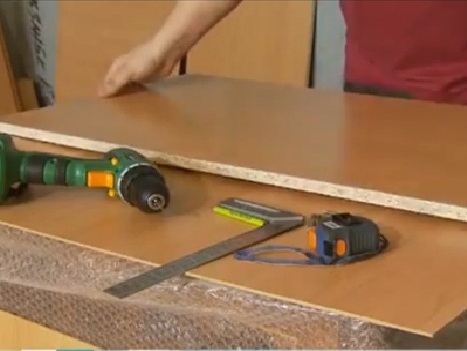
- Now you can start creating furniture from the chipboard. In our case it will be a small closet. Determine the dimensions and make the markings, marking the places for fastening.
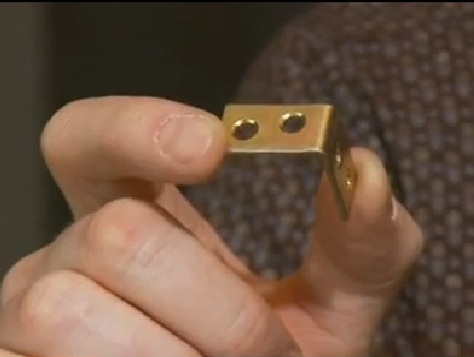
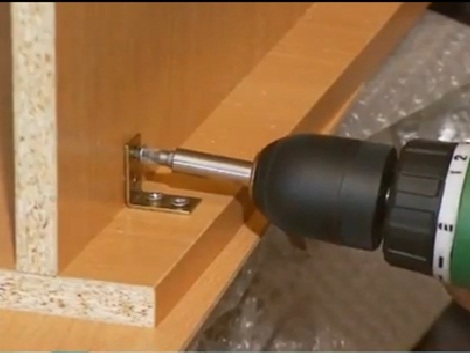
- For our locker, we take small corners. The larger the product - the stronger the fastening and the more reliable.
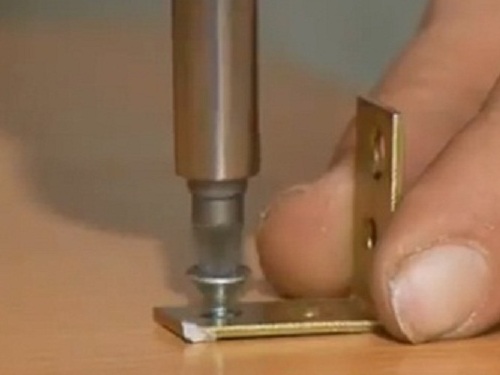
- We will fix the corners on the screws. You need to attach them to the attachment points and mark with a pencil the center of the future hole.
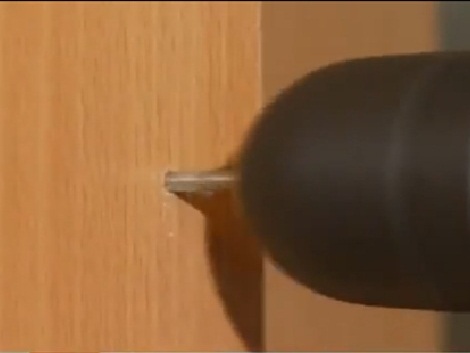
- In order for the self-tapping screw to fit easily into the chipboard, drill a small hole in the target location and screw it in with a screwdriver or screwdriver.
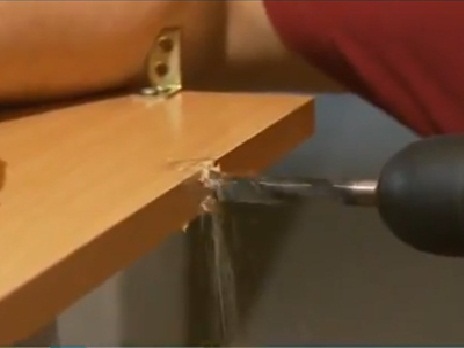
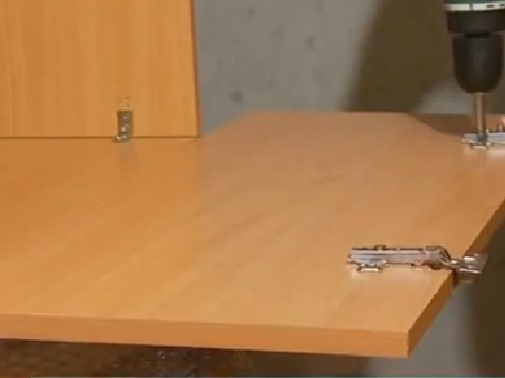
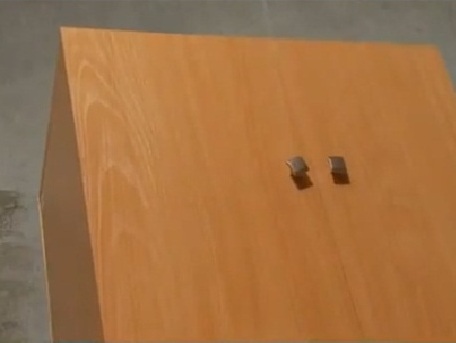
- From the lower and upper edges of the wall, we retreat about 15 cm, and then notice where the bases of the loops will be fastened.
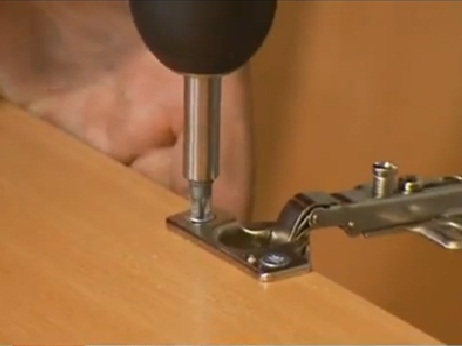
- Drilled holes for them in a special way. First, an opening is made from the end of the wall of the future cabinet. Then a second hole is made - on the plane of the chipboard.
- After that, we insert the base of the loop and fix it on the self-tapping screws. The same procedure is done with the second wall of the cabinet.
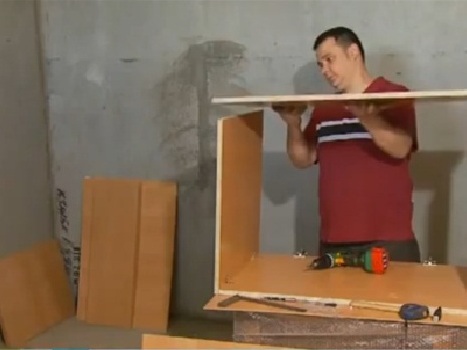
- Now it's the turn to screw the bottom of our product to the side.
- In the next step, install the lid of the locker with the help of the same corners and screws.
- We turn the frame so that it would be convenient for us to install the rear wall. It can be made from a piece of a sheet of fiberboard. Mount it to the frame can be with the help of small nails.
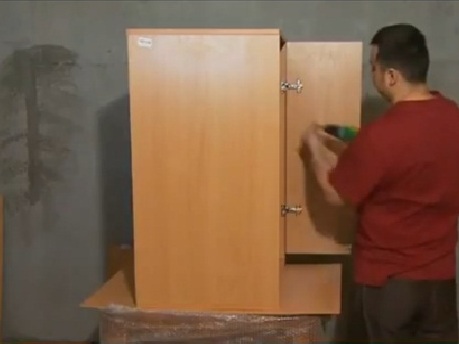
- We pass to the door. On each of them we attach the details of our hinges.
- We install the doors on the frame.
- Then we drill into them with the help of screwdriver holes and screw the handles.
- Now our simple locker is fully ready for use.
We here have set a very simple example of how to make a small table or cabinet from a chipboard. If you want to make an ottoman or sofa at home, then you will have to apply more strength and skill. Here you need to know how to make furniture yourself. With a great desire, all this can also be learned, surprising later with their unique works of acquaintances and neighbors.