Modular origami is a technique that allows you to make amazingly beautiful 3D shapes from paper. The difference between this technique and the classic origami is that not one but several sheets of paper are used to create the crafts, from which the modules are made, which in turn add up to form the desired figure.
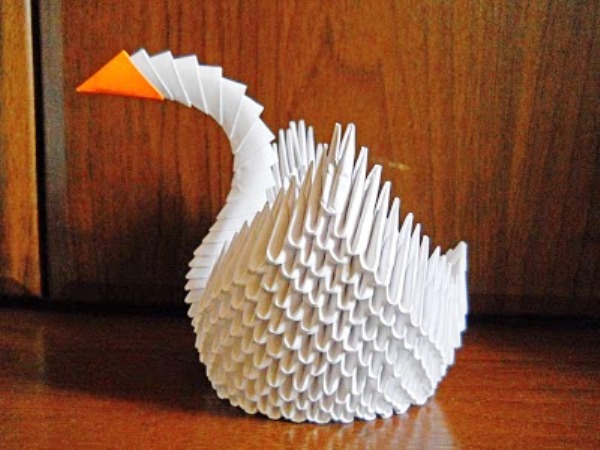
One of the most striking examples of technology is the swan of triangular modules. As a result of a simple, but rather laborious work, you can get a beautiful bird. Depending on what color the paper is at your disposal, you can make a white or colored, rainbow swan from the modules.
Looking at the photos of the ready figures, it is even theoretically difficult to imagine how to make a swan from the modules - it seems, it is very complicated and intricate. In fact, nothing complicated in the manufacture of figures is not enough, it is enough only to study in detail the master class on making a swan from the modules with the assembly scheme and consistently follow the steps described there.
We bring to your attention a detailed manual, consisting of two stages - the manufacture of components and the assembly of the finished product.
How to make a swan from modules?
First you need to make modules. To do this, you need only sheets of ordinary xerographic paper, white or colored, depending on what you want to get as a result.
Progress:
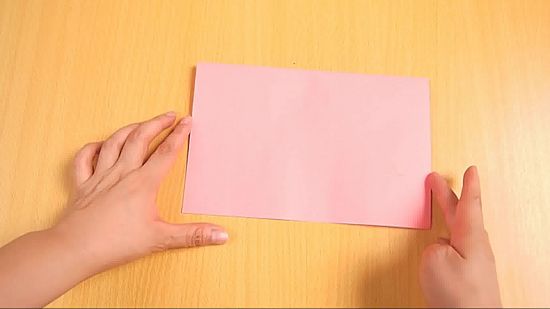
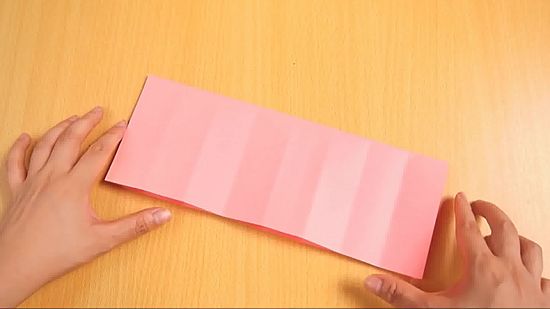
- A sheet of A4 paper is bent in half in width.
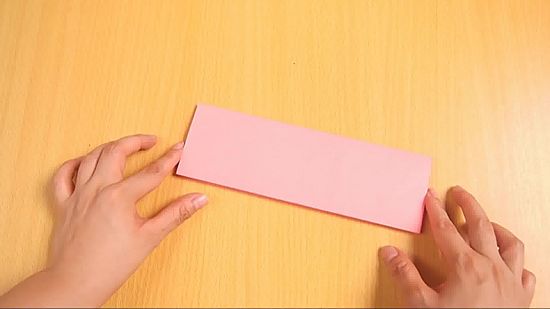
- Once again bend in half.
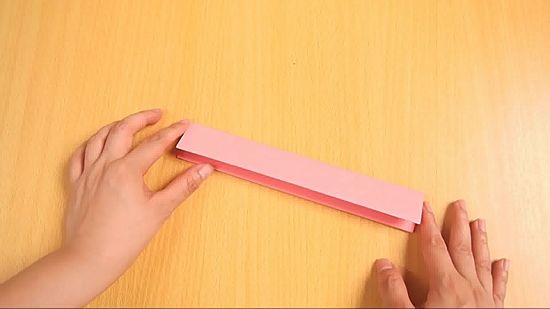
- And once again bend in half.
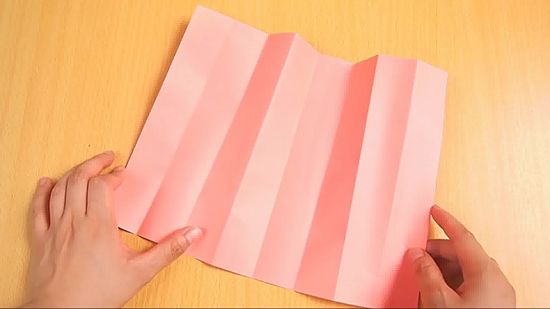
- We unfold and turn so that the fold lines are vertical.
- Again, fold the sheet in half, but in another direction.
- And once again fold in half.
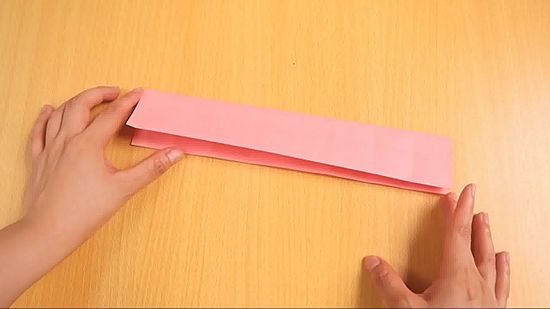
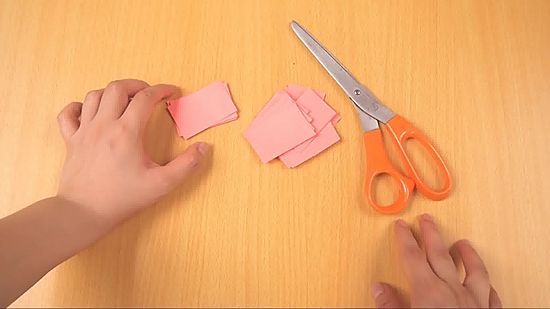
- We unfold and cut or tear the sheet along the fold lines in such a way that 32 rectangles are obtained.
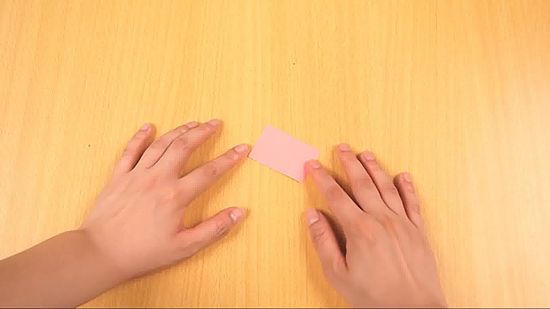
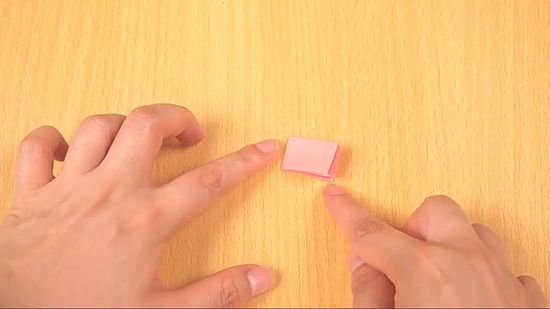
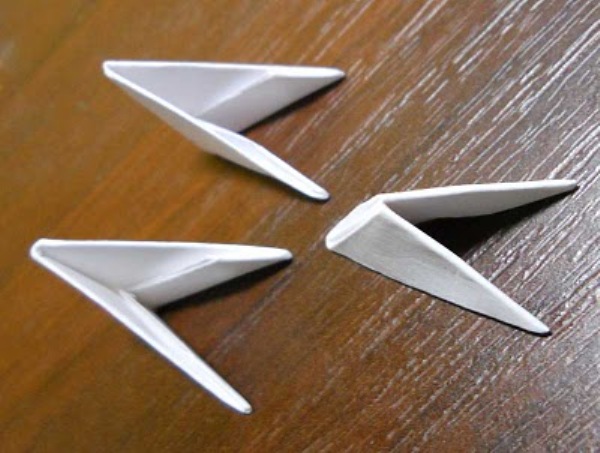
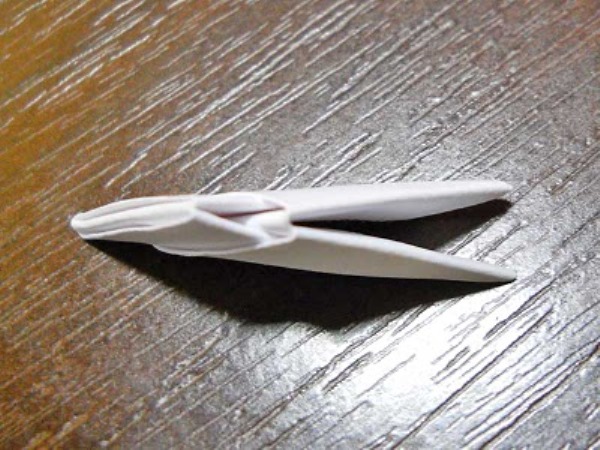
- We take one of the rectangles and proceed to make the module.
- We fold in half.
- Now bend across the first fold line.
- Unroll and fold the bottom corners inward towards each other.
- Fold the upper corners as shown in the photo.
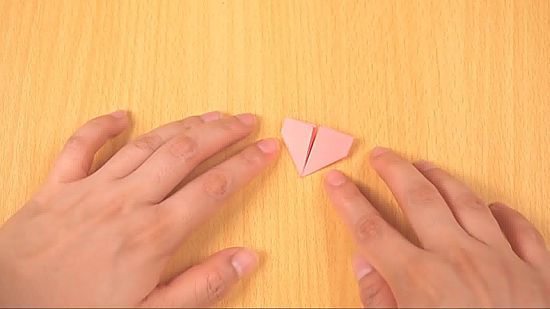
- And now the upper part is bent down, so that eventually a triangle is formed.
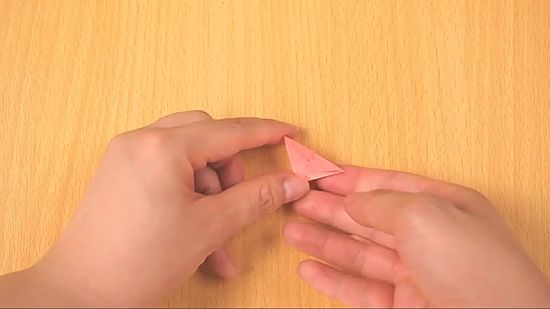
- The resulting triangle is folded in half.
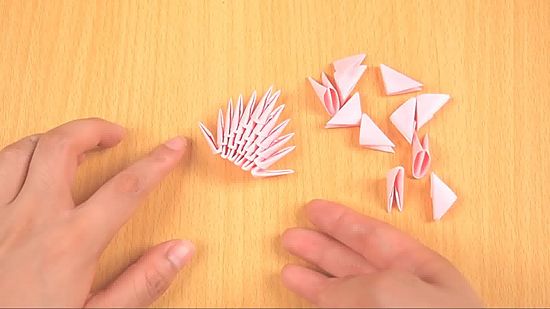
- Similar actions are repeated with other paper rectangles.
- At us the triangular module with a pocket so that it was possible to insert in it another has turned out.
How many modules do you need for a swan?
The number of blanks directly depends on the assembly scheme and the size of the future bird. For example, in the assembly diagram below, 458 white triangles and one red are used. By reducing their number and simplifying the assembly, you can get a small swan from the modules.
Assembling a swan from triangular modules
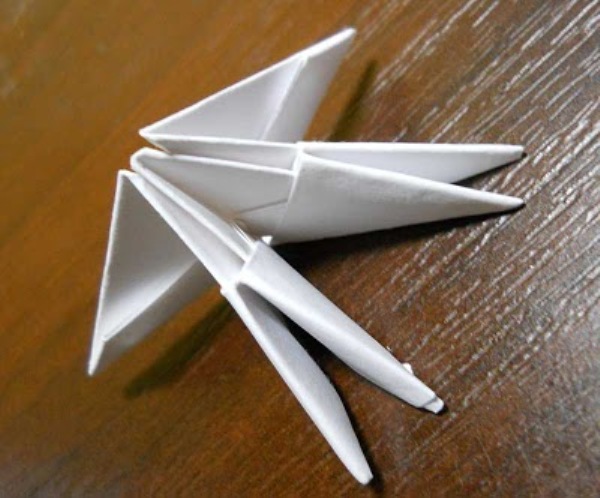
- We have three modules in the order shown in the picture.
- We insert the corners of the two upper modules into the bottom pocket.
- Similarly, we attach two more triangles to the construction.
- In the extreme modules we insert 3 pairs of triangles.
- Then we proceed in a similar way.
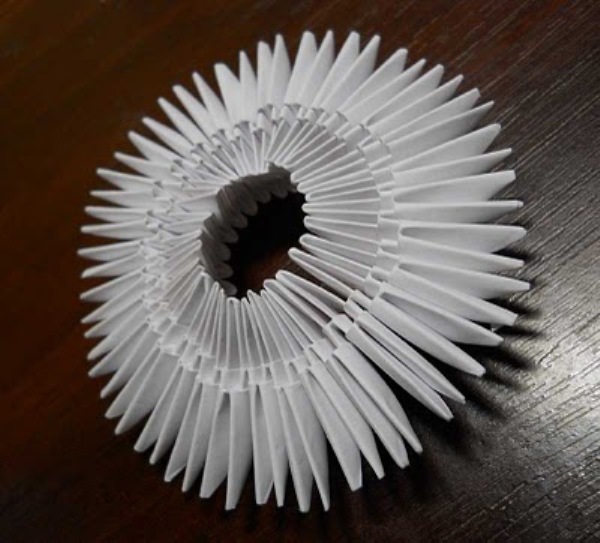
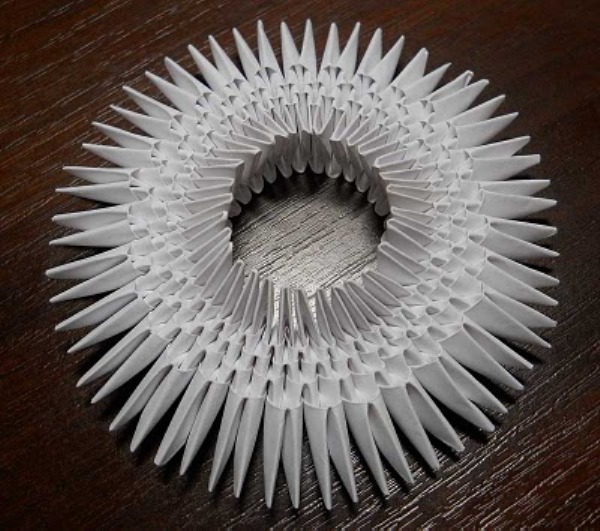
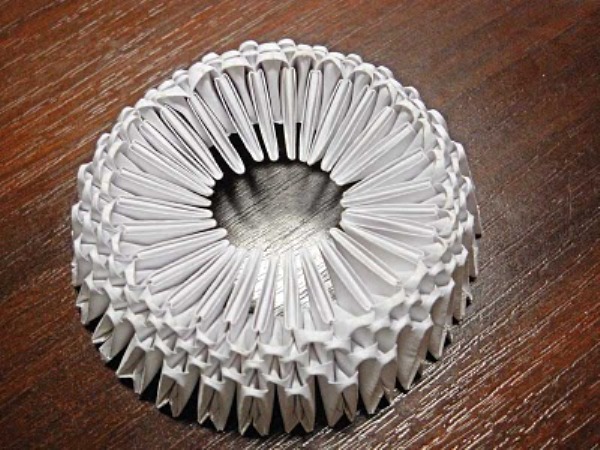
- Using 30 modules, we get this construction.
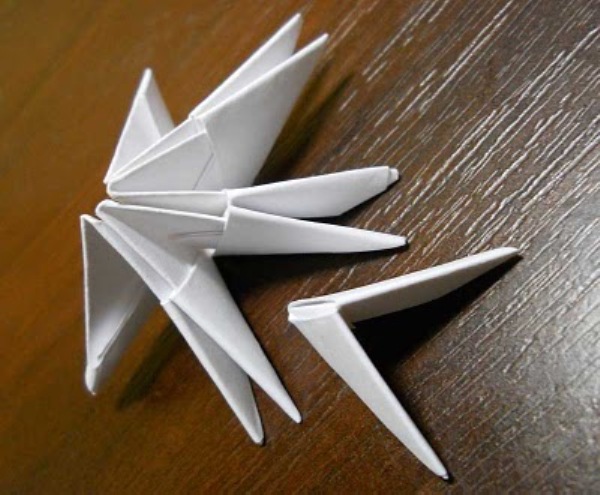
- We add 3 more rows, in total there should be 5 rows of modules.
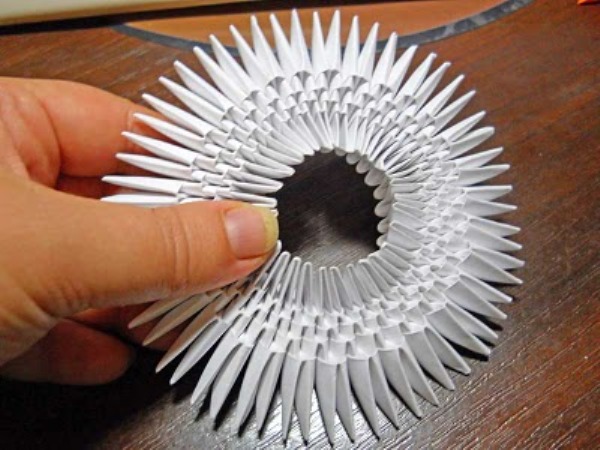
- Pushing the construction in the middle, we turn it inside out.
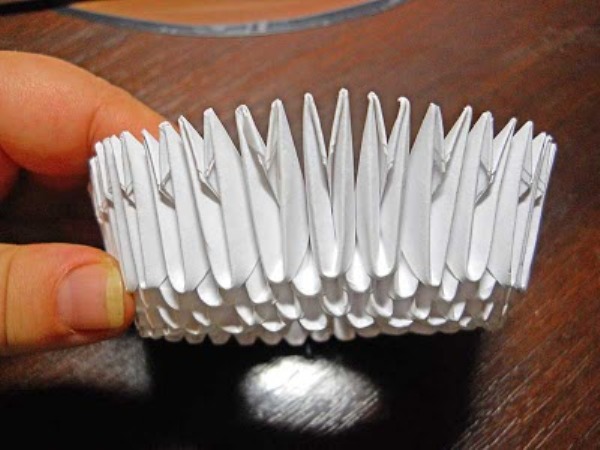
- Fold the edges up to learn the cup, as in the picture.
- Type of construction from below.
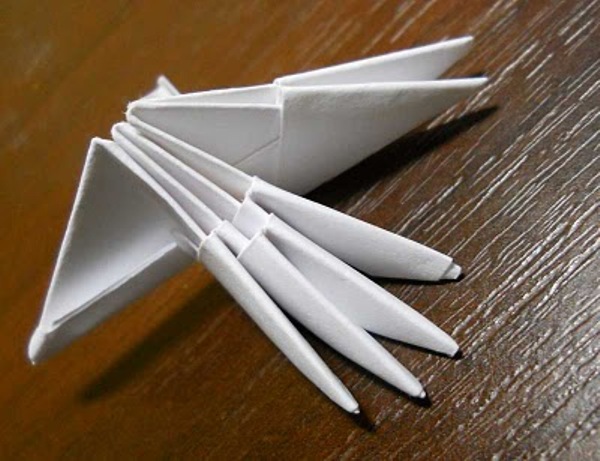
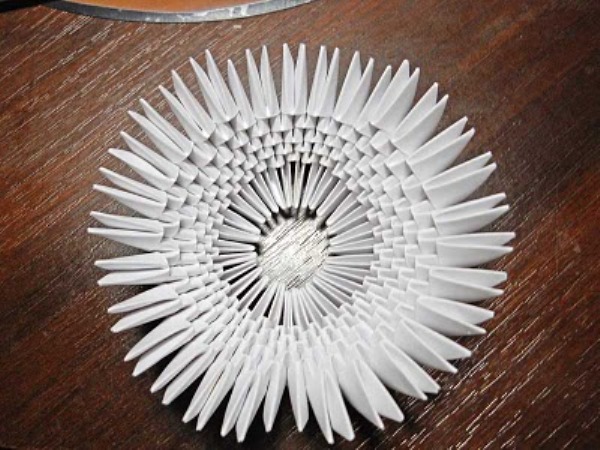
- By the same principle as before, we put on 6 and 7 a number of modules.
- Starting with the 8th row, we proceed to the construction of the wings of the swan. To do this, we put 8 on the 12 modules, skip 2 and attach 12 more. At the place where 2 triangles are missed, there will be a neck, on the remaining section of the 7th row - the tail of the swan.
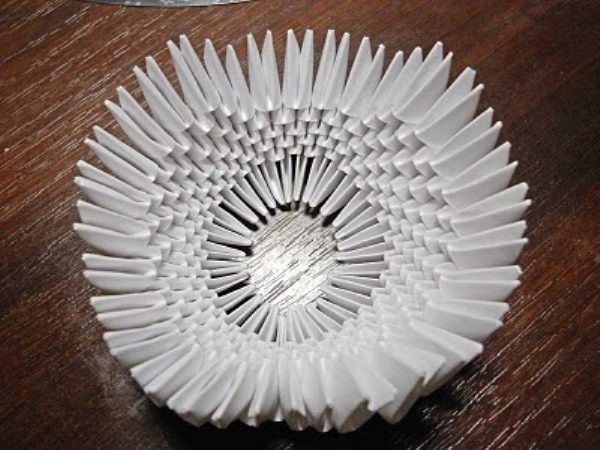
- In the 9th row, we reduce each wing of the swan by 1 triangle.
- Continue on, with each row reducing the wings by 1 until there remains one module.
- Make the tail, similarly reducing the row by 1 module.
- For the neck and head we take 19 white and 1 red module in which we glue the corners so that the beak turns out.
- We begin to collect the neck, putting the corners of one module into the pockets of the other.
- We bend the design crochet.
- The final step is to insert the neck into the gap between the wings of the swan.
- The swan of paper modules is ready.
| | |
From the modules you can do other crafts, for example, a hare or a vase .