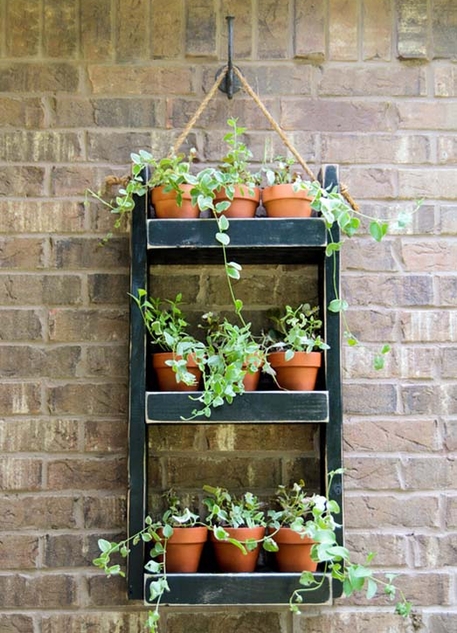
Many women like to decorate the house with fresh flowers. Thanks to them, the room becomes more cozy, radiates warmth and hospitality. However, when plants accumulate very much, there is a problem with the placement of pots. Solve it by hanging on the wall special shelves, which will accommodate several plants. Having a few planks and a small set of shelf tools on the wall for flowers can be made by hand. So you not only save on buying, but also show your creative approach in the design of the room.
How to make a shelf for flowers with your own hands?
The most suitable material for making the shelf is a tree . It just works and it fits into any interior of the apartment. When making a shelf from wood, it is important to choose a board of optimal thickness so that it does not bend under the weight of the plant. In addition, the wood must be painted with a water-repellent paint or a special varnish that will protect the material from moisture.
To produce decorative shelves for flowers with your own hands you will need such materials:
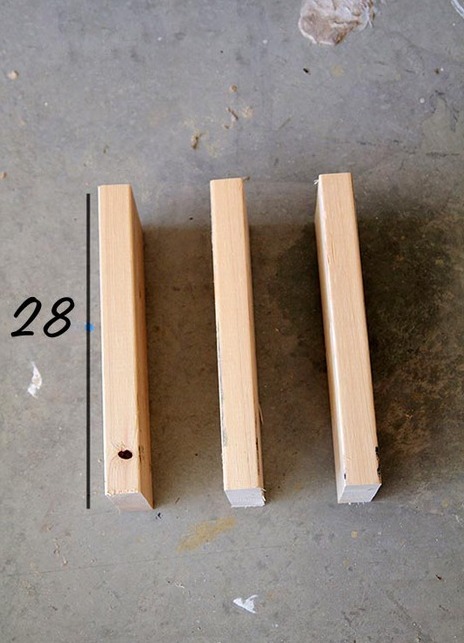
- three wide and three narrow plates 28 cm wide;
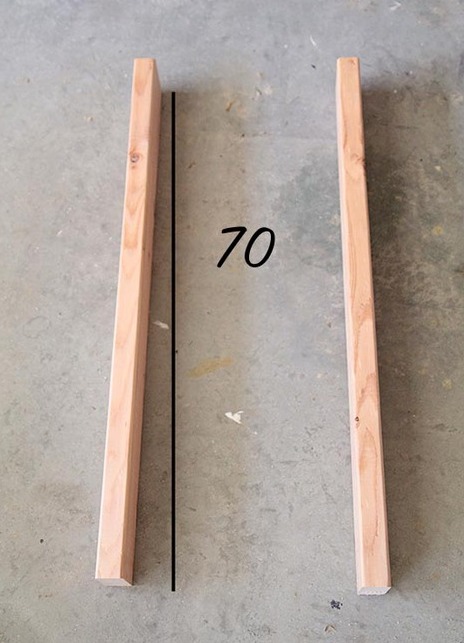
- two boards 75 cm long;
- paint / varnish on wood;
- hammer and nails;
- drill;
- sandpaper;
- twine;
- marker or pencil for marks on the tree.
When everything you need is collected you can start working. The shelf will be manufactured in several stages:
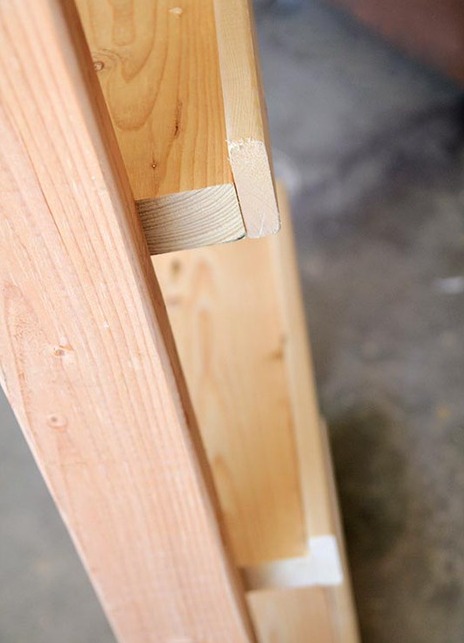
- Preparation of boards . If you do not have the required length of the boards, you need to cut the existing bars. To do this, you can use a manual or circular saw. The second option is more convenient, since it allows you to quickly get the board the right shape and length with neat edges, but it is rarely available. As a result of cutting you should get boards of such sizes and shapes.
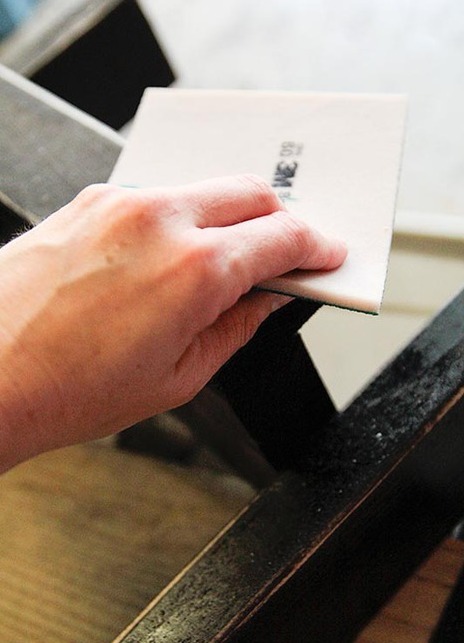
- Grinding of wood . To smooth the spills and the places where the chips split off, use sandpaper. First, walk through the skin with a large, and then with a fine grain.
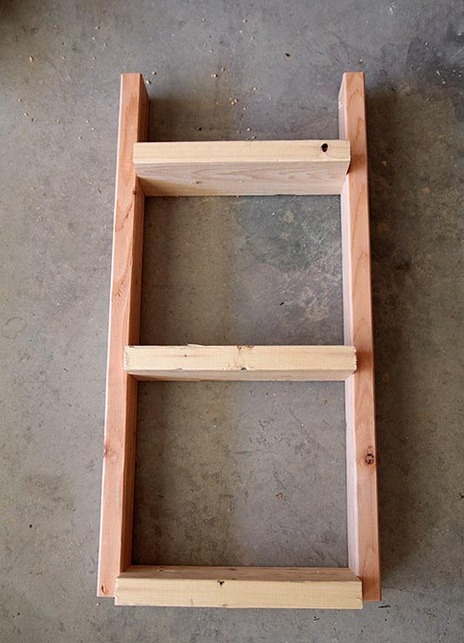
- Bonding . Connect wide wide and long long boards like a ladder to each other. Use nails for fastening. Narrow short boards use as a restrictor.
- Painting . Cover the tree with stain and dry it in the open air. Indent the indents with a sandpaper, slightly erasing the applied layer and coat the shelf with wood wax or finishing varnish.
- Fixation . In the drilled holes, insert a thick rope and make strong knots. For this rope the shelf can be hung on the wall.
| | |
| | |
At the top of the shelf, drill holes.
| | |