Many boys are very fond of toys-transformers. This is due to the fact that it seems to be an object, but you can play them as two different characters. The most popular are robots, turning into typewriters. They can be made not only from plastic, but also from other materials.
The world of origami and paper-plastics is very large, in it, besides the usual articles made of paper ( panels , applications, topiary, quilling articles), there are transformers, and after reading this article, you will learn how you can make one of them yourself. After all, the child will be doubly more interesting if he first does it himself, then only will be played.
How to make a transformer made of paper?
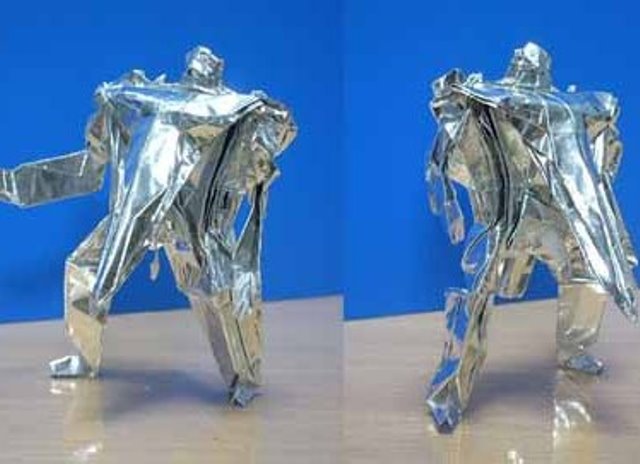
To produce it, you only need a sheet of silvery paper (paper-based foil), suitable for folding origami. Just remember that a standard A4 sheet will be too small for such a craft, it's better to take more (A3 or A2).
Progress:
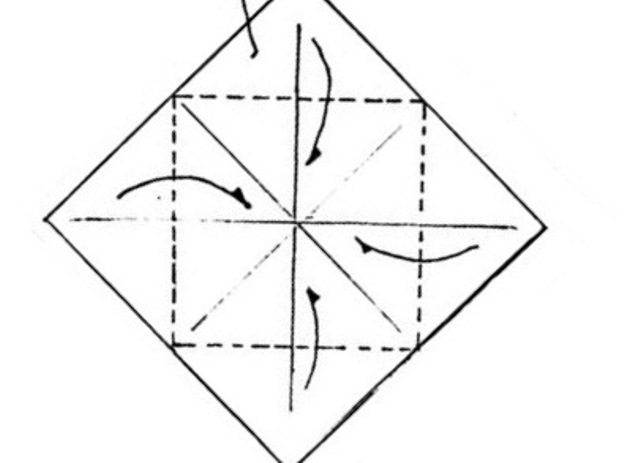
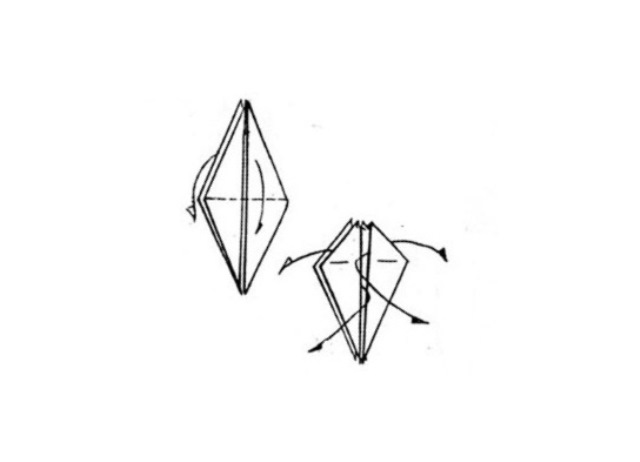
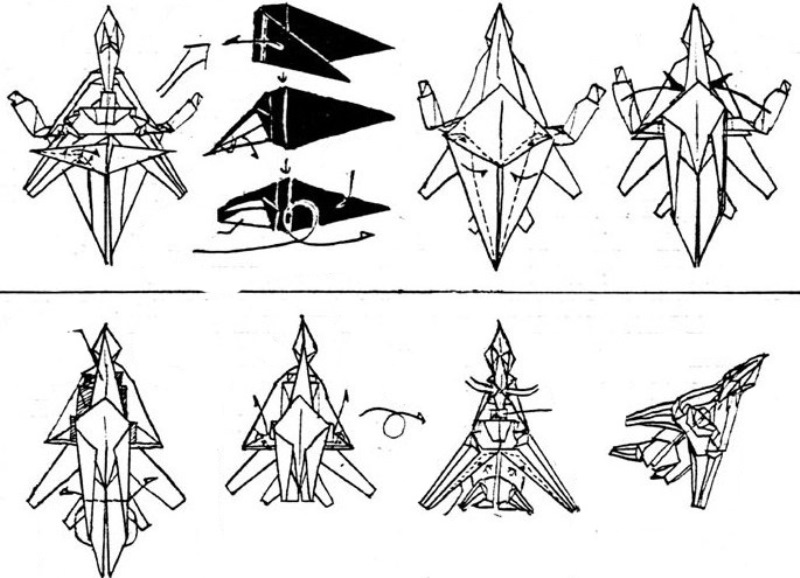
- Cut out a square of paper. Fold it on the diagonals, and then the corners to the center.
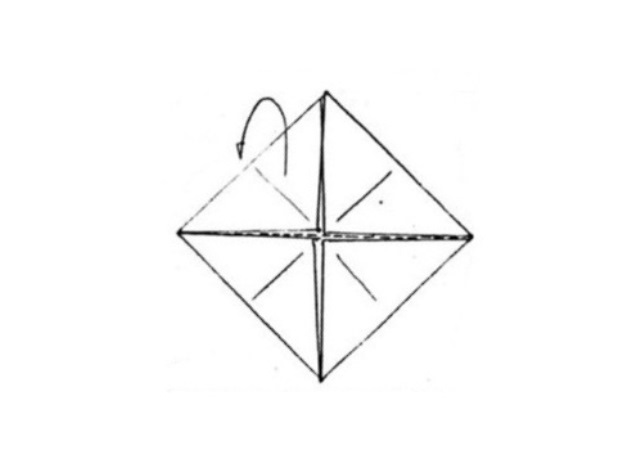
- Bend the top corner back down, and then add the right side to the left.
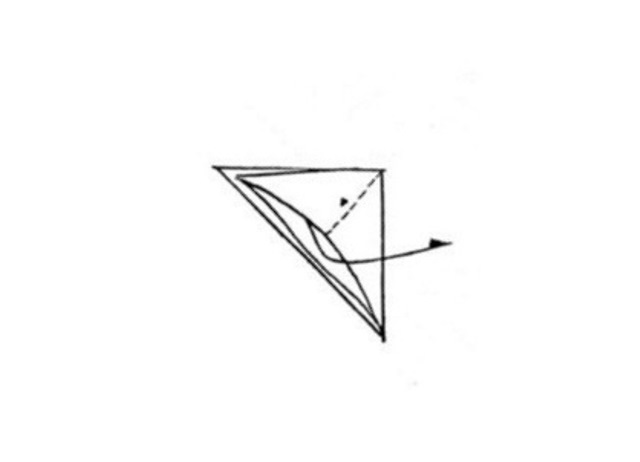
- Take the edge of the upper layer of paper and push it aside. We should get the figure shown in the picture.
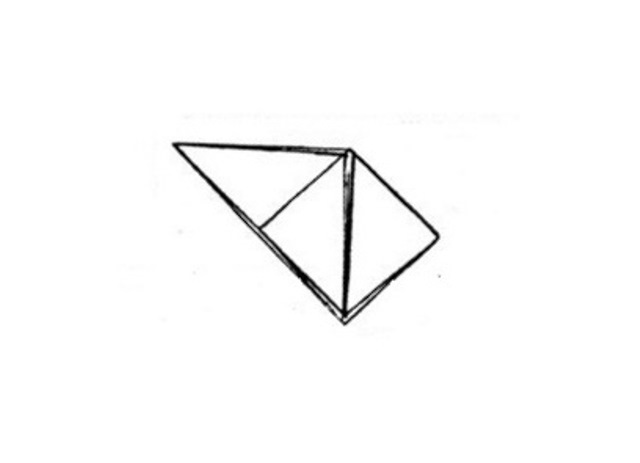
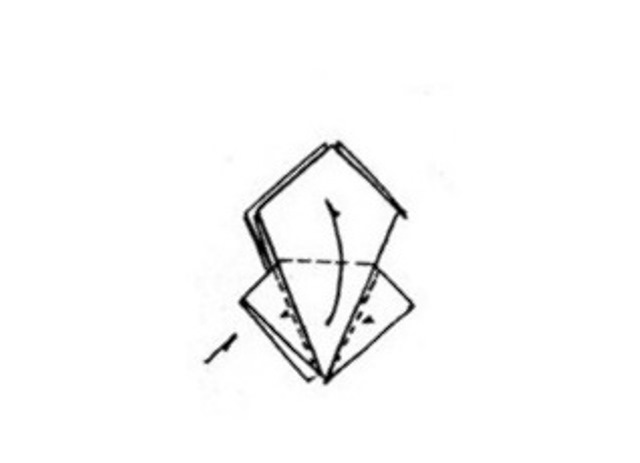
- Fold the square on the other side. Then we lift the middle of the upper square to the top. We do so with the second. As a result, we get the basic figure of origami "Bird". Lower the ends of the paper from the top to get a shape like in the photo. We do this on the other side.
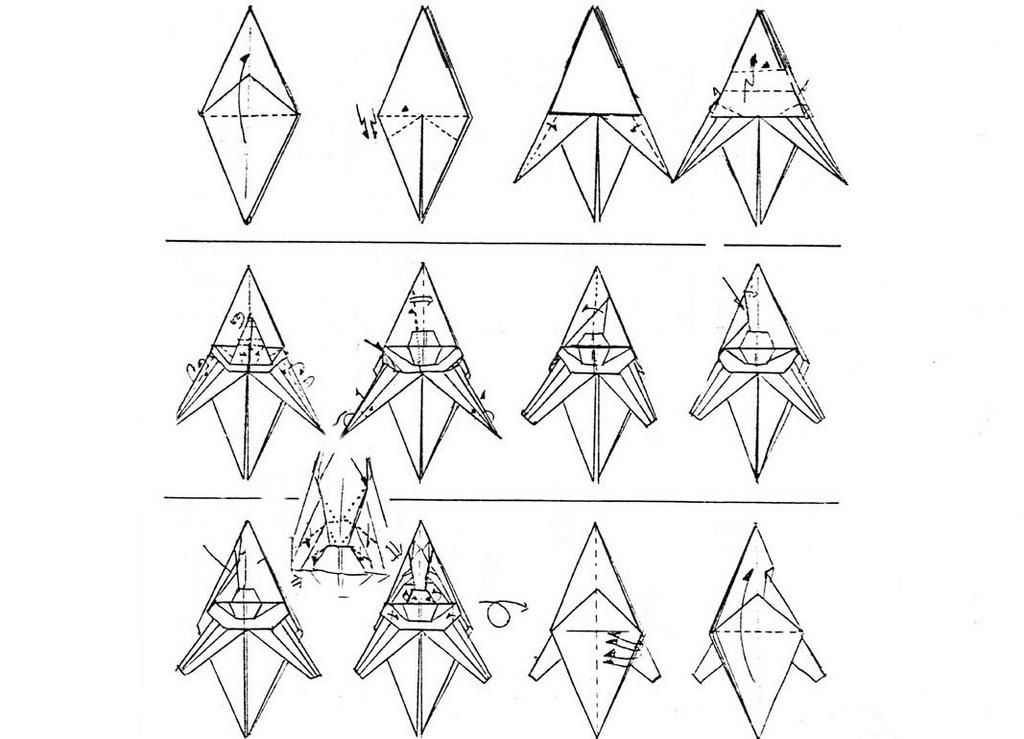
- Fold the formed wings in the middle and down. After that, on both sides, raise the lower triangle, while guiding the side wings to the center.
- We swap the top and bottom of the workpiece. Fold the upper wings in the middle. Formed above and behind the robes fold in half upward. Fold the lateral corner to the center, and then bend inward. We do so with all four corners.
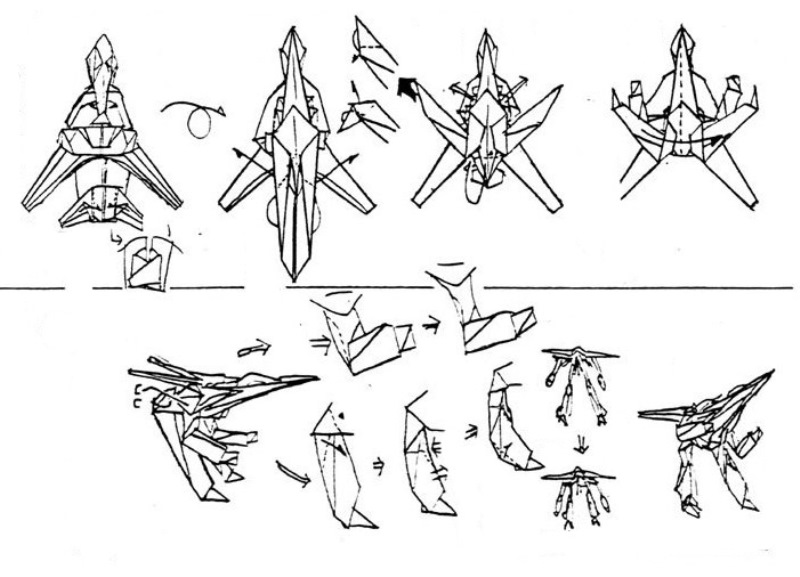
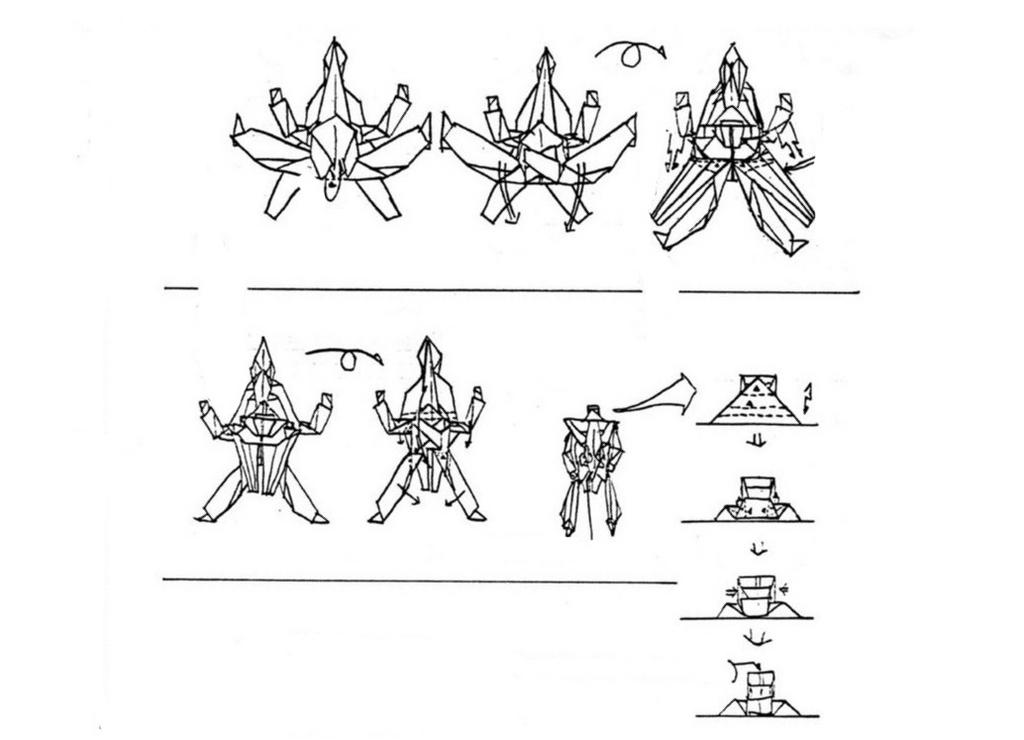
- We again turn the resulting blank from the top down. Doing as shown in the photo, pull out the triangle in the middle of the detail.
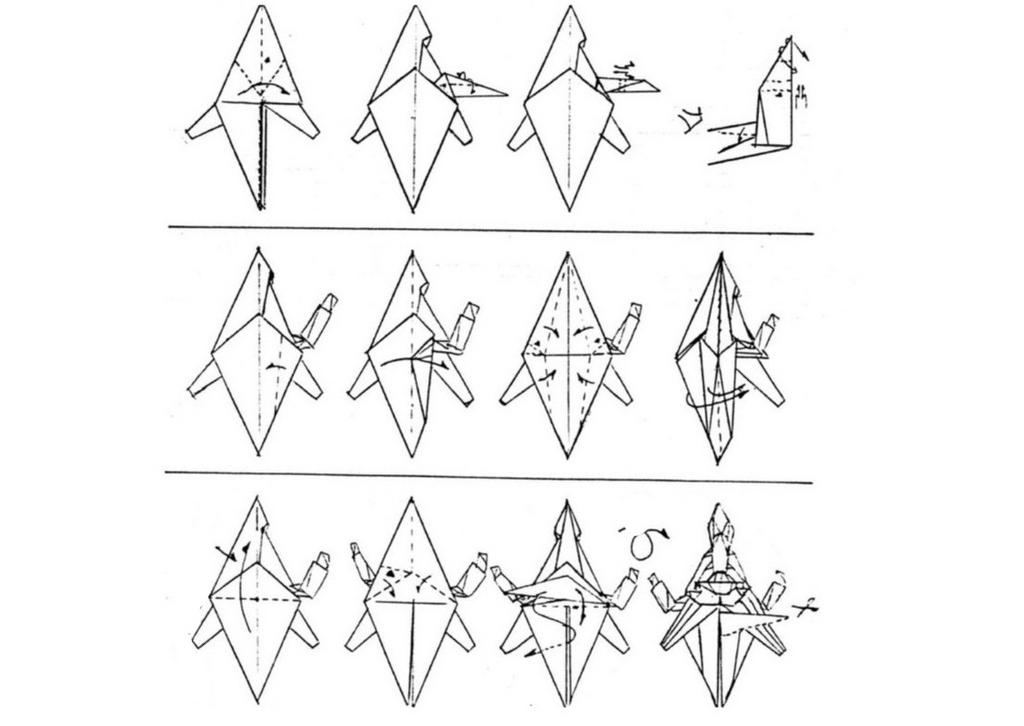
- Further we add from a paper under the offered schemes already the transformer.
- We got the plane. Now we have his hands, feet and head, and we have a robot.
| | |
| | |
| | |
| | |
| | |
| | |
There is a second master class, how to make a robot-transformer made of paper.
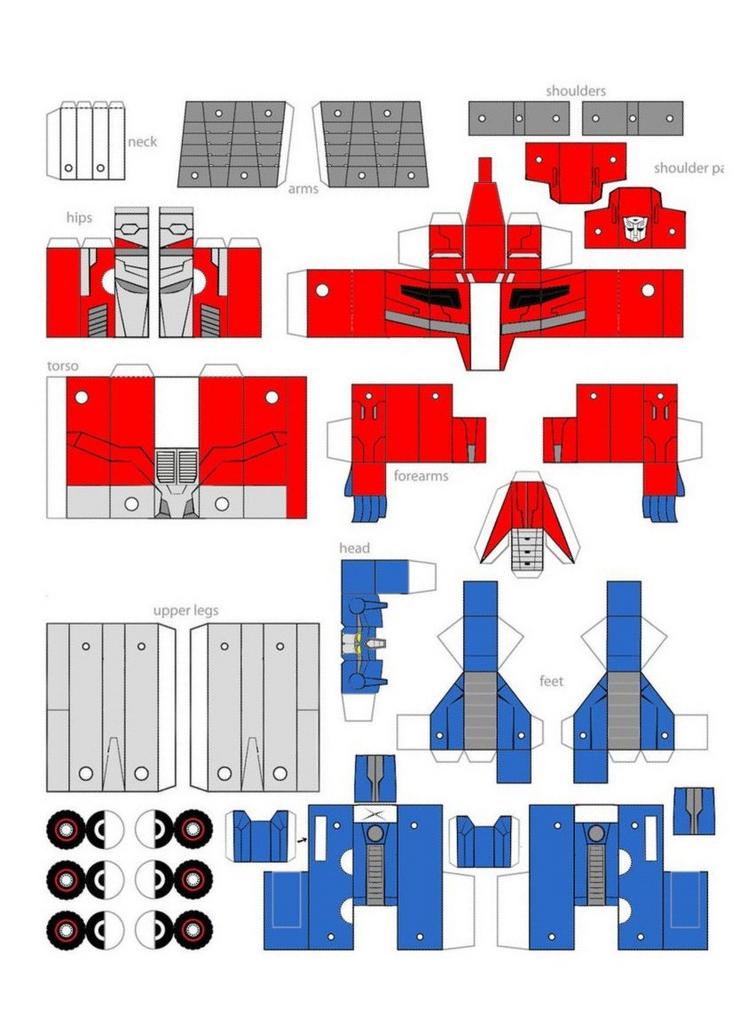
Transformer made of paper - master class
To do this, we need to print (or draw) the details. Better for this, take a thick paper (for example: Whatman) or matte white cardboard. They can be immediately colored or just black and white.
Then carefully cut out every detail. It is very important to keep all allowances for gluing.
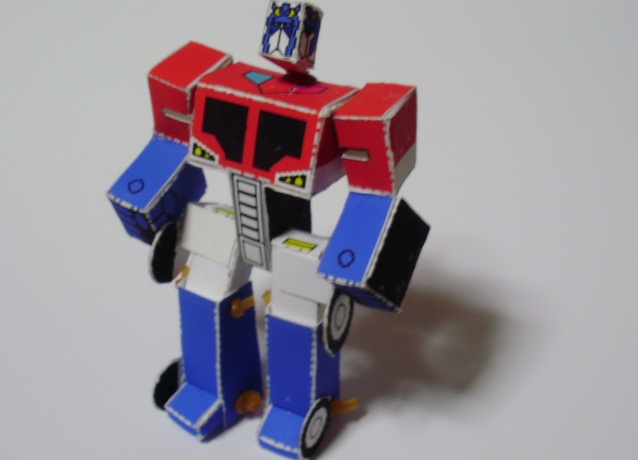
After this, each piece is glued separately. We do this carefully so that there are no traces of glue anywhere. We let them dry well. Our transformer should not only be voluminous, but also move and develop from a robot into a typewriter. To do this, we connect the wire or the strong according to this scheme all the prepared details of our future super-hero.
Transformer is ready.
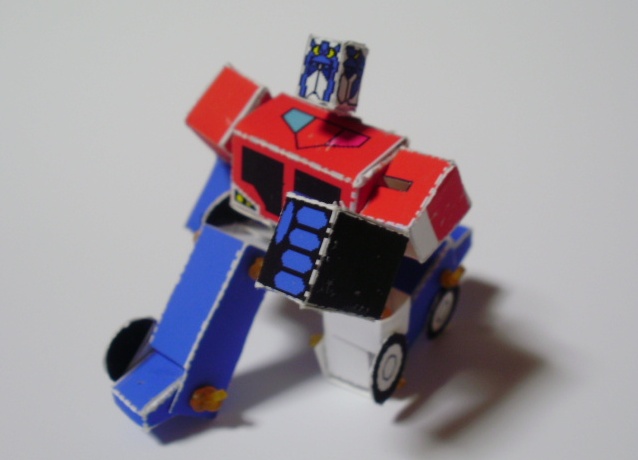
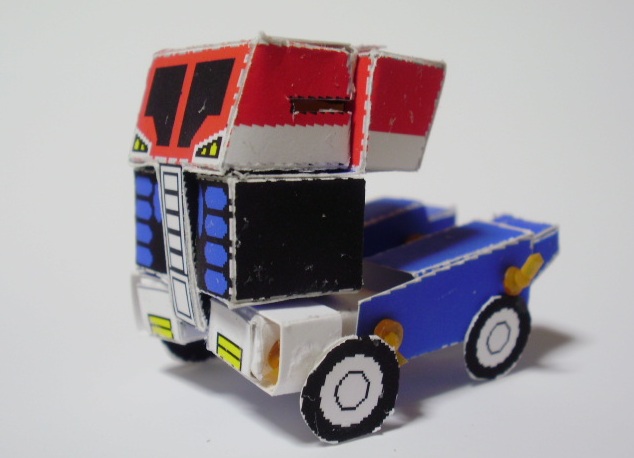
Now let's get acquainted, how to change it into a lorry. To do this, it is necessary to straighten his legs, put them on a flat surface, and place the trunk perpendicular to them. Hands bend at right angles and we have near the head so that the fists are in place of the headlights and the shoulder is near the driver's cab.
| | | |
Such transformers made of paper, made by yourself, will not only contribute to the development of your child's creative abilities, but also are wonderful elements of his games.
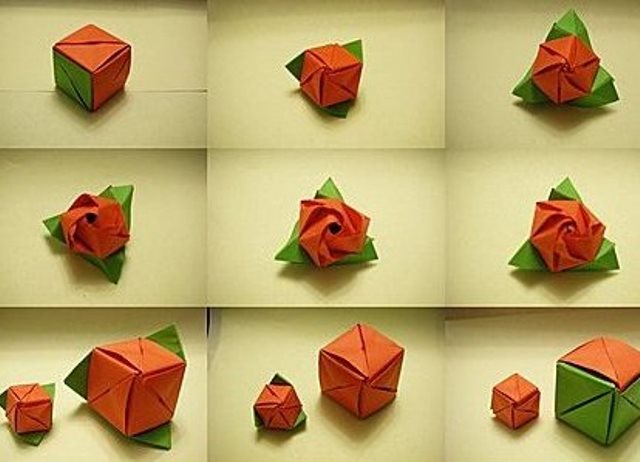
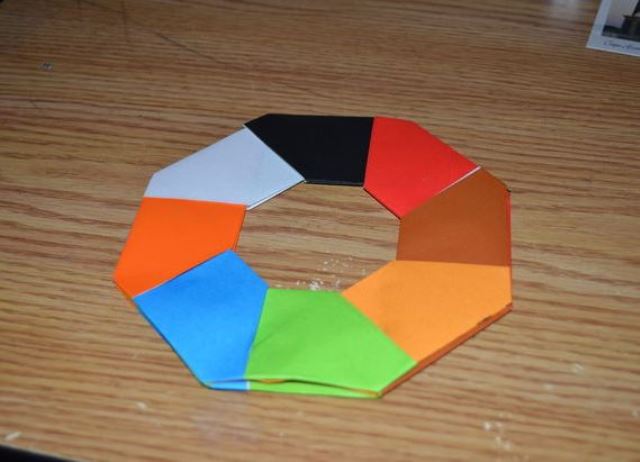
Transformers made of paper "Cube-Rose" and "Ring-Star" are also very popular.
| | | |