Paper is one of the best materials for creativity. From it you can do almost everything - from Christmas tree decorations to children's houses and scenery to a home performance. In addition, creating a paper decor is a great way to spend time with children. In this article, we'll talk about how to make jewelry from paper with your own hands.
How to make jewelry made of paper?
Pompons are the most universal and popular type of paper jewelry.
Depending on the size, they can be used for decorating clothes, accessories or interior.
Let's take a closer look at the process of creating a paper pompon.
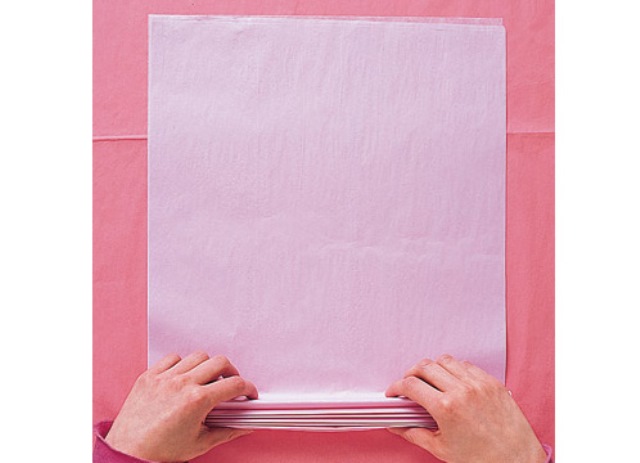
We will need colored tissue paper (kraft paper), scissors and threads. We put several sheets of paper on top of each other and collect them with an accordion. For small balls, 4 layers are enough (2 cut sheets in half), on average, about 6-7, and for large balls - not less than 8 layers of paper.
The wider the step of the "accordion", the more magnificent and airy will be the pompon. But do not get carried away - wide creases are much more difficult to straighten, especially at first.
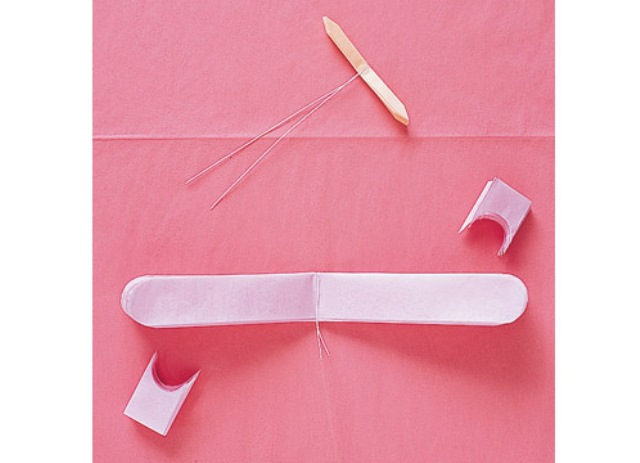
The middle of the folded sheet is tied with a string (not tightening, but tight enough). It is important that the thread is located exactly in the center, otherwise the pompon will be skewed, one-sided. In order to designate the middle without any problems, fold the "accordion" in half and tie a string or wire on the crease. If you plan to hang balls, make sure that the loose ends of the thread are long enough. Cut the edges of the "accordion". You can cut it in a semicircle or a triangle - as you like.
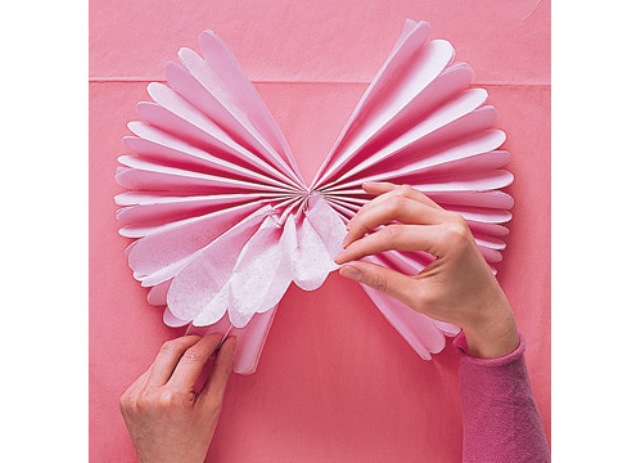
Then gently and carefully, so as not to damage the paper, we start to spread each sheet separately. Do not pull at the edges of the paper, try to move as close as possible to the center of the sheet, and then spread the individual layers. It is best to first split the layers in half, and not to separate one sheet from the total mass. For example, if you have a large pompon of 8 sheets, first divide 4 and 5 layers, and then divide the resulting groups in half again. Do not try to immediately give the pompom the right shape - first, just separate the sheets between each other.
After all layers of "accordion" are straightened out, we start to study each layer separately. Straighten and stretch each sheet until we get a cute paper ball.
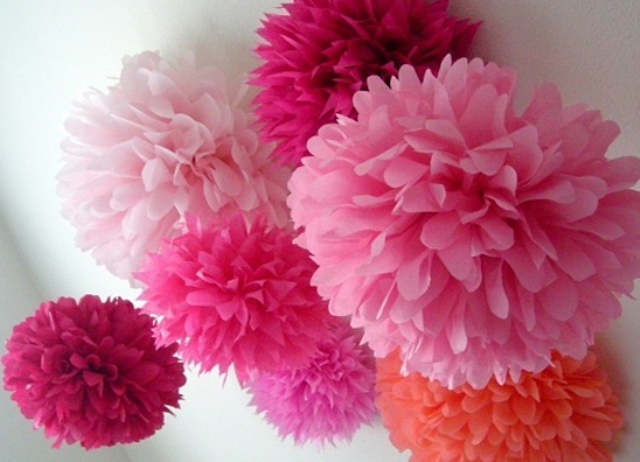
Having made several pompoms of different size and color, you can hang them on the wall or spread out on a table, floor or any other surfaces.
Now you know how to make children's decorations with your own hands and can easily decorate carnival or festive costumes.
Also from paper it is possible to make unusual giant flowers for an interior decor or photo shoots.