Wedding is one of the most important moments in our life, the memory of which you want to save for many years. The long-awaited event will pass quickly, but only a photo album will remain for memory, which will preserve the most precious moments, the beauty and the greatness of that day. Of course, you can buy an album in the store, but if you want something special and unique, try making it yourself.
Today, scrapbooking is one of the modern and most popular ways to design a wedding album with your own hands. Even if you have not worked in this direction, it's time to try this exciting activity. In addition, there are a lot of ideas for creating a wedding album in the scrapbooking technique and you will be able to choose exactly what will please you.
Wedding album scrapbooking: master class
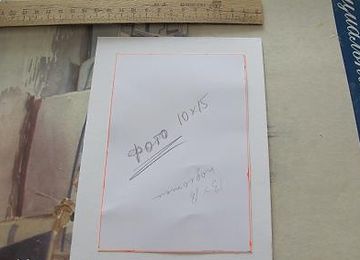
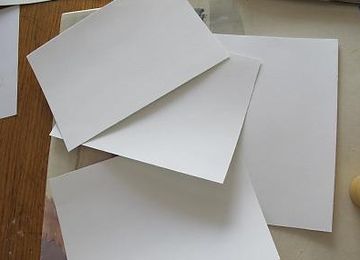
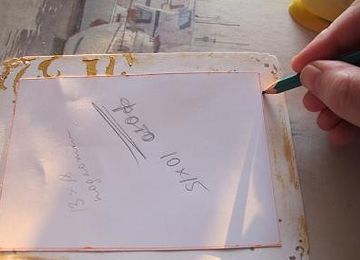
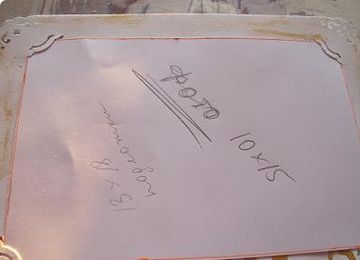
- First we need to decide on the size of the album. Photo 10x15 will look great on 25x30 sheets. Our album will consist of 6 sheets, therefore from watercolor paper it is necessary to cut out 12 sheets (then we will glue them together in pairs) and 2 more sheets for fly-sheets. Total 14 sheets.
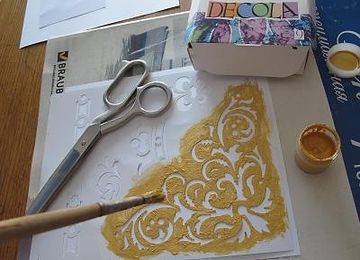
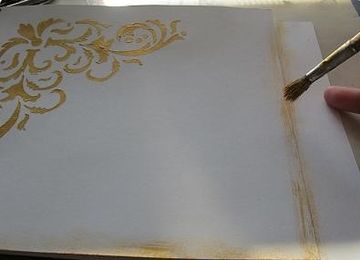
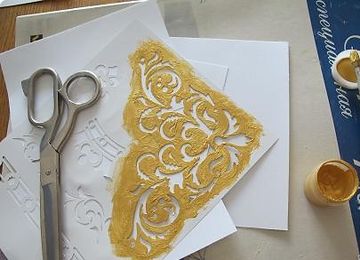
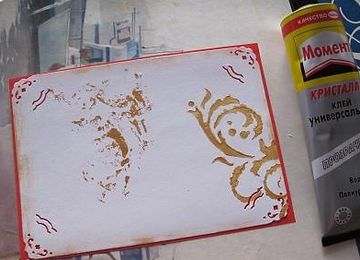
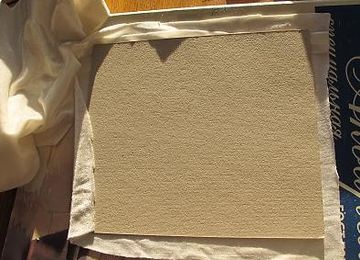
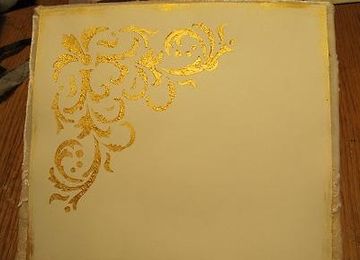
- On the finished sheet through the stencil we apply a pattern of golden acrylic paint. Using a hard, dry brush, lightly tint the edges of the sheet.
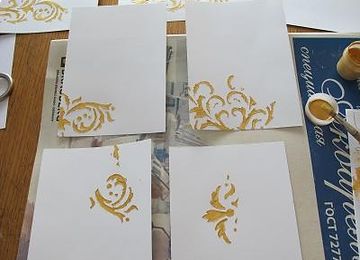
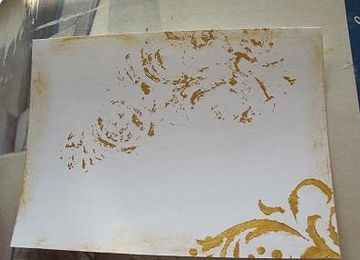
- Now we need substrates for the photo. Since we have 12 pages, it means that the substrates for the photo we need 12 pieces. We spread chaotically 3-4 substrates and apply a golden paint over the same stencil from above. On each sheet we should have separate fragments of the pattern. If there is paint on the stencil, so as not to lose good, you can make an arbitrary print on the sheet. The edges of the sheets are toned.
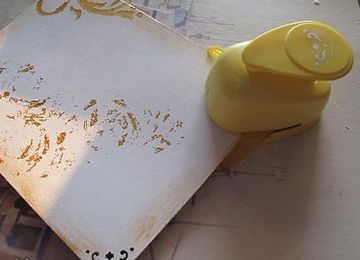
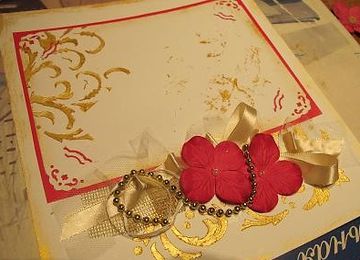
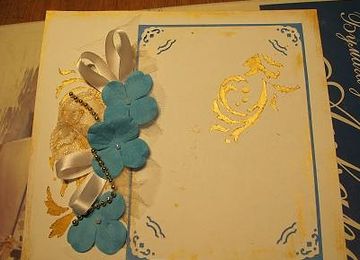
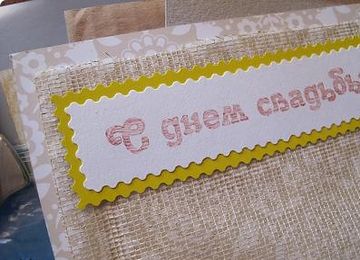
- Using a patterned puncher, we decorate the corners. Determine the substrate on the substrate slot, where the photo itself will be fixed. Slots can be made a mock knife or a special punch. We paste the substrate on the contrast paper, avoiding the place of the slits.
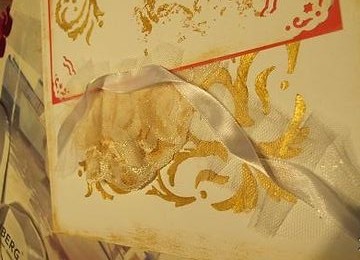
- We glue the substrate onto the prepared sheets of the photo album. We adorn the pages with lace, mesh, ribbons, beads, flowers - everything your soul desires. Design the pages of the album in the same style, but try to bring a little variety.
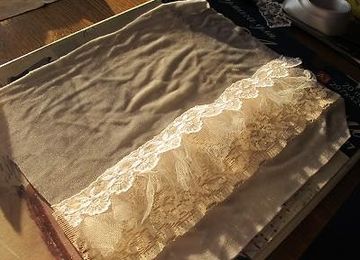
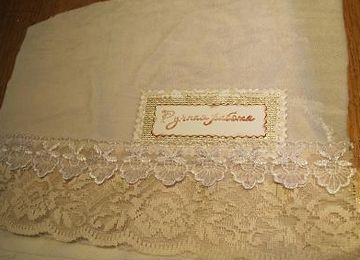
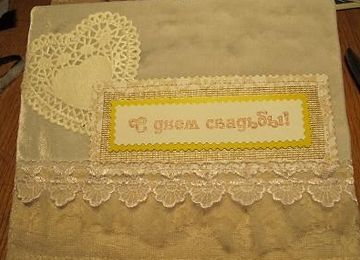
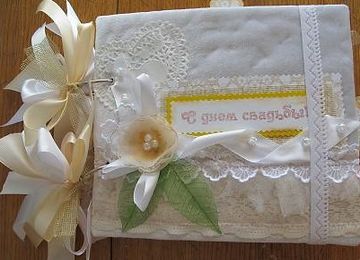
- Let's start creating the cover. We need to cut out a thick cardboard with a size slightly larger than the main sheets. For the cover any beautiful fabric of light tones is suitable. In our case it is white velvet. Cut out the fabric on the cardboard leaving on all sides 2-3 cm Sew or glue on the fabric of several different laces. We glue a multi-layered congratulatory inscription and also sew it to the fabric. The back part is made in the same spirit.
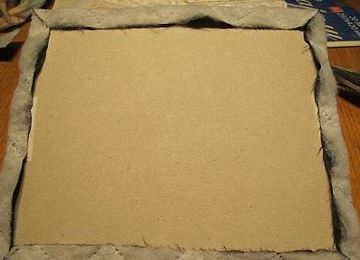
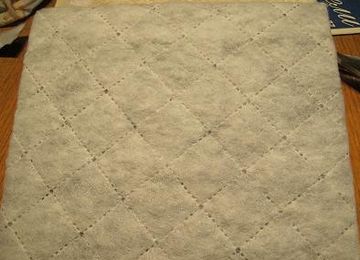
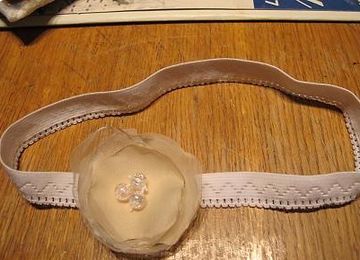
- We glue the blank from cardboard with a sintepon, bend the edges to the wrong side and cut the corners to remove excess thickness. From the top of the sintepon we glue the fabric cover and add the bulk decorations - a flower, a ribbon, a half-shell. From the back side of the front and back cover we paste sheets prepared for fly-leaves.
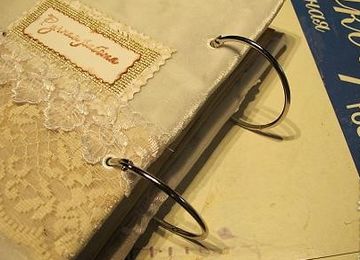
- Using double-sided adhesive tape, glue sheets and punch holes with a punch hole. In the holes we insert eyelets and collect the album on the rings, which can then be decorated with different ribbons. And in order that the album does not open spontaneously, we'll sew some kind of bandage that will reliably fix the cover.
Wedding album in the technique of scrapbooking is ready!
Creating a unique and amazing wedding photo album scrapbooking with your own hands, which is designed to become the storehouse of the brightest moments of your couple's love, you will not only be able to arrange your photos as you want and like you, but also get a lot of pleasure from the technique itself. And then you can make a regular family album scrapbooking , as well as a children's scrapbooking album .