Interesting, unusual and always appropriate is such an ornament as 3D butterflies on the wall, especially charmingly looks the children's room, the wall of which is decorated with a lot of three-dimensional moths.
There are many options, how you can make the decoration in the form of butterflies on the wall with your own hands, in the master class we will show the two most popular and interesting options.
How to make butterflies on the wall?
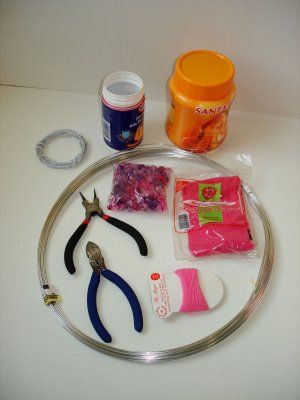
For the first version of making 3d butterflies on the wall, we need the following:
- thin and elastic wire for needlework;
- several pairs of bright children's nylon pantyhose or socks;
- Large beads, combined in color with pantyhose;
- two plastic jars as templates;
- slabs and thin-nosed pliers.
So, if everything is ready, let's get to work.
Butterflies on the wall with their own hands - master class
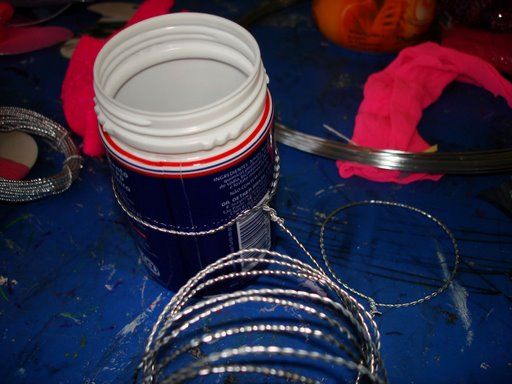
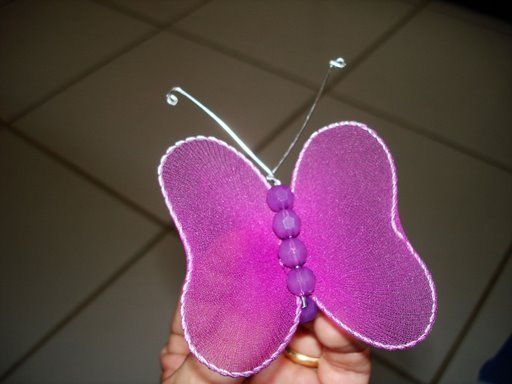
- Take the wire, using one of the jars-templates make a circle and tightly twist it.
- Remove the circle from the jar.
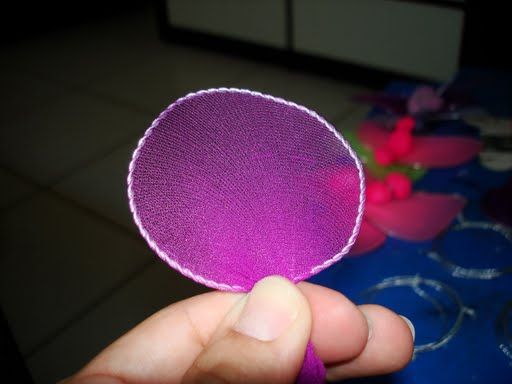
- Next, take the children's tights, in our case a bright lilac color, and cut off the flap.
- Then tightly tighten the circle with capron and tie the fabric on a strong and reliable knot.
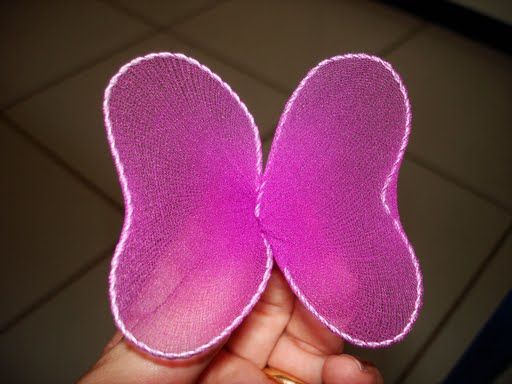
- In the same way, we make one more circle of the same size, and we also tighten it with a kapron cloth.
- Then, by cutting the wire, we join two circles.
- Now change the shape of the circles, gently squeezing them in the middle. Our circles have become charming butterfly wings.
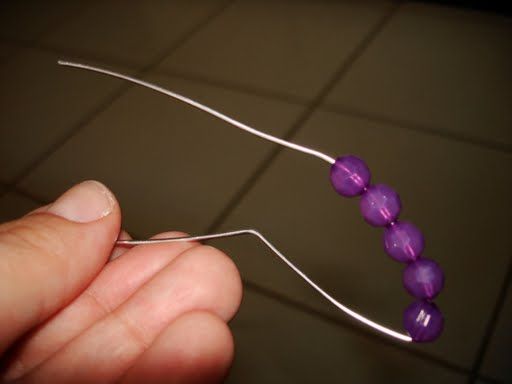
- Now decorate our moth. To do this, take the wire cut, bend it twice, and on one of the sides we string a few beads along the length of the butterfly's trunk.
- And then we place the butterfly between the ends of the wire, after which we twist the ends, fixing the position. The ends themselves became cute mustaches.
| | |
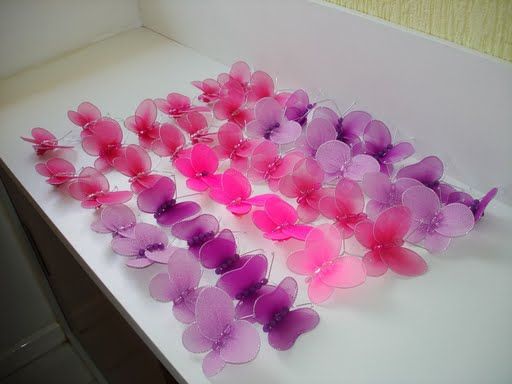
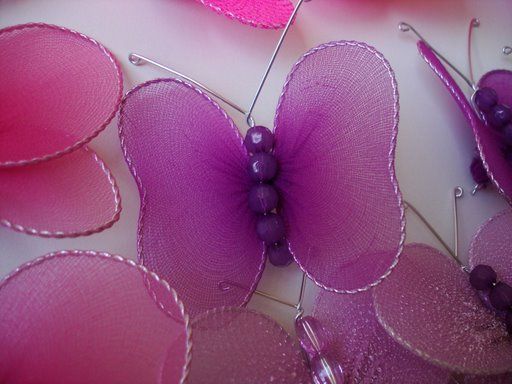
This version of butterflies is especially appropriate as decoration of the walls of the nursery of the little princess. For decorating the walls with butterflies, you can use glue, double-sided adhesive tape or small pins.
| | |
Consider another, easier way to make butterflies on the wall. This option is more appropriate in the interior of the living room or bedroom.
Paper butterflies on the wall
To make this kind of butterflies for the decoration of walls we need the following materials:
- sufficiently thick black paper, glossy if possible;
- cardboard for butterfly patterns;
- reliable adhesive - preferably "Titan" or "Superglue";
- pins with a plastic head;
- sharp simple pencil;
- pliers;
- scissors.
Now we can start making paper butterflies on the wall.
How to make paper butterflies on the wall - a master class
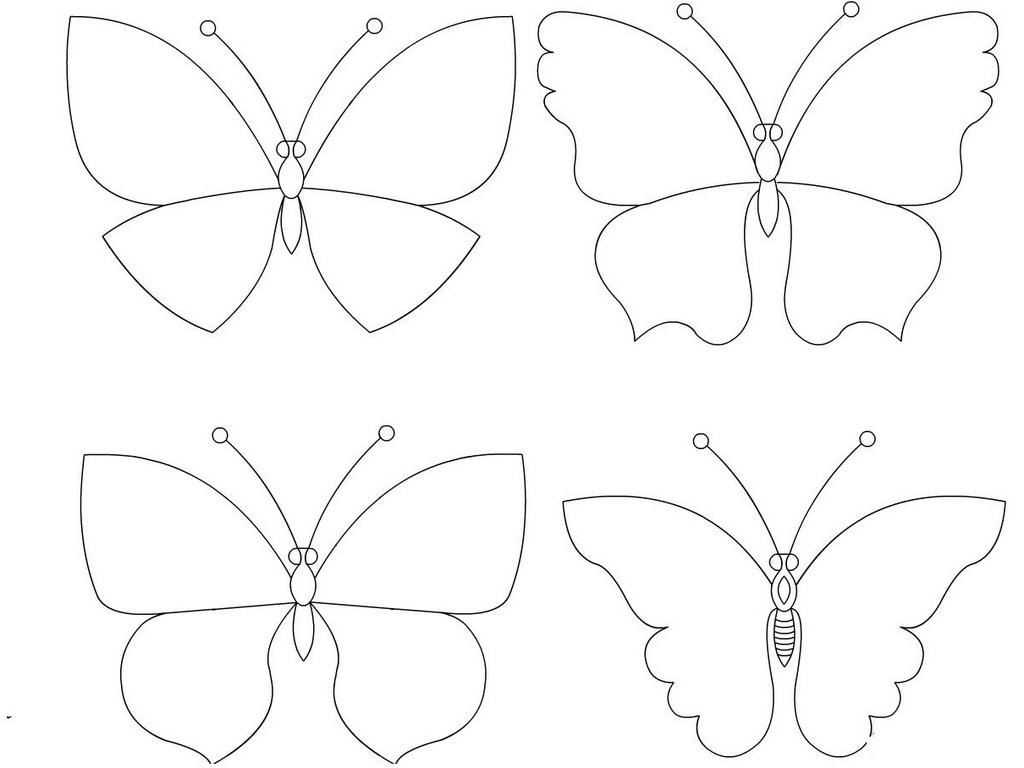
- The first stage of the work is the production of butterfly stencils on the wall. You can come up with your own special kind of butterflies, then the decoration of your walls will be truly unique. But if you do not want to write something of your own, you can use ready-made ideas.
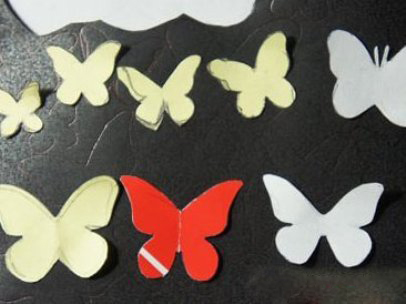
- We cut out by stencils several templates of different types and sizes.
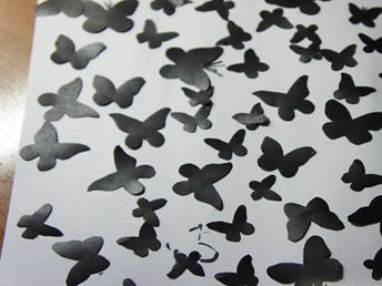
- Now with the help of a simple pencil we transfer the contours of our butterflies to black paper.
- Cut out black paper butterflies to decorate the wall.
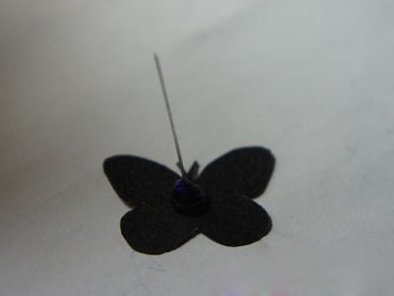
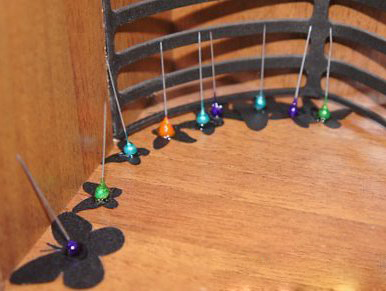
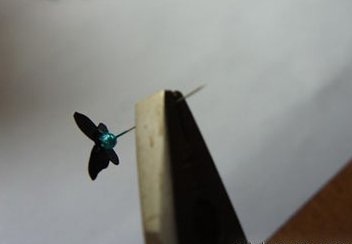
- Next, we have to fine and scrupulous work on each butterfly. So, take the moth, in the middle, with a little bit of glue and stick the pin with a plastic head.
- The same is done with each moth, after which we leave the work, allowing time for the glue to dry. Quality glue adheres to the surface instantly, especially when it comes to paper, but it is better to leave the products for at least an hour to guarantee.
- Returning to work, take the pliers, and heal the pin approximately in the middle.
- And we make a bend of 90 degrees.
- The same is done with all the other butterflies. In passing, we bend the wings of butterflies to each other.
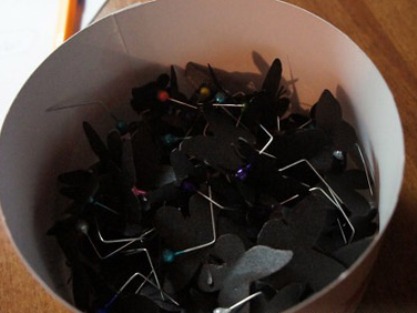
- Paper butterflies for decorating the walls with their own hands are ready.
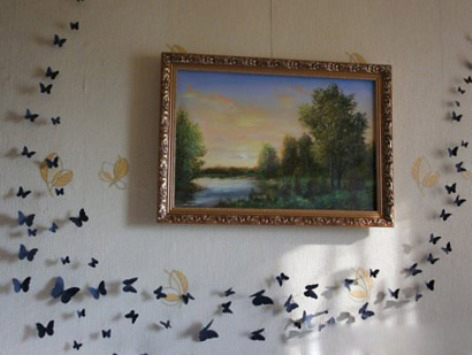
Wall decoration with butterflies
In this there is nothing complicated. In advance we come up with a composition from our moths, and then we just drive the needle under the wallpaper. In a few minutes our wall is transformed beyond recognition. And such variants of wall decorations are absolutely not costly.