Decoupage, or the art of decorating various objects ( bottles , dishes, caskets , furniture) by gluing images cut from paper or fabric on them, is becoming increasingly popular. With the help of this technique, art painting is imitated, and the more accurate and unobtrusive the application is made, the higher the master's level. Decoupage - an activity very interesting and accessible even for beginners. In fact, using a simple set of tools and adaptations, you can in the shortest possible time to turn a common thing into a real work of art. Decoupling bottles with a cloth is one way to make an unusual gift or turn a bottle into an interior item. Today's master class will be dedicated to decorating bottles with a cloth in the technique of decoupage. A bottle of champagne decorated with a cloth will be a wonderful gift.
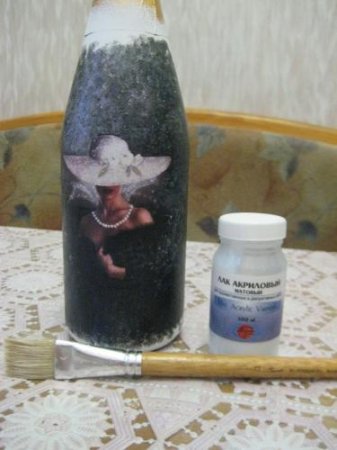
We need:
- cotton fabric;
- acrylic paints;
- acrylic primer;
- acrylic lacquer;
- putty;
- golden acrylic paint;
- suitable for the purpose of the picture on a napkin or printed on a printer.
Begin decorating the bottle with a cloth
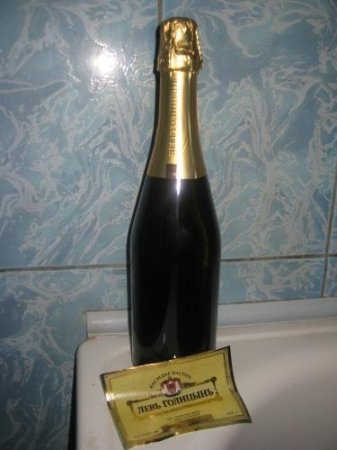
- Prepare a bottle for further work: remove the labels, thoroughly wash and degrease. Degrease the bottle with alcohol or a glass cleaner. To degrease must be approached very responsibly, because in places where there are fat traces, the paint will lie unevenly.
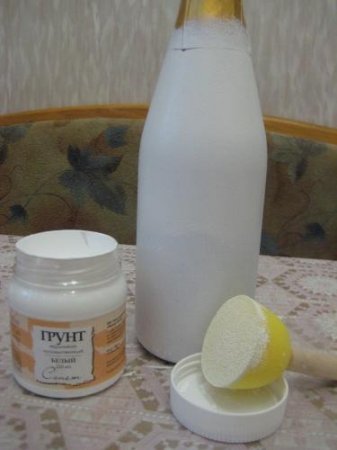
- We cover the cleaned bottle with acrylic primer with the help of foam rubber sponge. We leave the bottle to dry for 8-10 hours. The drying time can be shortened by using a conventional hairdryer to dry the bottle. In this case, the bottle will be ready for further work after 30-45 minutes.
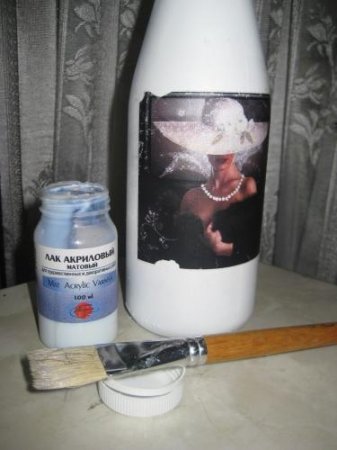
- Using an acrylic lacquer, we glue the selected image. The image can be carefully cut out along the contour with scissors or hand-torn if the background matches the color of the paint. Before gluing the picture you need to water it and remove the bottom layer of paper, and the napkin is disassembled into layers.
- Cover the bottle with paint in the background color of the image. Make it comfortable with a foam sponge or sponge for washing dishes. Let the paint dry, and apply a matte acrylic lacquer on top.
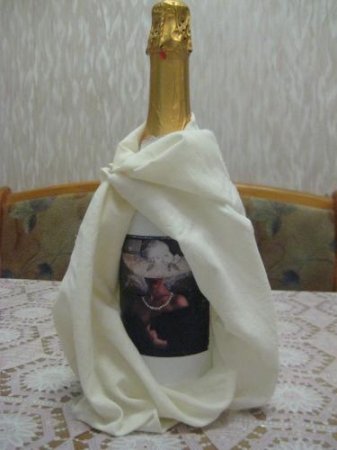
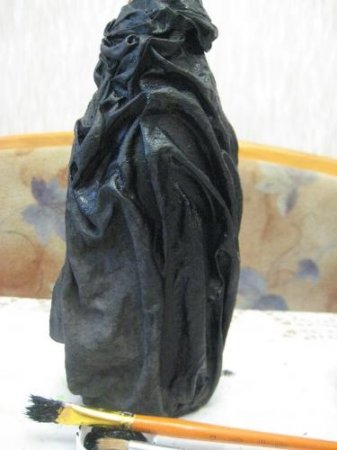
- We proceed directly to the process of draping the bottle with a cloth. The fabric for decorating is necessary to take a natural, better cotton (a large handkerchief, an old T-shirt, a towel, etc.). We try to try on how the fabric looks on the bottle, mark out the folds.
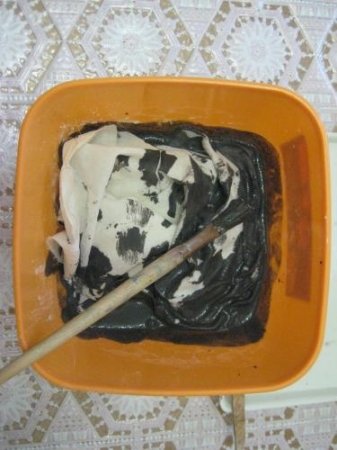
- The next step is to impregnate the fabric with glue. To do this, we pour PVA glue into the container, dilute it with water, and apply a little putty and paint. We will moisten the cloth in this mixture, evenly distributing the glue along the fabric.
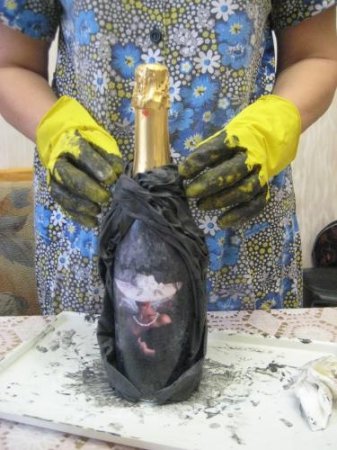
- Squeeze the fabric and gently wrap the bottle. The picture on the bottle should remain open. We leave the bottle decorated with a cloth until it dries completely - about a day.
- Completely dry the bottle neatly covered with acrylic paint, trying to completely paint all the wrinkles. After drying, topcoat with acrylic lacquer.
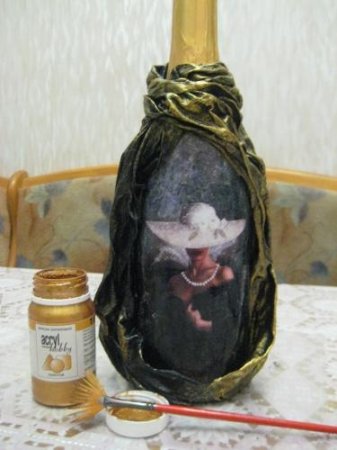
- After the varnish has dried, proceed to gilding our bottle. For this we will use golden acrylic paint. Lightly apply the paint on the folds and the bottom of the bottle.
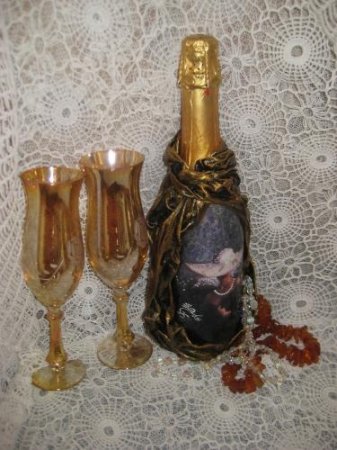
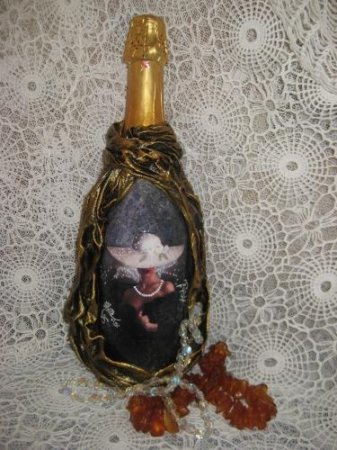
- Cover the bottle with a layer of acrylic lacquer and set aside until completely dry. As a result, we will receive an unusually decorated with our own hands a bottle made in the technique of cloth decoration (photo 12).
| | |