This tendency to express feelings and emotions with the help of floral compositions has survived to this day: in Paris and Rome, in Moscow and Amsterdam, instead of a thousand words people give each other these insanely beautiful flowers.
There are many varieties of roses, and all of them, without exception, like our children. Not imbued with symbolic meaning, children draw roses on postcards, older crumbs make crafts and appliques. And all because even the smallest artists are convinced that such an unearthly beauty simply can not please Mom, grandmother or beloved teacher. Certainly, the first children's masterpieces touch their simplicity and spontaneity, but in our power to help the child improve their skills and teach them how to draw roses properly and beautifully.
Actually, this is what we will do. So, we present to your attention a master class, how beautifully to draw a rose in stages.
Option 1
First, let's look at how easy and right to draw such a beautiful rose with a pencil step by step.
First of all we will prepare everything you need: a blank sheet of paper, an eraser, a simple pencil.
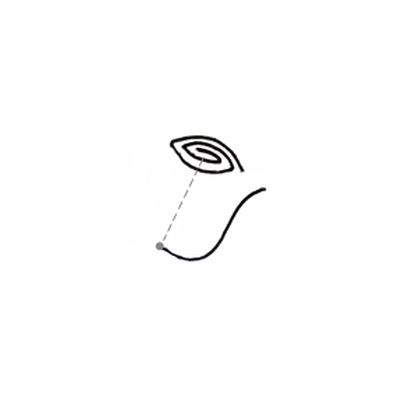
- Now proceed. Let's start drawing a rose from an oval spiral, which should consist of several turns.
- Then draw an auxiliary line that will connect the center of the spiral and the point laid on the perpendicular to the curl of the plane. The height of the line can be adjusted independently, depending on how much bud you want to get.
- From the lower point of the auxiliary line, draw a curved curve, so that it does not touch the edge of the spiral.
- From the same point, we draw two more curves, only on the other side and at different angles.
- Then connect the base of the bud with the top of the first S-shaped curve, so we get the first petal. Similarly, we finish the second petal.
- That the image turned out to be volumetric, from the edges of the spiral we lower the short segments downwards, as shown in the figure.
- We draw the stalk and the flower-root.
- Add beautiful leaves.
So we figured out how to draw a rose in a pencil step by step, left to decorate it with colors or colored pencils.
Option 2
Painted flowers, can, and lose in beauty by the present, but only not if they are painted by children's handles. Such gifts are priceless, and will never equal even the most luxurious bouquet. So let's show the child how to draw a pencil such a beautiful rose.
Prepare all the necessary and proceed.
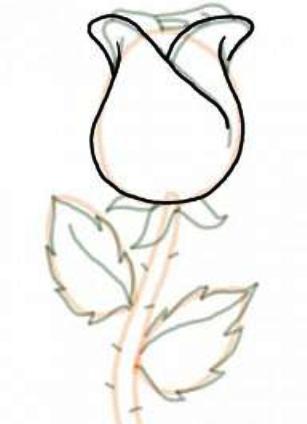
- At the top of the vertically arranged sheet, draw an oval. Below we draw a smooth curved line, which will serve as the basis of the stem.
- Next, draw the outline of the leaves.
- After that, carefully look at the picture and repeat the contours of the rosebud, draw a sepal.
- Then correct the shape of the leaves and add rose spines.
- Now we trace the contours with a pencil: a bud, petals, thorns, leaves. Carefully and accurately draw each line, we correct errors.
- Eraser wipe the auxiliary lines.
| | |
| | |
Here, in fact, the sketch of our roses is ready, it remains only to decorate. As you can see, it turned out to be quite simple. And if you practice a little, you can easily and without any problems, stage by stage draw the same elegant rose, as a pencil, and paints.