Make your home truly exclusive to you will help modern design moves, which today is very much. So, for example, wall decoration with decorative plaster, 3D panels , vinyl and non-woven wallpaper is popular. No less relevant today and painting the walls in different shades. But just colored walls or wallpaper with repeating patterns - it's boring. Let's find out how you can decorate the interior of the room stylishly and tastefully!
And it's very simple to do this - you can use stencils for this. They are devices for applying to the wall or any other surface of the paint. We all came across stencils while at school, studying letters. Modern versions of stencils in design are unusual drawings for decorating any room. As a result, your room will be painted with patterns that will make it original - in fact, you choose the stencil yourself, as well as the color.
So, how do you make a stencil for your decor?
Master-class "How to make a stencil yourself"
Stencil for design can be bought at any construction store. However, consider that this will always be a mass production product. But to get an exclusive thing and decorate the room with a drawing that you will not find anywhere else, you'll have to work hard.
Self-made stencils can be made in several ways. Here's how to do it:
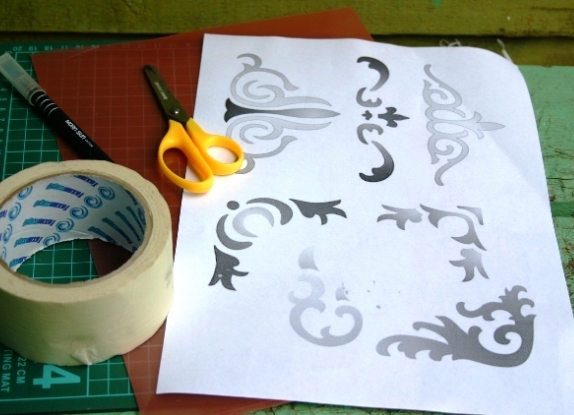
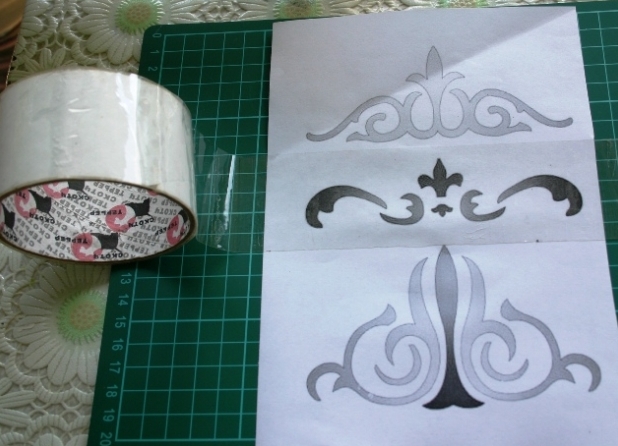
- Prepare sharp scissors, scotch tape and most importantly - a printout with a picture of the future stencil. It can be anything - floral ornament, the silhouette of an animal or a person, words and letters or generally an abstract pattern.
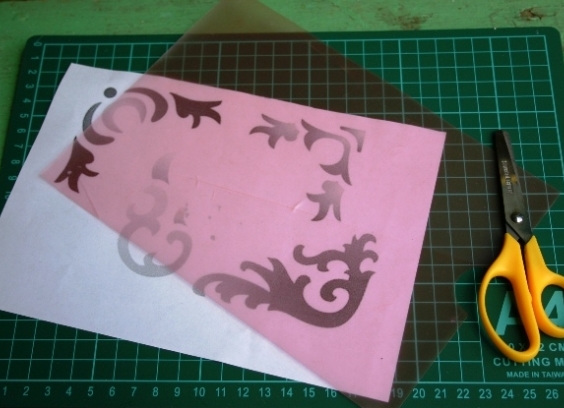
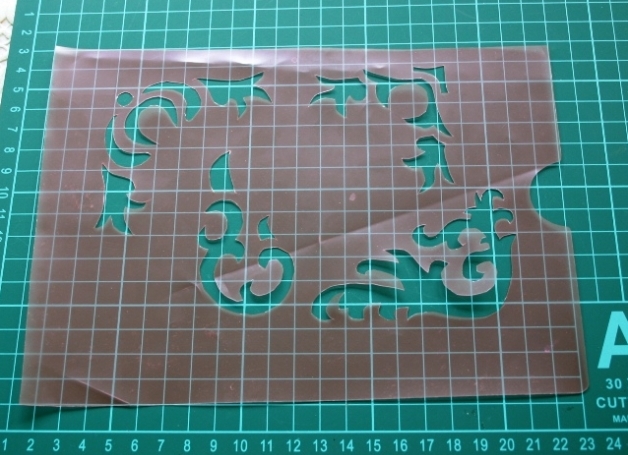
- In addition, we need a transparent base for the stencil. As it is convenient to use a plastic folder.
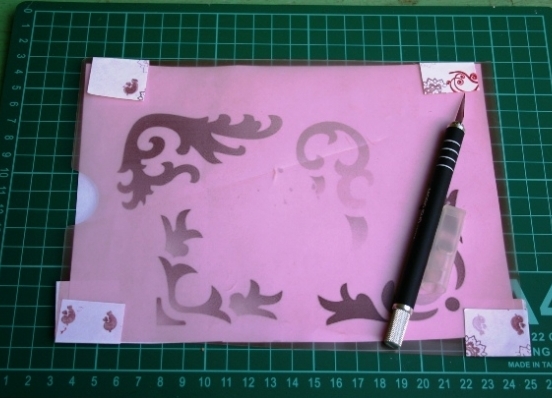
- Fix the pattern to the base, fixing both so that they do not move relative to each other. Take a sharp knife (special mock-up or conventional construction), and under the bottom, put a self-healing mat. If you do not have one, use any substrate to avoid scratching the desk on which you are working.
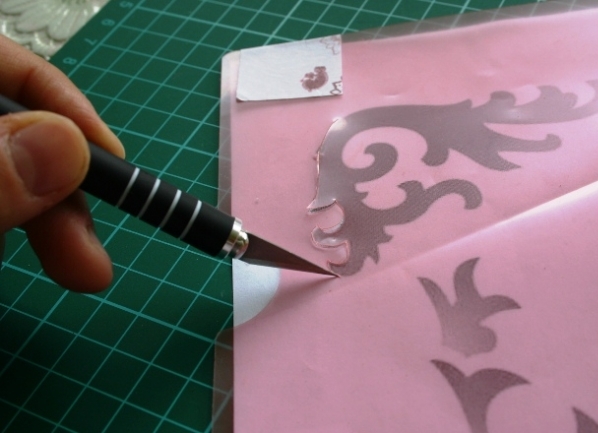
- We begin to cut out the pattern, trying to move as smoothly and neater as possible.
- Here's how the homemade stencil from the folder looks like: it can be done with your own hands in just 10-15 minutes. Of course, such a product will differ from purchased store stencils, but, nevertheless, it will last you for a relatively long time. This stencil is reusable, and after use it must be washed from the paint, putty or paste with warm water and soap.
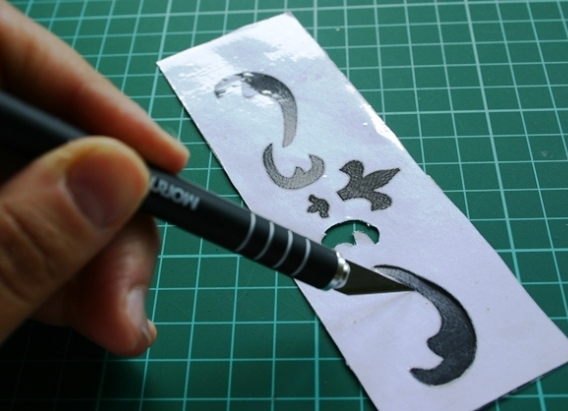
- And now let's talk about what else you can make a stencil if you do not have a plastic folder at hand. In principle, you can do without it, having at hand a roll of wide transparent tape. Take a printout of the pattern and, if its dimensions permit, cover with a wide strip of adhesive tape all over the width of the paper sheet.
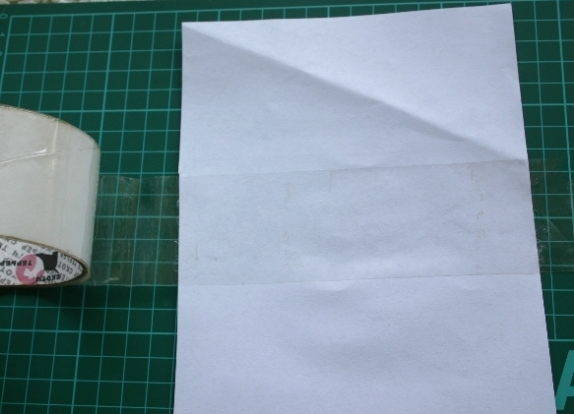
- Do the same on the back of the paper. Scotch is needed in order to protect the paper stencil from soaking, otherwise it will inevitably get wet when it gets wet.
- Cut the paper along the width of the pasted strip of tape.
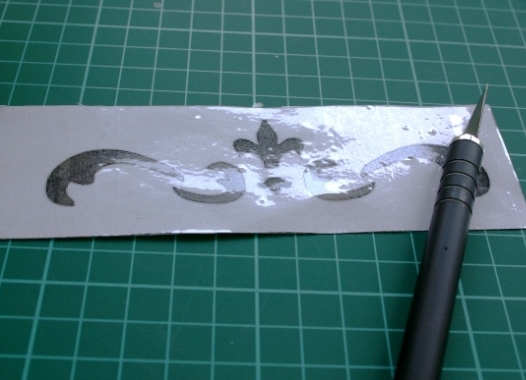
- Cut out the holes in the stencil that correspond to the black color in the picture. It is most convenient for this purpose to use a mock knife, but you can do with ordinary manicure scissors, especially if the drawing contains small details.
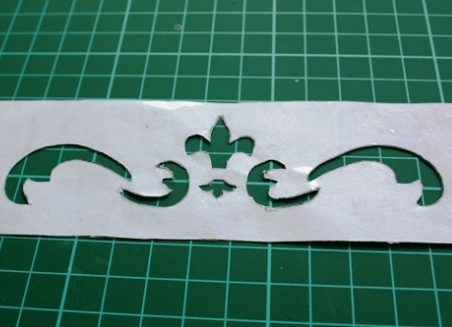
- The stencil is ready, and you can start painting. This option is rather one-time, and it is not worth using twice - the edges of the paper stencil are deformed, and the pattern will be sloppy.