For each bride, a wedding is a special event that must occur once in a lifetime. Therefore, every small detail is important in the design, as, as you know, it's the little things that create a special atmosphere. Champagne is an indispensable attribute of any solemn event: with the clinking of glasses the young couple are shouting "Bitter!". That is why many brides consider it necessary to decorate wedding champagne. Of course, the original bottle can be purchased in salons specializing in the services of preparation for the wedding. But make your own and cheaper, and touching. Therefore, if you are in search of how to decorate wedding champagne, we hope, the offered master classes will help you.
Wedding bottles of champagne with your own hands: a heart shaped decor
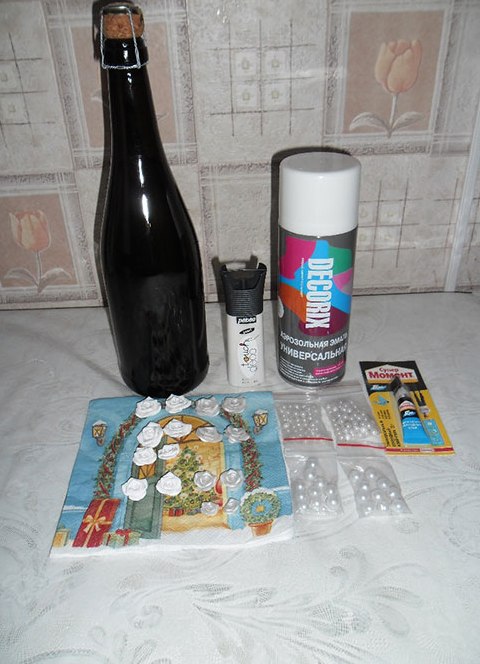
For decoration you will need:
- A bottle of champagne, peeled from the label and glue residues;
- the contour on the glass is white;
- aerosol paint of white color;
- glue super-moment;
- beads of white color in different sizes;
- flowers of small size - made of ribbons or thermoplastic.
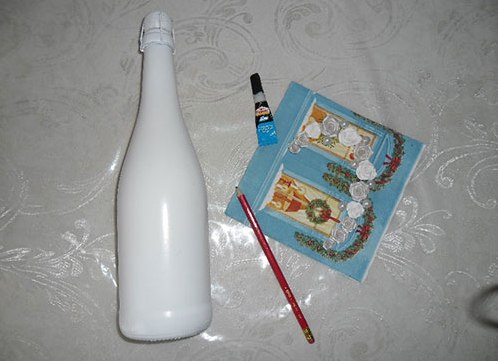
So, we begin to decorate the wedding champagne with our own hands:
- We paint the bottle with aerosol paint in several steps after 2 hours, so that the applied layers can dry and be evenly applied.
- We spread on the napkin flowers and beads in the shape of a half-hearted, and on the bottle with a simple pencil we draw an approximate pattern of the pattern. Then, starting from the bottom, using glue and tweezers, carefully attach the parts to the bottle.
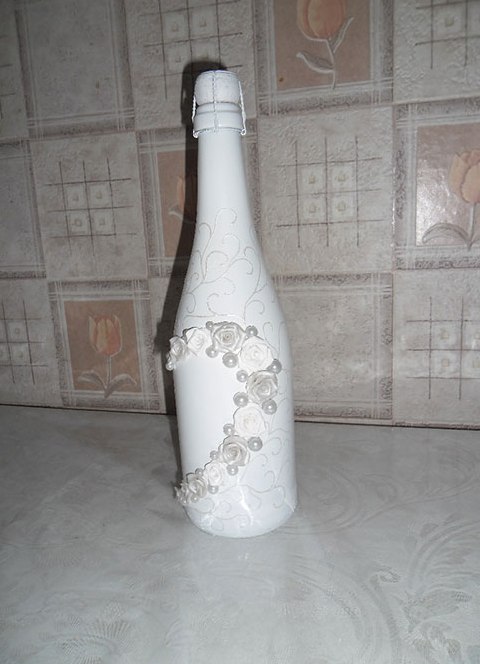
- Now, using the decor on the glass, fill the voids on the bottle of patterns in the form of zakoryuchek. Thus, we get an originally decorated wedding champagne with our own hands, which perfectly fits into the overall atmosphere of the celebration.
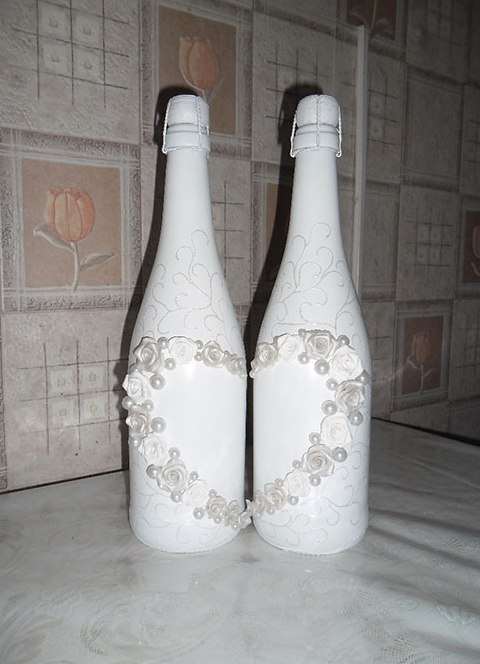
And if you decorate the second bottle with a mirror image, you get a heart from two halves.
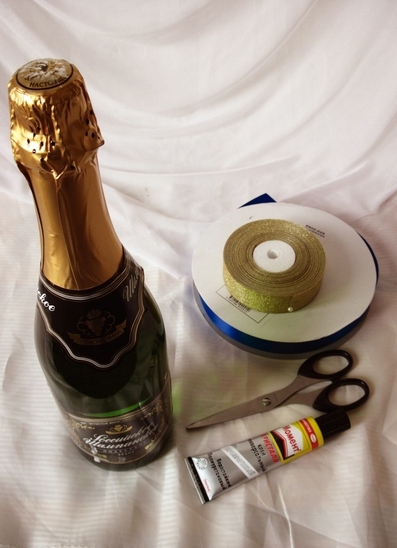
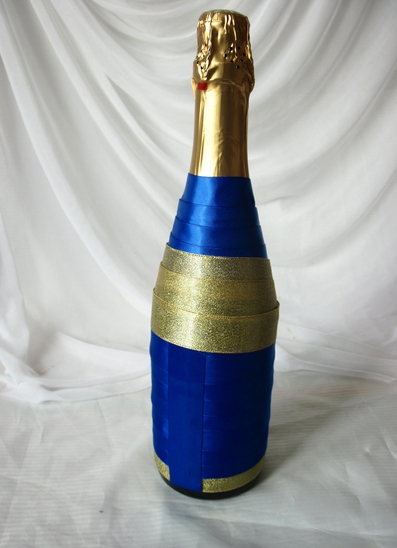
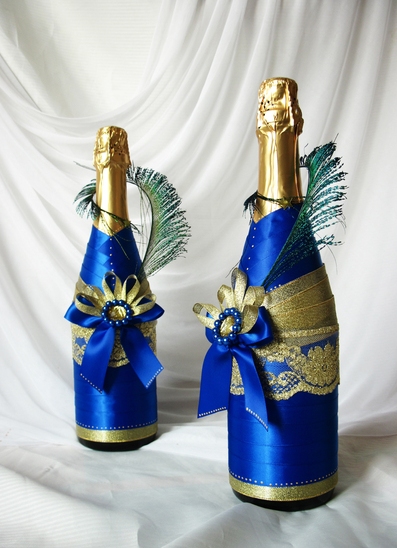
Decoration of wedding champagne with your own hands: decor ribbons
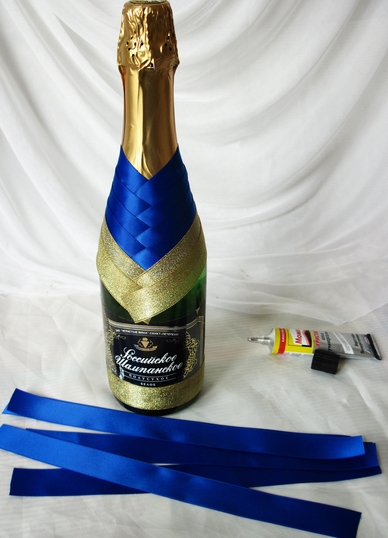
A very festive look will be the braid of bottles of champagne with satin ribbons. To do this you need the following materials:
- a bottle of champagne with a gold foil, on which there are no inscriptions;
- a satin ribbon with a length of 3.5-4 m;
- brocade ribbon gold 1,5 m;
- scissors;
- glue "moment-crystal" gel.
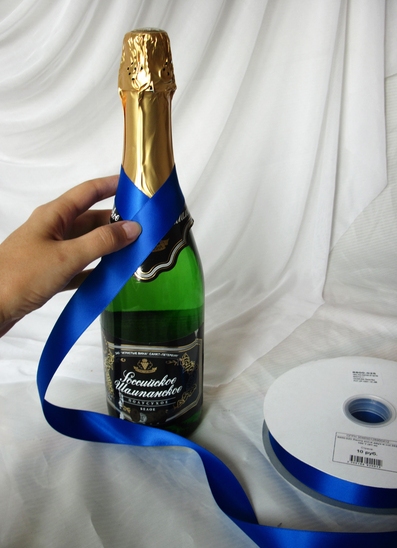
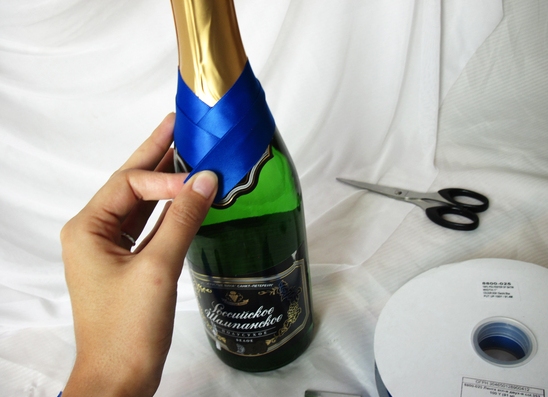
We proceed to decorating wedding champagne with our own hands:
- Take the satin ribbon and, attaching it to the neck of the bottle, we measure the necessary section for the first layer.
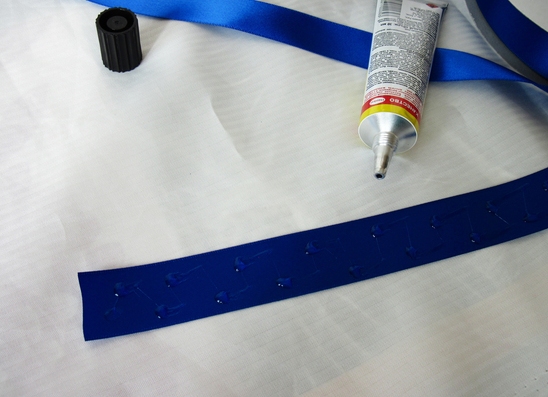
Cut off the tape, grease point glue, wrap around the neck and attach to the bottle, putting the right end of the tape on the left. - Now measure the second layer of the tape: it will be larger, as the bottle expands to the bottom. Again cut off, apply glue and apply to the bottle. Make sure that all the layers on top of the overlapping of the right end of the pieces of tape, then the pigtail will look neat.
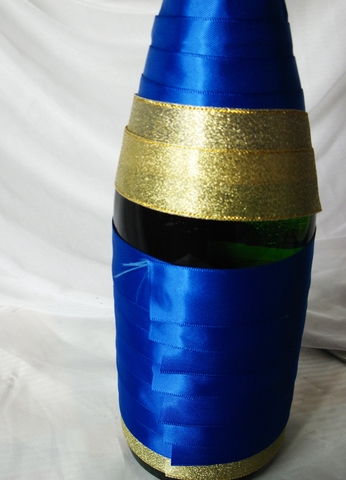
In the same manner, you need to decorate the third and fourth layers. - The fifth and sixth layers are decorated with brocade tape according to the same scheme as the satin ribbon.
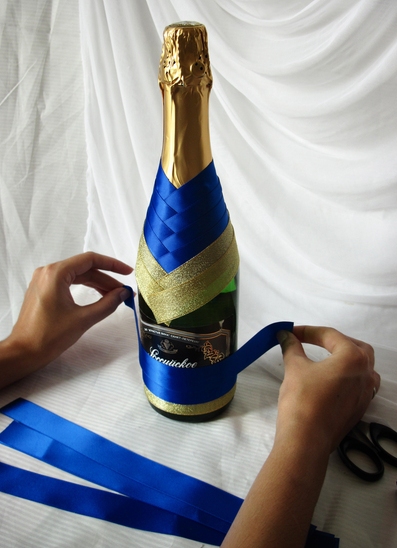
- And now we continue decorating the bottle from the bottom. Let's start with the brocade tape: again, apply it in a circle exactly, so that the seam is behind. Then cut 7-8 satin ribbons of the same length and glue them with a tension one to one, smelling one end of each segment on the other. It will be inaccurate, but it's not scary!
- Cut off the length of the satin ribbon length of 10-12 cm, apply a drop of glue on its end, push it under the free edge of the bottom brocade tape at the junction of the layers and attach to the bottle.
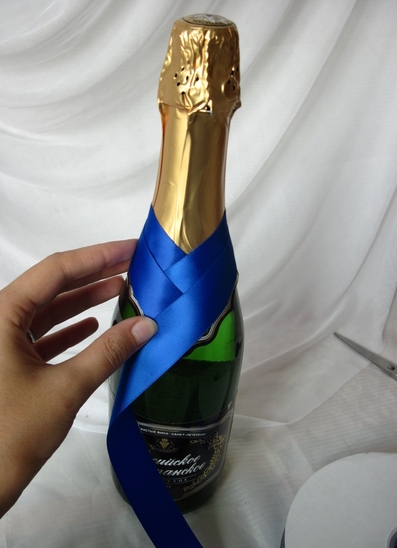
Then stretch the tape along the length of the bottle, closing the seam, and fix it on the glass. - Attach the last layer of brocade tape.
- Adding in front a few more beads, decorative feathers, lace and figures of ribbons, we will be able to decorate the wedding champagne with our own hands.
You can supplement the wedding party with other accessories made with your own hands: a cushion for the rings , a handbag for the bride , a bonbonniere and a wedding chest . We wish you every success in your wedding decor!
Subscribe to receive the best articles on Facebook
I already like Close