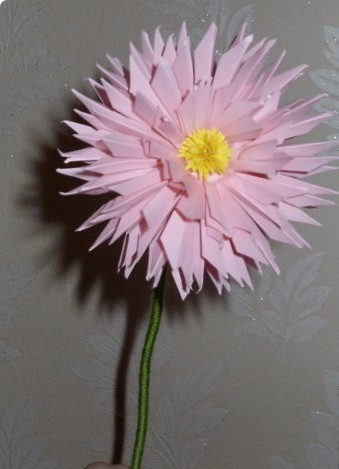
One of the most popular colors of autumn is the aster. Due to its colorfulness and form, there are many ways how to make beautiful asters with your own hands from different types of paper.
In the article we will consider several master classes on the production of paper asters.
Master-class 1: flower "Aster" made of paper
- colored paper: 2 sheets of pink, 1 sheet of green, 1 sheet of yellow;
- glue PVA and "Moment";
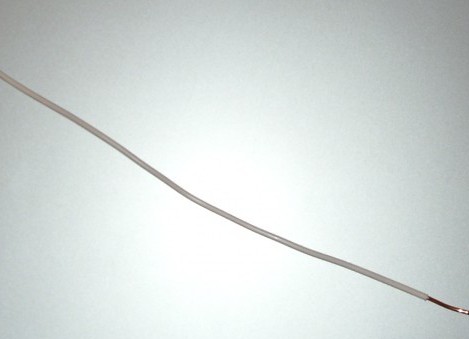
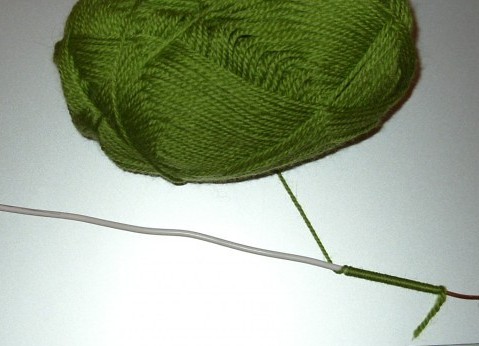
- wire;
- green thread for knitting;
- awl.
Progress:
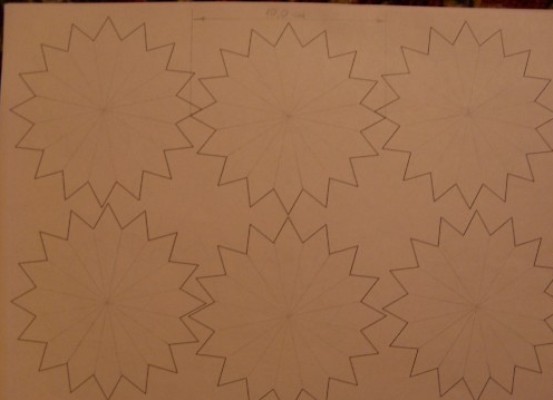
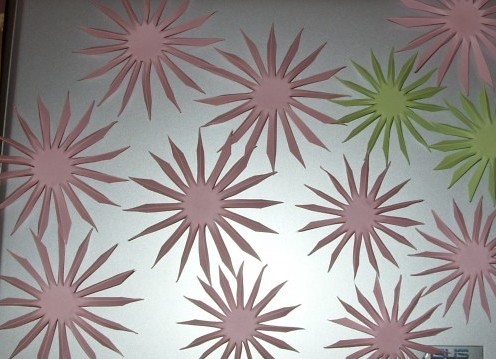
- Using the function "Drawing" - "AutoShapes" we print 16-pointed stars:
- on the pink sheet - large (10 cm in diameter);
- on the second pink - small (diameter 8 cm);
- on the green - small (diameter 8 cm).
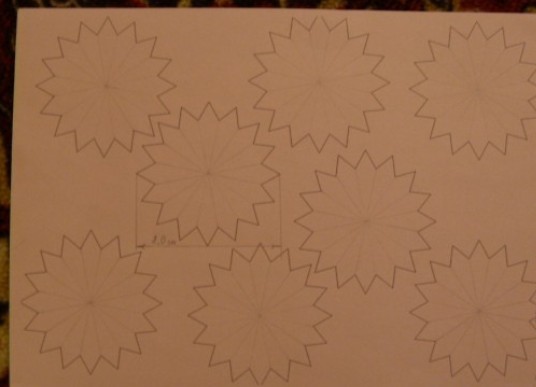
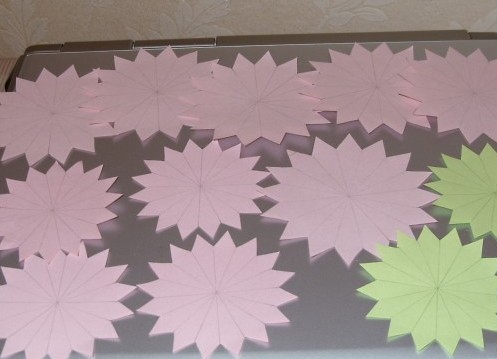
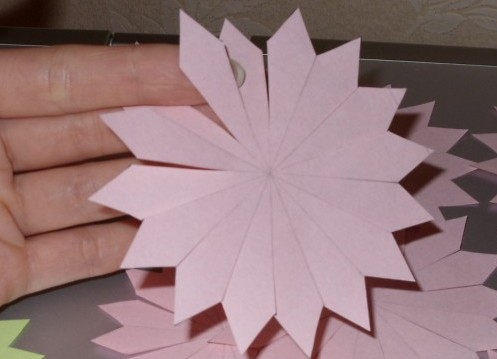
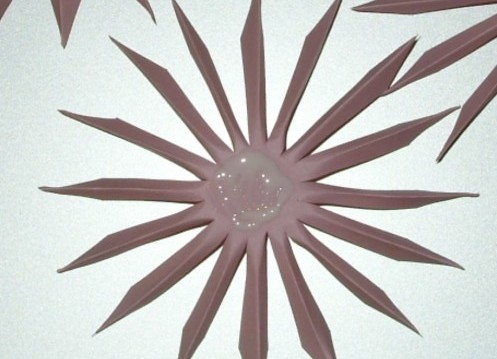
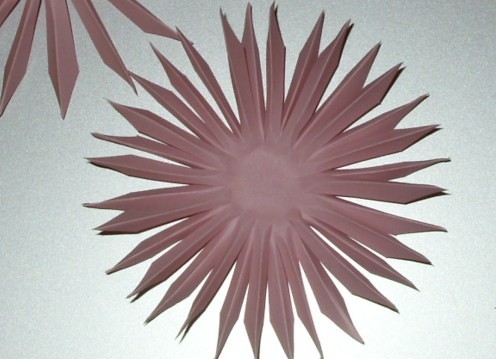
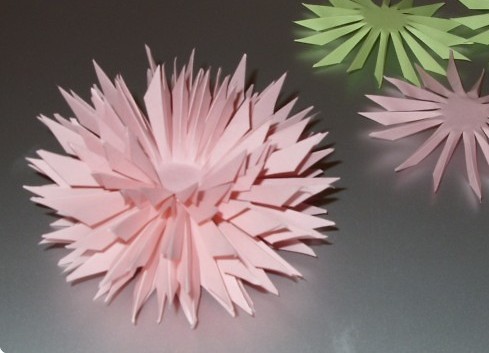
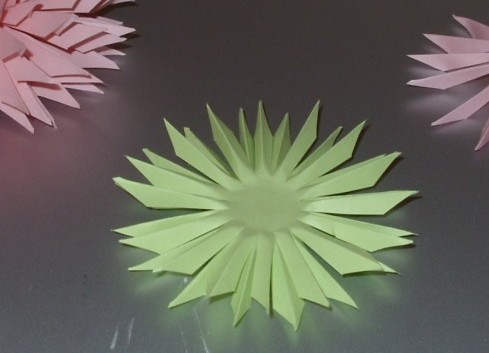
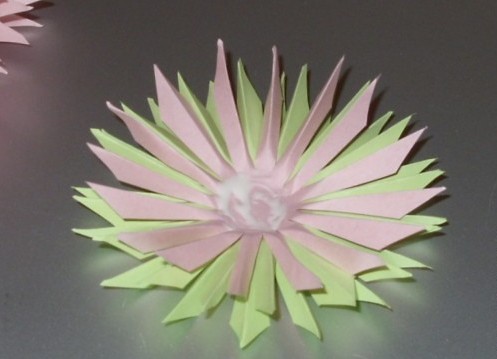
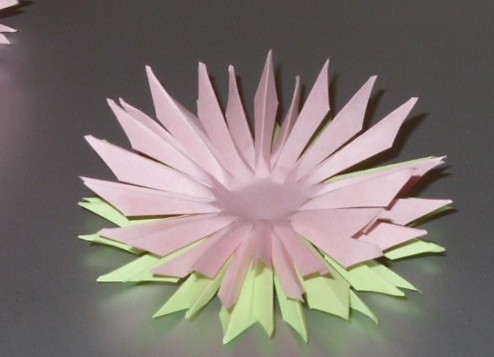
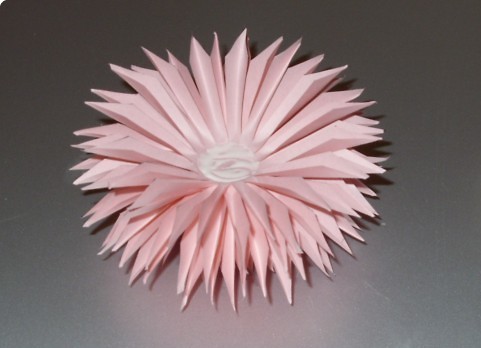
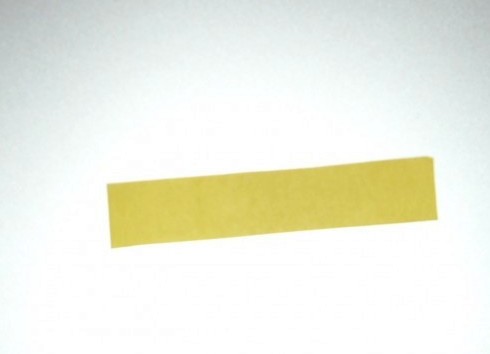
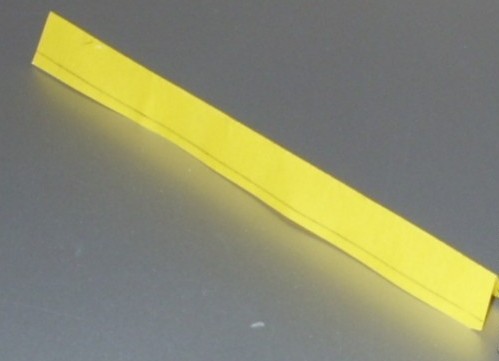
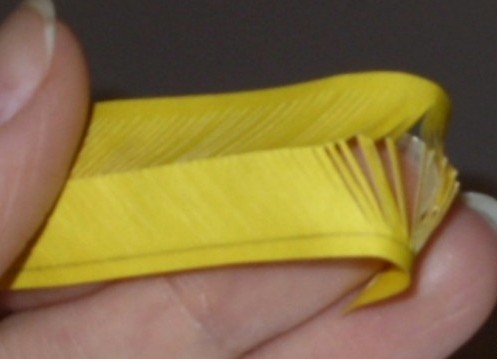
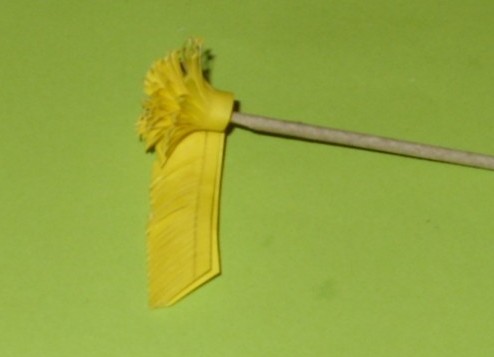
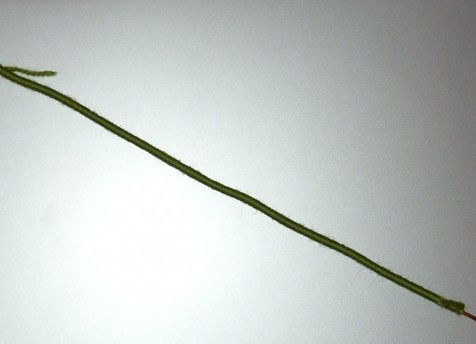
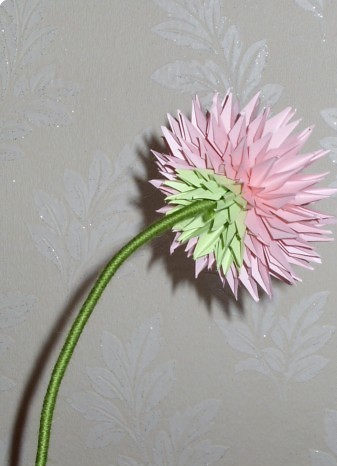
Print out and cut out the received stars in such quantity: 6pcs of large pink, 4 pieces of small pink and 2 pieces of small green. We find a center on each star and draw lines through it, dividing it into rays. We cut along the lines obtained, not reaching the middle. Fold each ray in half. We do this with all the blanks. We take 1 large star, put on its middle glue and glue to it the second same workpiece in staggered order (that the beams were between each other) So we glue all six large blanks. Then to them we glue two small pink blanks. We glue the green pieces together in a staggered manner. To them we glue two more small pink blanks. Turn over the billet of a large flower, glue a small pink-green billet. This will be the reverse side of our asters To make a middle, cut off a strip of yellow paper measuring 10cm by 2cm. Fold it in half and cut it (not completely) at an angle from one side. The unsharpened side of the yellow strip is screwed tightly onto the toothpick or awl. The tip is glued together. The stem is made of wire, which is tightly wound with a green thread. On the reverse side of the flower, make a hole in the stylus, into which we insert the stalk (for reliability fix the glue "Moment"), and in the center - glue the middle. Our aster is ready.
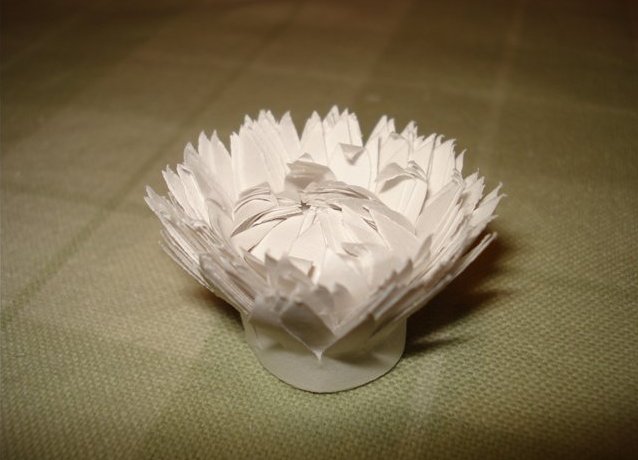
Master class 2: office paper aster
It will take:
- paper: white, green and yellow on 1 sheet;
- scissors, toothpick;
- PVA glue.
Progress:
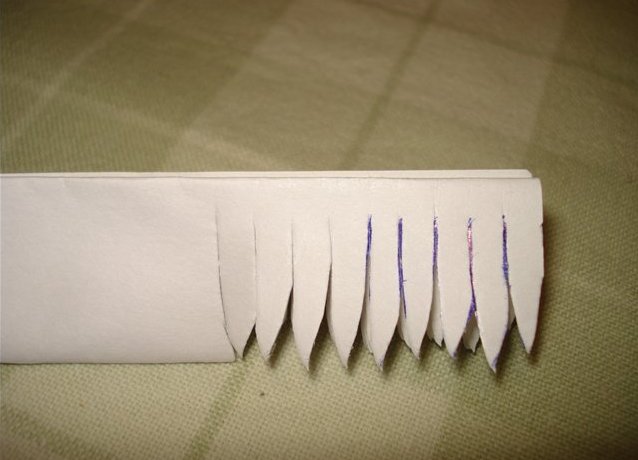
- Take a sheet of white paper and fold three times in half to get a strip of 8 layers. We cut this strip from one side with denticles and cut them into bends.
- Of the yellow paper, we make the same strip two times smaller in width, and from the green - 2 strips, but with denticles of different lengths.
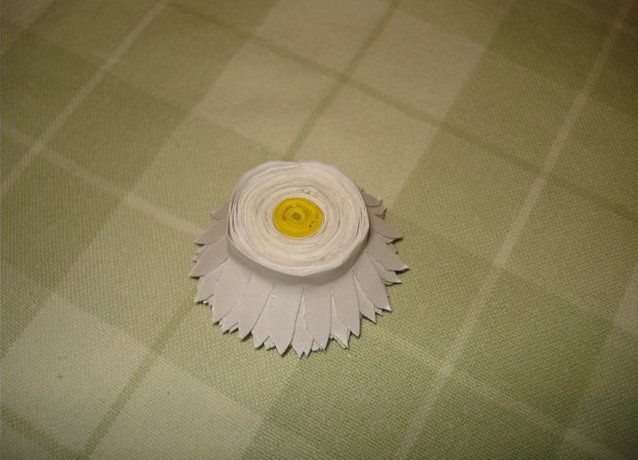
- Yellow strip tightly wound on the toothpick, for strength fixing glue.
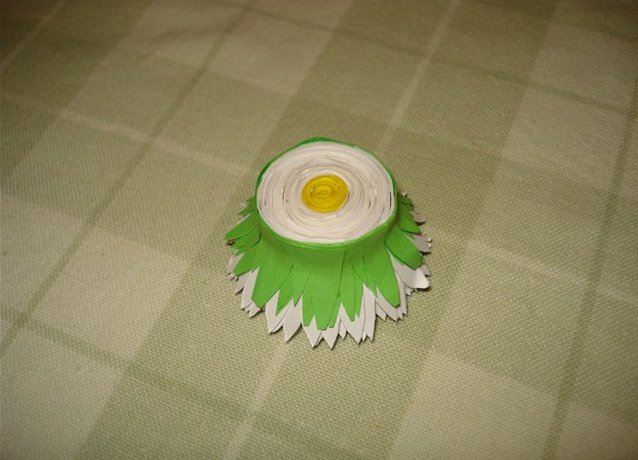
- In the same way, we twist all 8 white strips on top, and after them - green
- We fan our flower, bending off the outer petals from the middle, and leaving the inner ones as it is.
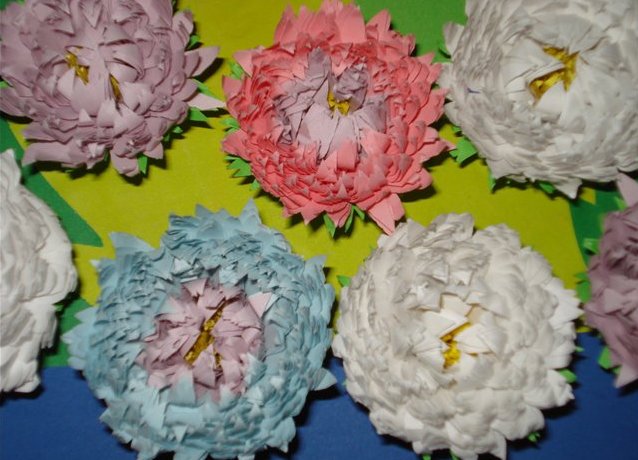
- Using instead of white paper color, you can get asters of different colors.
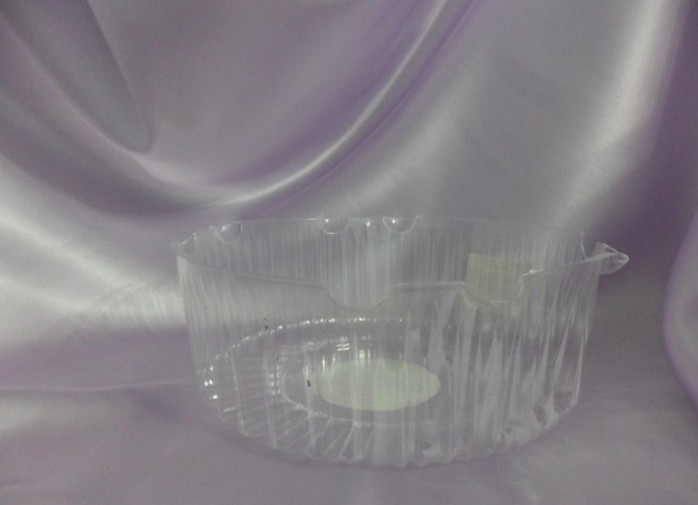
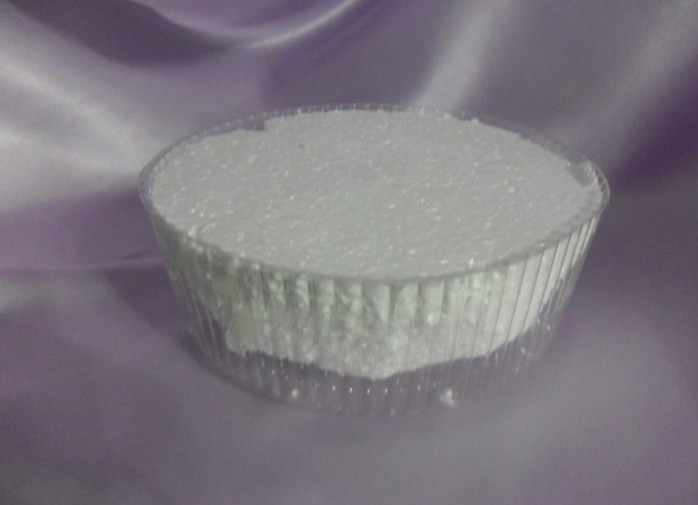
Master class 3: Basket aster of corrugated paper
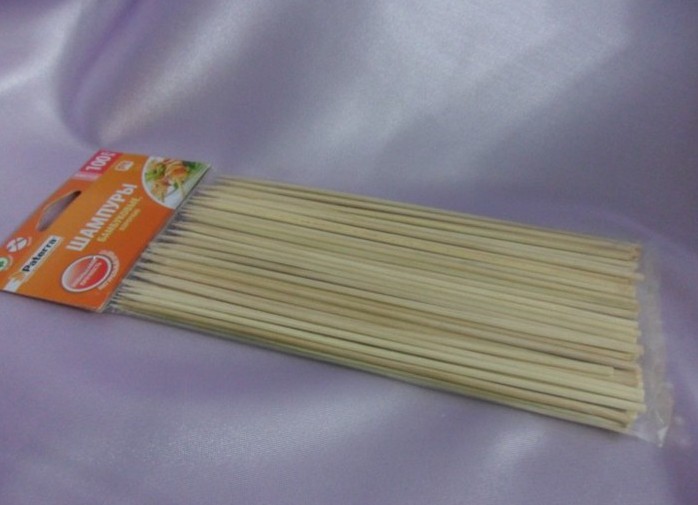
It will take:
- a lid from under the cake;
- Styrofoam;
- skewers;
- candies of the trumpet;
- Scotch;
- corrugated paper: green and lilac.
Progress:
- We cut out the foam plastic by the diameter of the plastic cover and insert it inside.
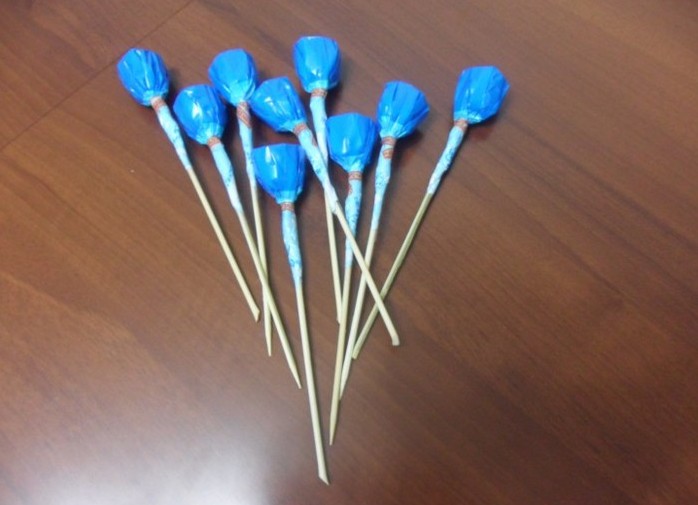
- We take sweets and skewers. We fix it with scotch on sweets sweets.
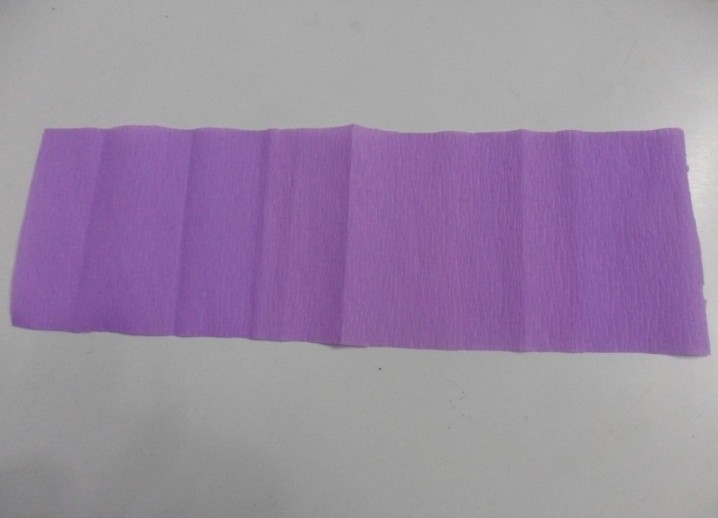
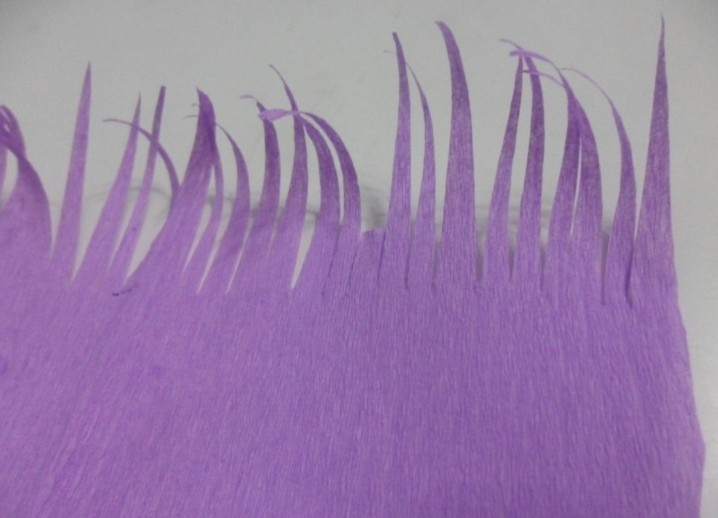
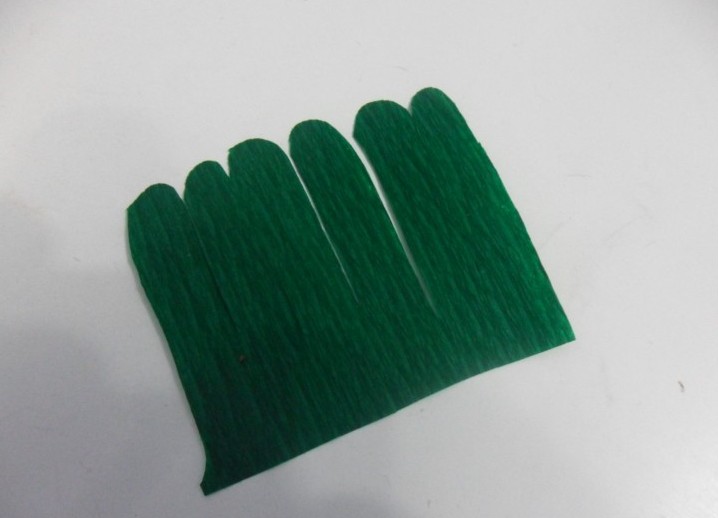
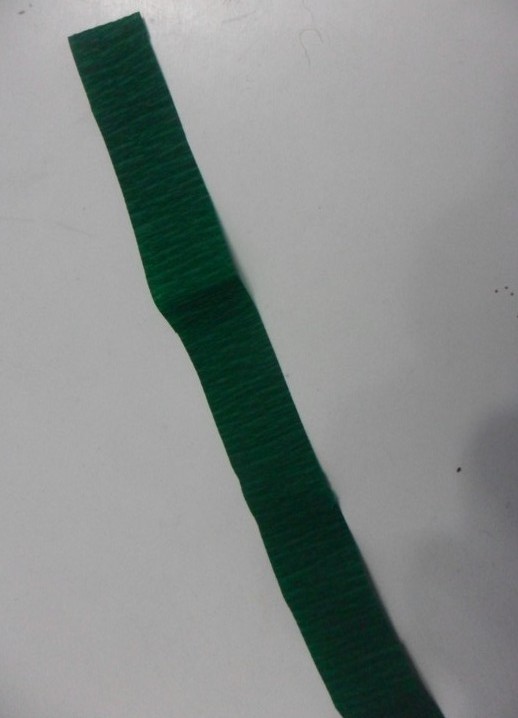
- Cut off the corrugated paper with a size of 25cm by 7cm and add it four times the length. We all need 6 such strips.
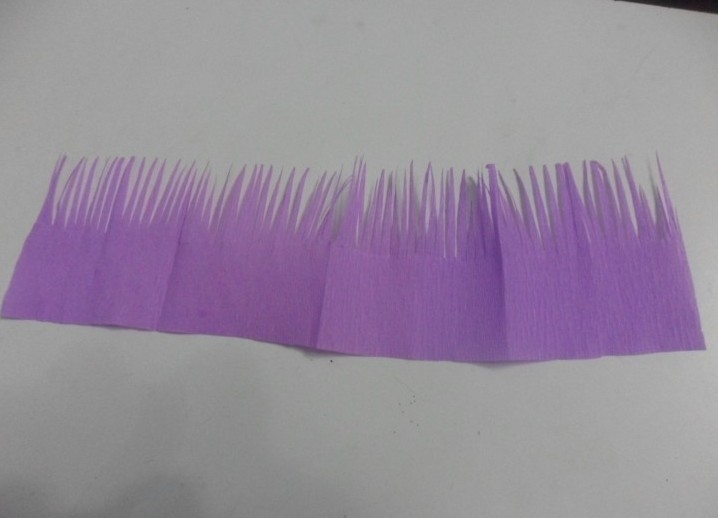
- On the one hand we make incisions with denticles, so that when we unfold it, it turned out as in the photo.
- The ends (fringe) with the help of scissors are rounded off, and the paper below them with fingers is stretched, giving a rounded shape.
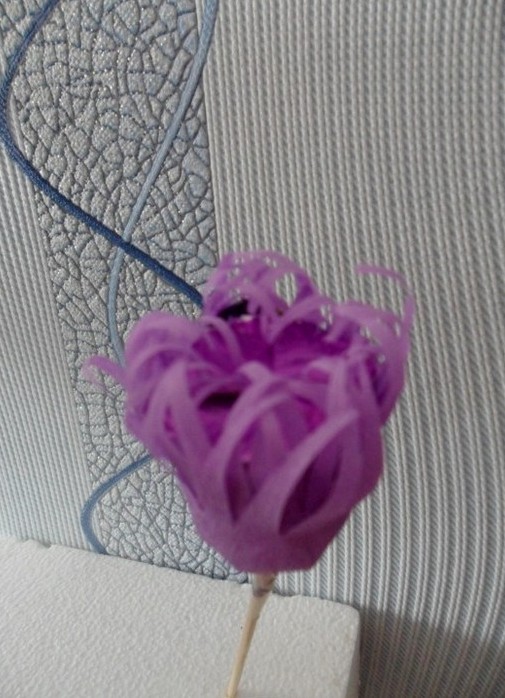
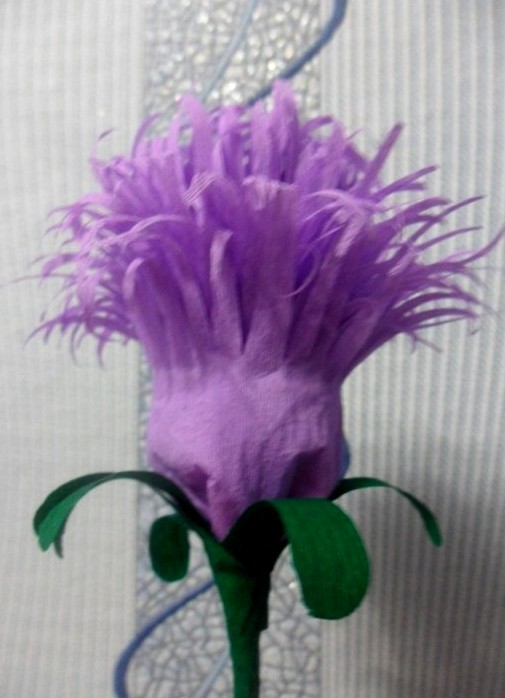
- With this strip we wrap the candy on the skewer with denticles inside and fix it down with scotch tape.
- Also reel two more strips of corrugated paper.
- The next three strips are wound with curled denticles outwards.
- From the green paper, we cut out the sepals and ends round it.
- Skewer wrapped in a rectangle of corrugated green paper (fixing it with glue), and on the top wrap the bud with sepals, also fixing with glue.
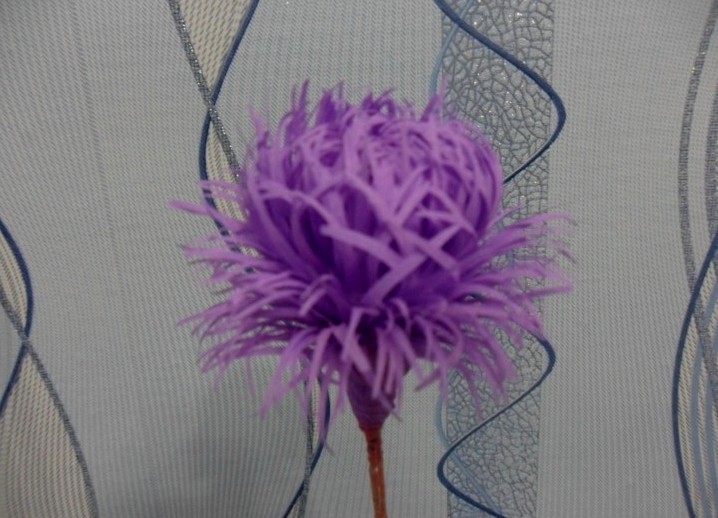
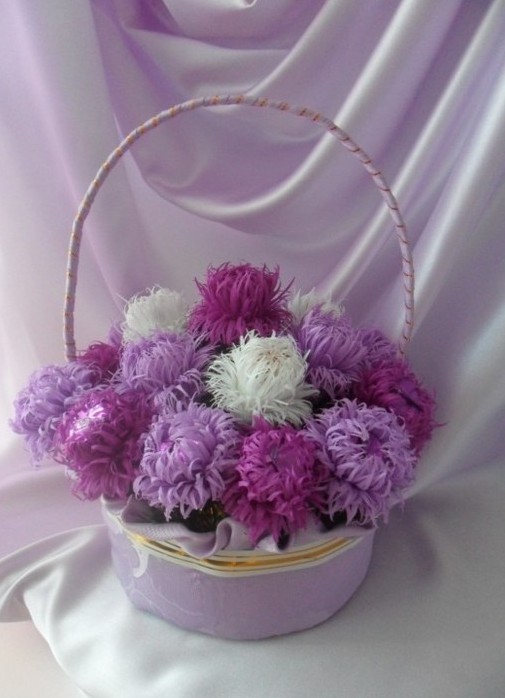
- Having made a cover with corrugated paper and inserting colored asters made into polystyrene, we get a beautiful autumn bouquet.
Other beautiful flowers are obtained from the paper, for example, carnations and roses .