Tulip is a delightful flower that is firmly associated in our minds with the spring. Of course, this is the main flower, along with mimosa, which is customary to give to women on the first spring holiday - March 8. It is believed that tulips will certainly bring happiness to those to whom they are addressed, because their popularity as a gift does not decrease, despite the huge abundance of various colors and compositions that have flooded the markets.
Interestingly, in addition to living, you can give paper tulips, made in the technique of modular origami. This is a rather complicated technique that requires time and painstaking work, but the result is worth it - origami-tulip from the modules will become an original souvenir in addition to the main gift and, unlike their living brethren, will not fall in a couple of days, long. We bring to your attention a detailed guide on how to make a tulip from modules.
Modular origami tulip: master class
Let's start work on the flower from the workpiece of the triangular modules. They should be made from colored paper of appropriate colors, in this case we use yellow for the color itself and green for the leaf.
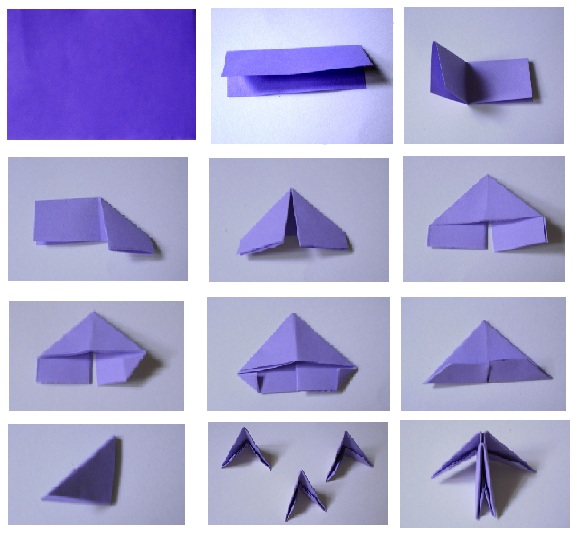
Proceed to make the module, following the picture:
- A sheet of A4 colored paper is bent twice, then four times, then again in half and cut through the fold lines. It turned out 8 identical rectangles.
- We take one of the rectangles, double bend in half - first along, then across. Expand the last fold.
- Fold the outer upper corners to each other.
- We turn the workpiece. Now we fold the outer lower corners inward.
- Bottom edge we turn upwards.
- We bend the triangle in half.
- Module - the basis of all crafts in the technique of three-dimensional origami, ready.
Flower Making
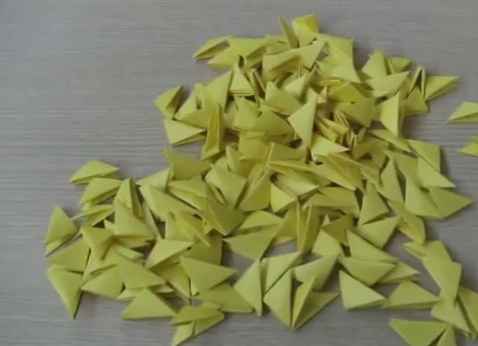
We prepare 186 yellow modules for the flower.
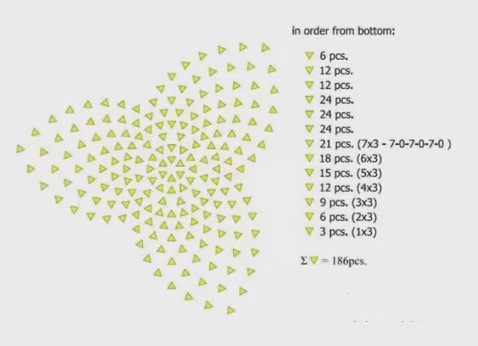
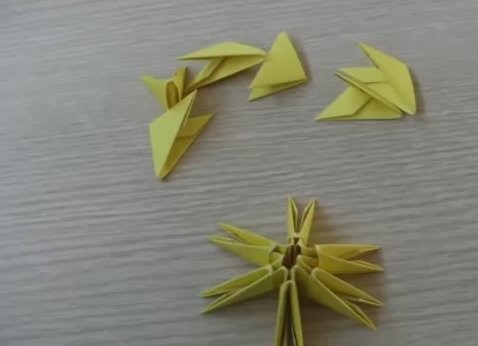
Let's start assembling modular origami tulip according to the scheme.
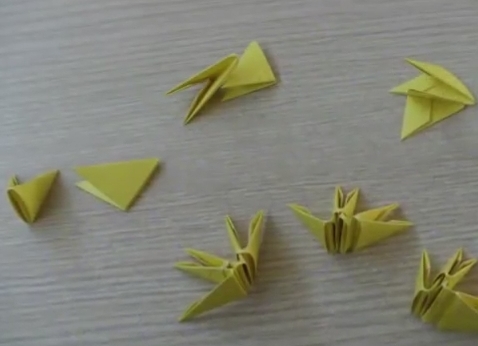
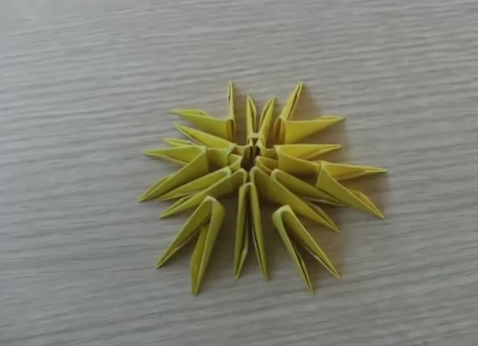
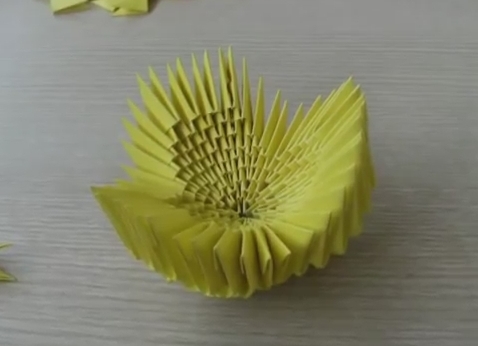
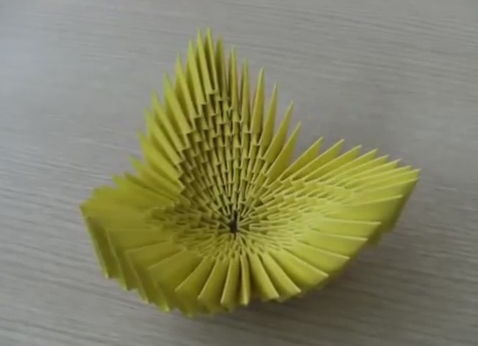
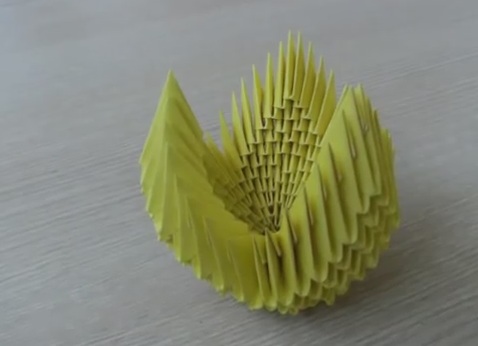
- We connect the modules to each other for 3 pieces. We connect 6 modules and get a circle, the basis of our tulip. We continue to follow the scheme, for the next row we take 12 modules.
- We put on the third row another 12 triangular blanks. For 4, 5, 6 rows we take 24 modules each. From the 7th row we begin to make petals. We take 21 modules and place them according to the scheme 7-0-7-0-7-0.
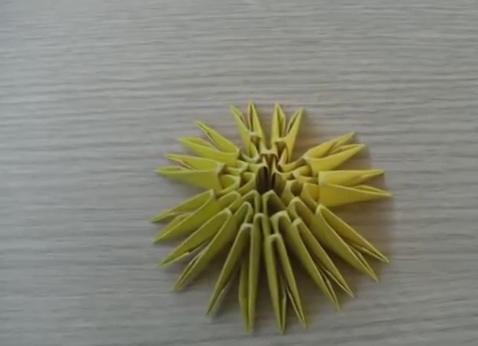
- 8th row: each petal is reduced by 1 module, all we need are 18 modules.
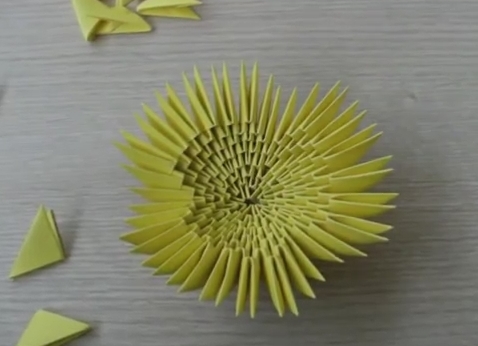
- Then we act in a similar way, with each new number decreasing the number of modules in the petal by 1, and the total number by 3.
- A tulip flower in the modular origami technique is ready.
| | | |
| | | |
| | | |
Then we make a stalk of a tulip. To do this, you can take a tube for cocktails and wrap it with colored paper, fixing it with glue. From above on an improvised stem with the help of glue we fix a flower.
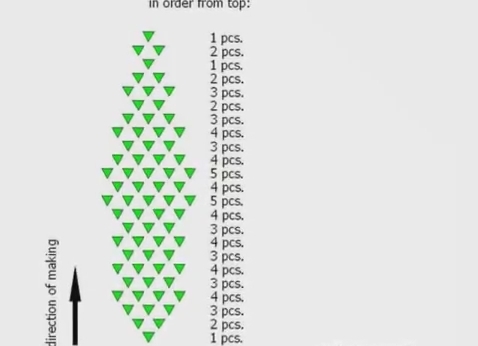
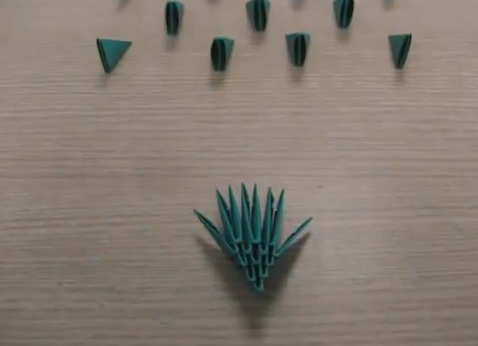
Next, proceed to assemble the leaf of the tulip from the modules according to the scheme.
For this, we prepare 70 modules of green paper.
Progress:
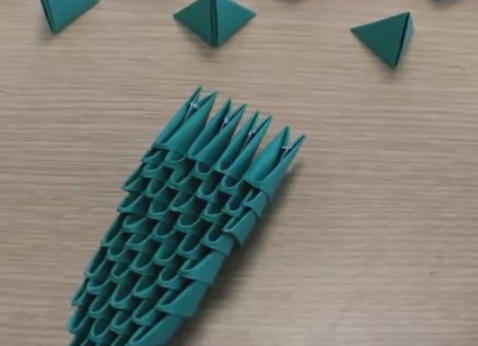
- We start assembling in order from the bottom row: we put 2 on the edges of the module, and on top of them 3 more. We continue assembling, clearly following the scheme: alternating modules 3 and 4 up to 10 rows inclusive.
- From 11 to 13, alternate 4 and 5 modules, and then we subtract and again alternate 3 and 4 modules to 17 rows.
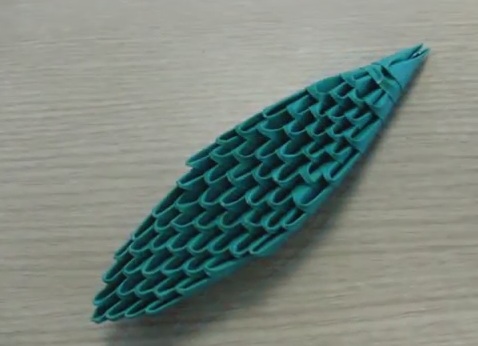
- We finish the leaf smoothly, but so that it turns out to be pointed. To do this, from 18 to 20 row we put the remaining modules according to the scheme: 2-1-2-1.
- We glue a sheet to the stem. The tulip from the triangular modules is ready.
| | | |
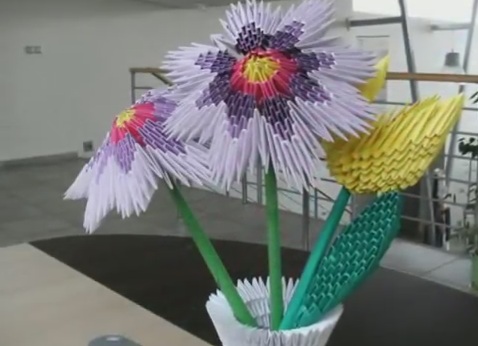
Very effectively, such a tulip will look in a bouquet, including other colors, made in the technique of three-dimensional origami. It is also interesting to put flowers in a vase in a similar style, which can also be made of their triangular modules.