The theme of fairy dragons, perhaps, will never lose its relevance. If just beautiful plant elements or beaded bracelets got bored a little, it's worth trying to weave something original. There are several basic techniques, how can we drag a dragon out of beads.
We suggest to consider the most elegant way, which can then be used to create an ornament.
How to make a dragon bead?
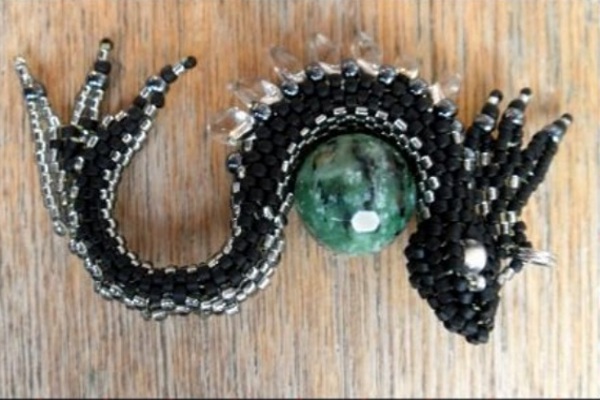
For work we will need beads of different sizes. One large bead is needed for the base, it will be skirted by our dragon from beads. Two beads are 6 eye sizes, two colors of cylindrical beads, and two colors of beads 11 and 15. For the body of our own dragon, we will use 8 size beads.
Well, now let's go directly to the scheme, how to weave from the bead of the dragon:
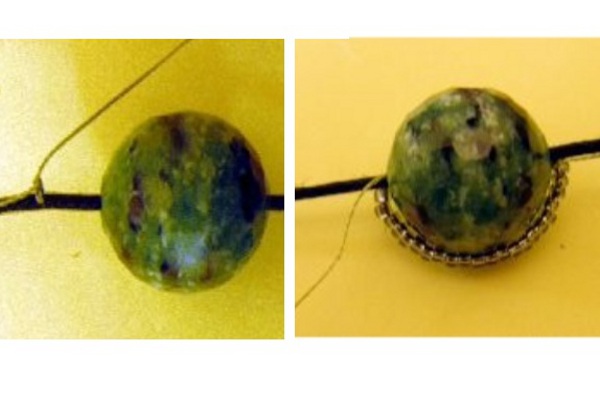
- So, fix our bead with a thin cord and start it with beads. We thread the cord so that it circles half of the bead. The first row of beads is 15 size.
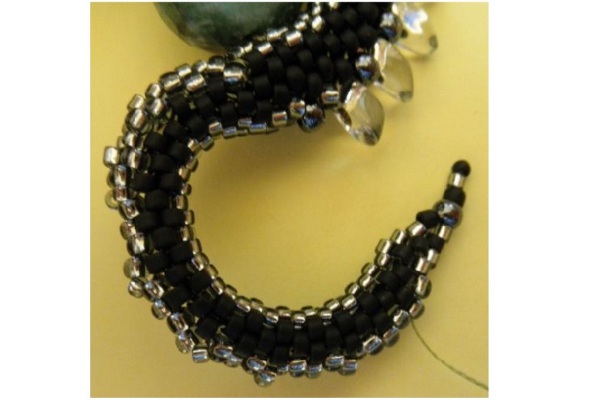
- And now we start step by step to braid the bead. A row of gray beads 15 ra-ra, 3 rows of a combination of 1seraya + 2 black beads, followed by a row of black beads of 11 sizes and a series of 8th. If instead of a thin wire we use a fishing line, we hide its end and cut it off.
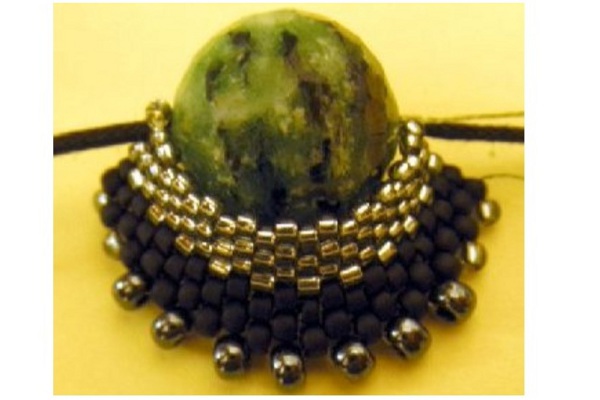
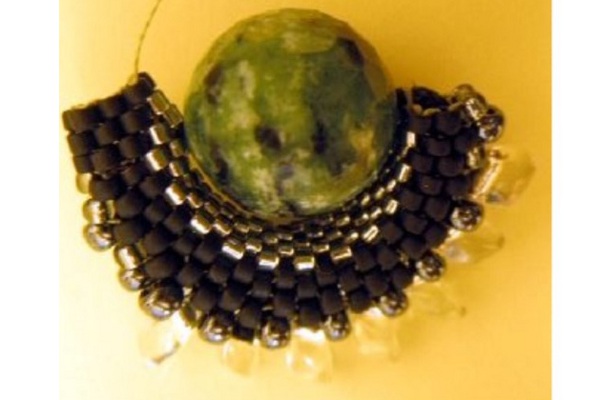
- Further we will need decorative beads of cylindrical shape. They will alternate with the usual. In the last row, 9 or 10 such beads are produced.
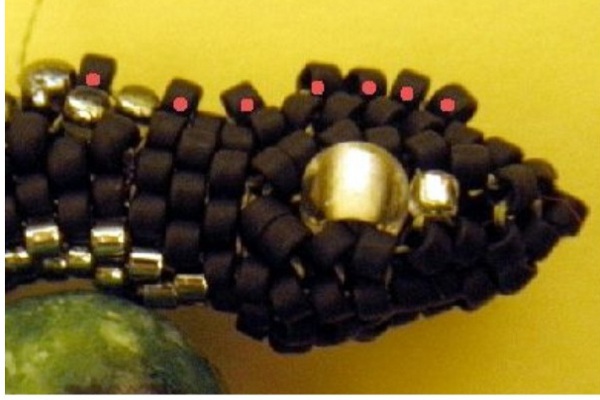
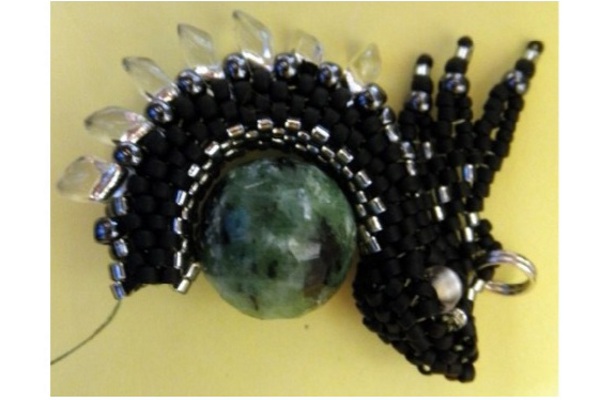
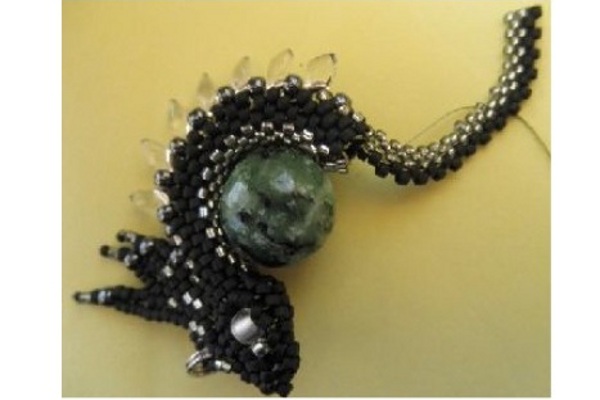
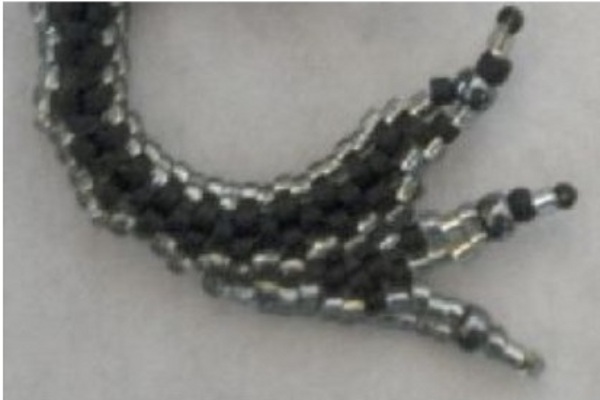
- Now for the body of our dragon from beads. In fact, it's something like a tourniquet. Large red dots indicate the location of the eyes, red dots indicate the last row of the neck.
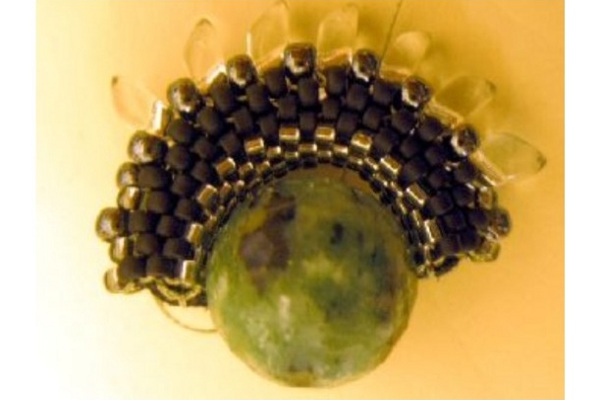
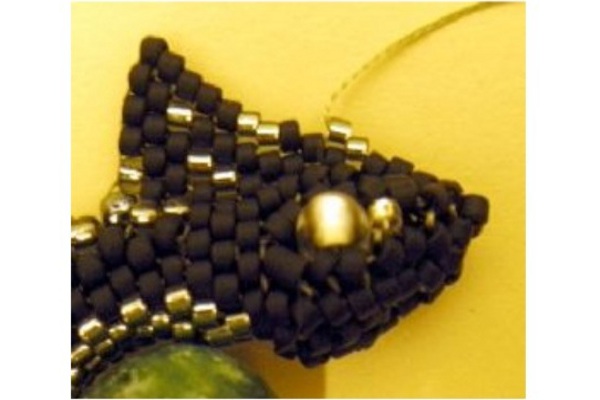
- Now we pass to the crest on the head of the dragon, made by own hands. First fix, as shown in the photo, 6-8 beads at the top of the head. Next, make a triangular piece with a constriction to the head.
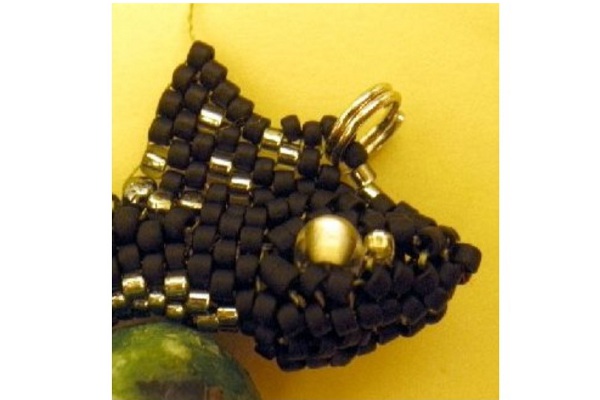
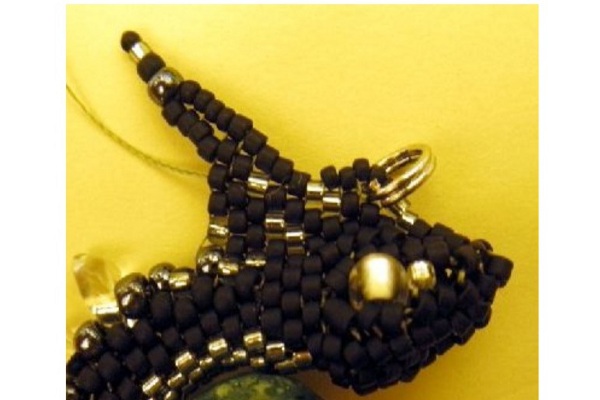
- We attach a metal ring so that you can make a decoration from the figure. To do this, pass through the line several beads and make a ring, a couple of times we pass the line to make the anchorage reliable.
- Next, let's take the last part of the master class dragon from beads-tail. The technique is not particularly different from the weaving of the body. First, the plait in the same way as working with a large bead, and then several rows of beads in staggered order. With the end we begin to narrow down a little to seven beads.
- Then start using beads 15 r-ra. It is more convenient to begin narrowing approximately from the middle of the main bead. The photo clearly shows this transition.
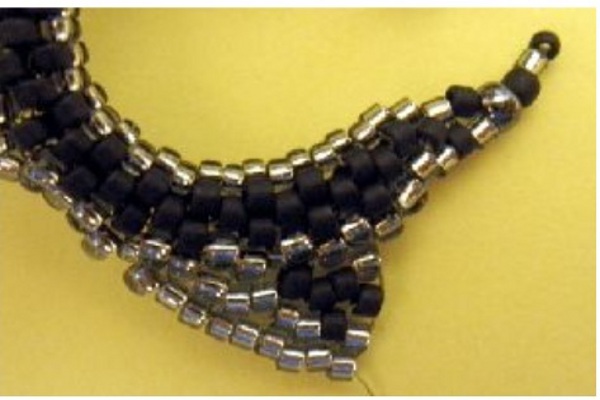
- First three rows of 15 p-ra of black color, then add a golden one in a staggered order connect the rows.
- The scallop on the end of the tail is done on the same principle as the comb on the head.
| | |
| | |
| | |
| | |
| | |
Master class, how to make a dragon bead, is finished and as a result you get a beautiful pendant for keys or mobile, which can also be used as a pendant or brooch detail.