Everyone is looking forward to the onset of the bright holiday of Easter. Everything wakes up, comes to life, we so want a bright spring mood! Maybe that's why we try to paint the easter eggs with the most vivid colors, make a colorful painting.
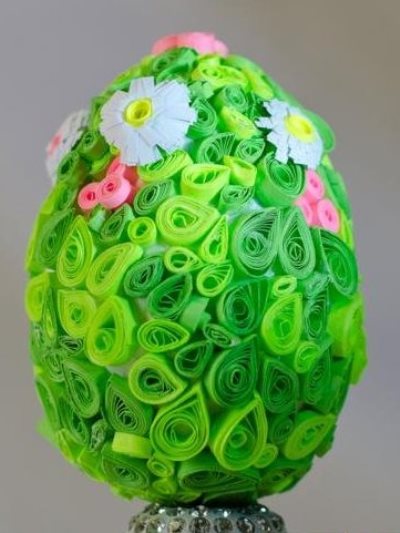
In the master class we introduce you to the entertaining quilling technique, with which you can do anything you like, including the colorful spring Easter egg. This testicle looks very picturesque and joyful. Everyone can make it, only a little patience, colored paper and glue. For this decoration, the quilling method is applied in the form of tender green leaves and first flowers.
How to make an egg quilling?
To make an easter egg in quilling technique, we will need the minimum of materials, which is sure to be found in every house, namely:
- Procurement in the form of eggs. In the master class we will prepare the workpiece with our hands, for it we will need PVA glue, the remains of newspapers and white acrylic paint.
- Office paper medium density of bright green, salad, white, pink and yellow flowers.
- A special awl with a forked end for winding up strips of paper.
- Clerical stationery, scissors, tweezers, paper knife, toothpicks, metal ruler, two large needles for fixing eggs.
1. The first thing we do is work. To make the billet in a bowl with warm water, add 10 grams of PVA glue and let down for a few minutes the crumpled newspapers.
2. Then carefully squeeze the resulting mass and give it the shape of an egg.
3. We put the received blank for the night in a warm place, the radiator of the battery will perfectly suit, we leave it there until it dries completely.
4. Further, when the workpiece has dried sufficiently, it should be primed with acrylic white paint to hide all small irregularities, to give a one-color color and to cover with glue on all sides.
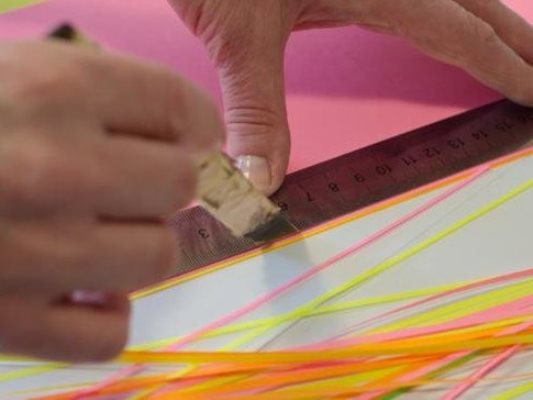
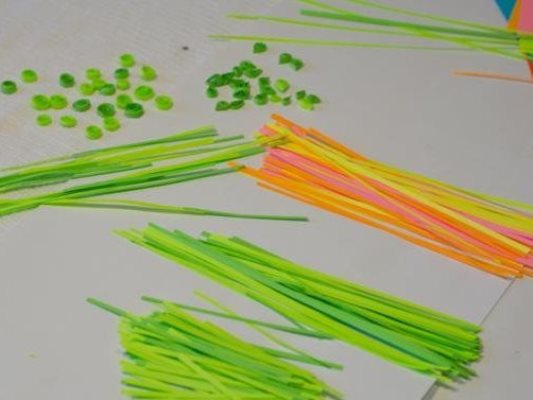
5. The next step is to make jewelry in the form of leaves and flowers. We will make them from narrow stripes of colored paper with a width of 1.5 millimeters, which we pre-cut with a paper knife and a metal ruler, since we can spoil a wooden one. For the production of large leaves, long strips are suitable, for smaller ones, short ones.
| | |
6. All the details are made by the method of winding the paper with a special silk with a bifurcated end. The tip of each spiral is coated with glue and pricked, forming a leaf.
7. Now gently roll the paper. For an average-sized egg, we need to make about two hundred leaves of different sizes. Glue should be applied on a droplet, using a toothpick, we work extremely accurately.
8. On the edge of the strip we put a drop of glue and fix it.
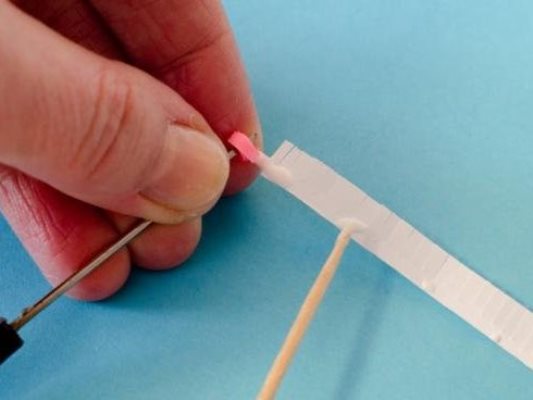
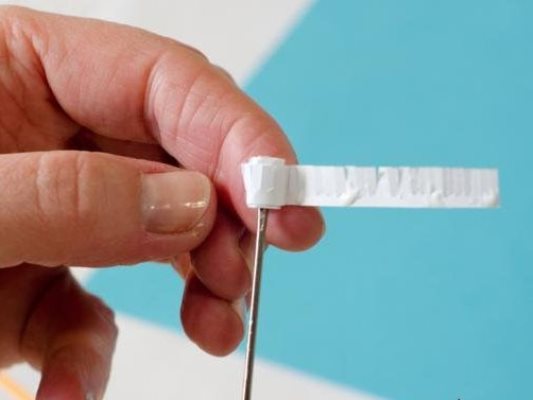
9. For the manufacture of flowers, cut a strip of white paper 7 cm wide and 15 cm long. One edge of the strip is cut using scissors, making fringe. To the same strip, we glue another thinner and colored as the core of the flower.
10. Paper with a fringe gently screwed on an awl, lubricating periodically glue the bottom of the flower.
| | |
11. After drying the flower, we will spread the petals with fingers, twisting them a bit.
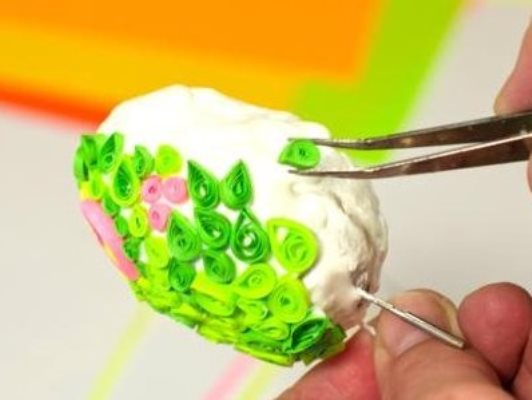
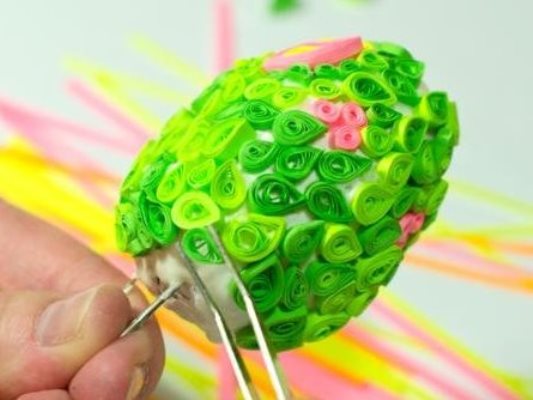
12. Now proceed directly to decorating the egg. We put a couple of needles in it for the convenience of decoration. Pour the glue on the right place and use tweezers to lay the petals on the surface. For a change, you can glue several pink circles, forming from them groups of three.
| | | |
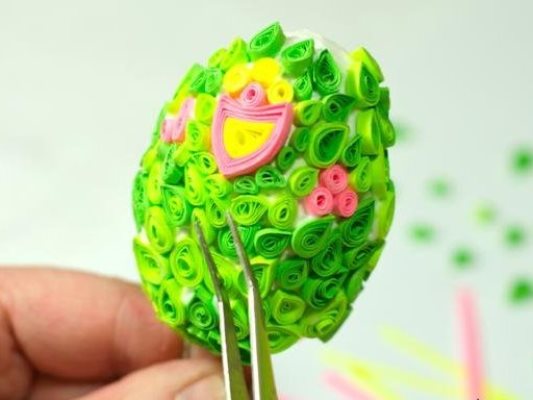
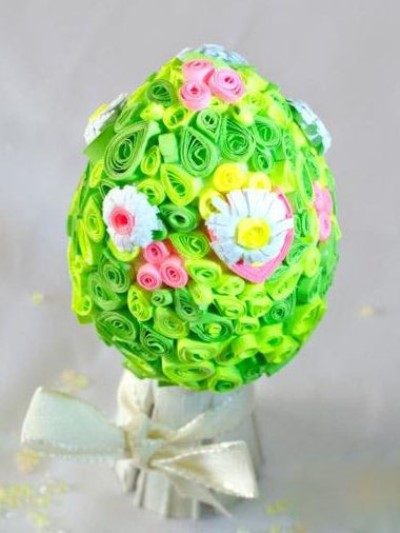
14. Our egg, decorated with paper in quilling technique, is completely ready. Now it remains only to place it on the podstavochku and fix it with glue.
| | |