Going on any holiday or party it has become fashionable to supplement your image with a small hat, this gives charm to very young ladies and emphasizes the elegance of adults. Vintage mini-hats, such as a cylinder, are very easy to create with your own hands.
In this article we will get acquainted with several options, how you can make a small hat-cylinder with your own hands.
Master Class: mini-hat-cylinder
Option number 1
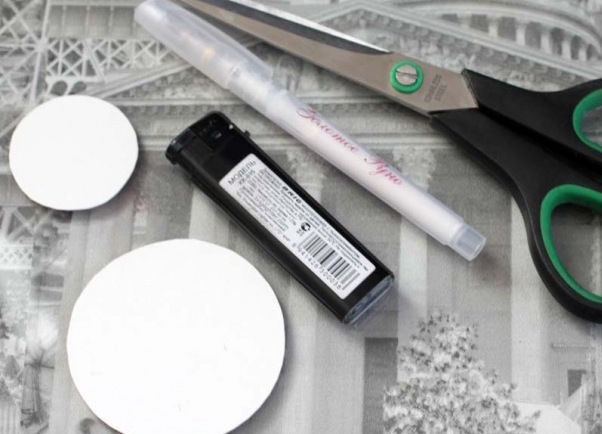
It will take:
- for the basis: black felt or drape;
- decorations: white beads, black lace, black mesh and feather
- bezel;
- templates of small and large circles;
- tools: scissors, lighter, thread with a needle, glue, drill.
Progress:
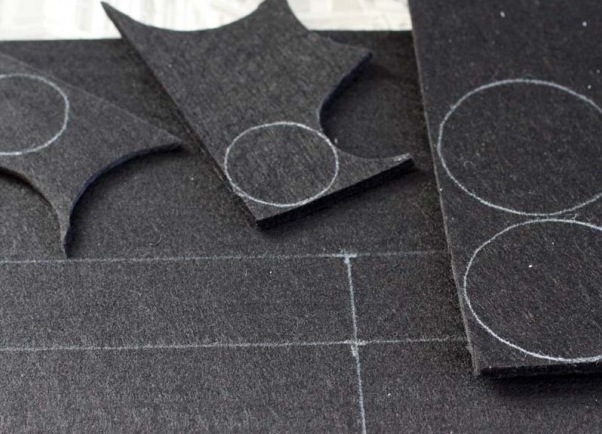
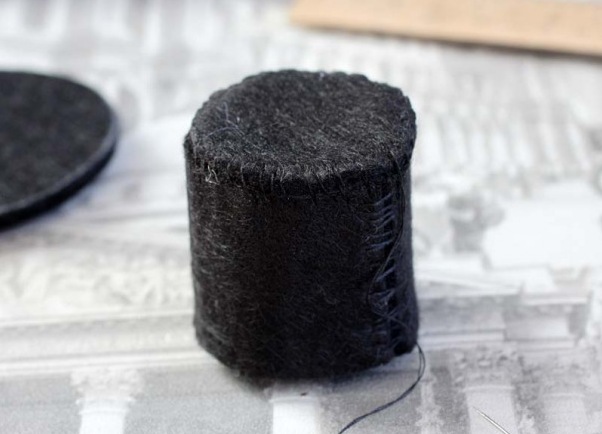
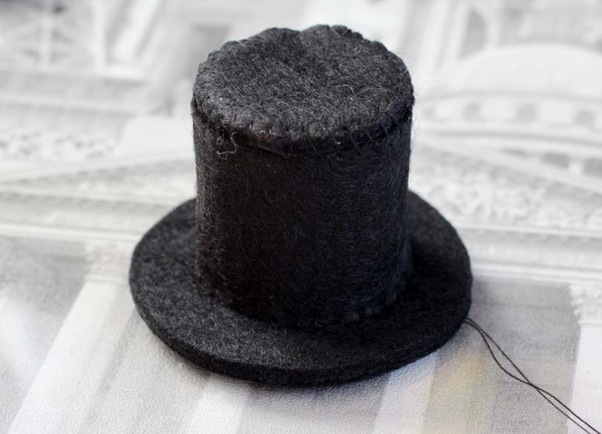
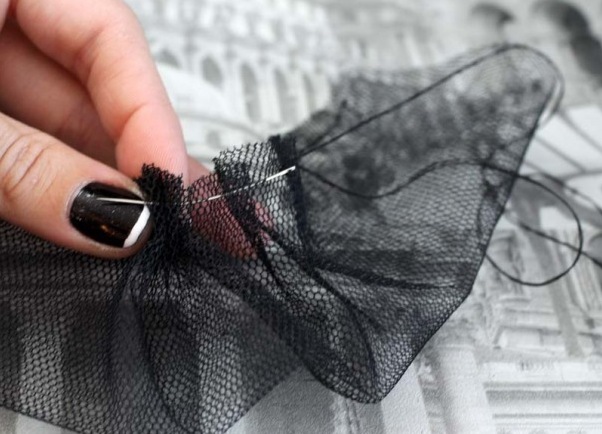
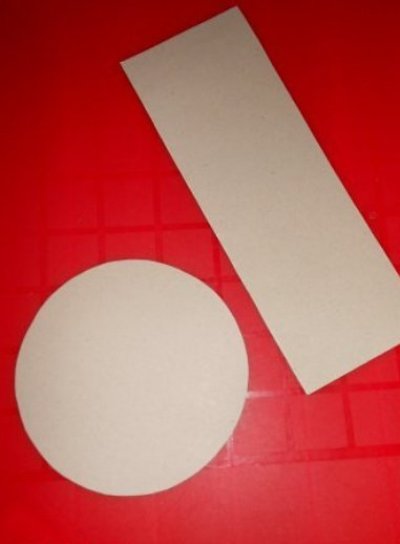
- From the prepared fabric for the base with templates, cut out a small circle with a diameter of 3 cm and a large one - 7 cm, a rectangle with sides 3-4 cm and 9.42 cm (circumference of a small circle).
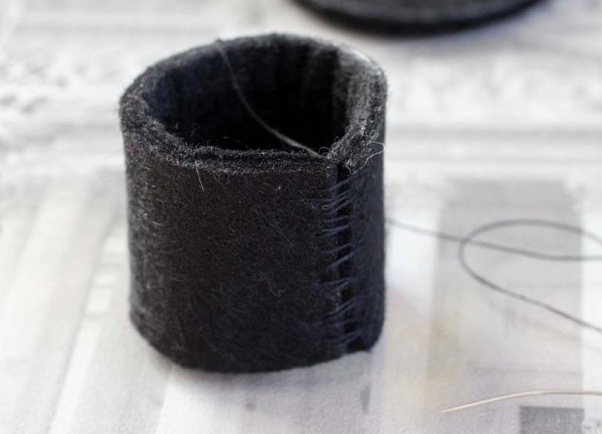
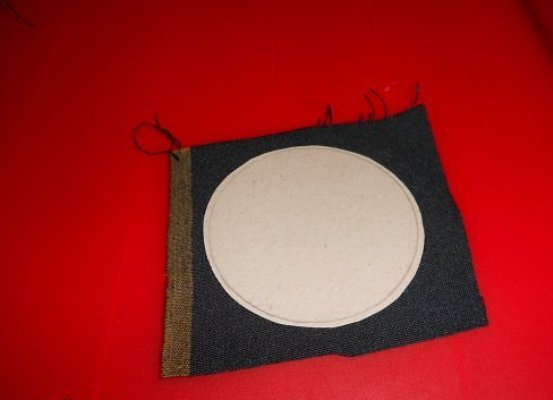
- We take the obtained strip and sew it, stitches can be any, as they will not be seen later.
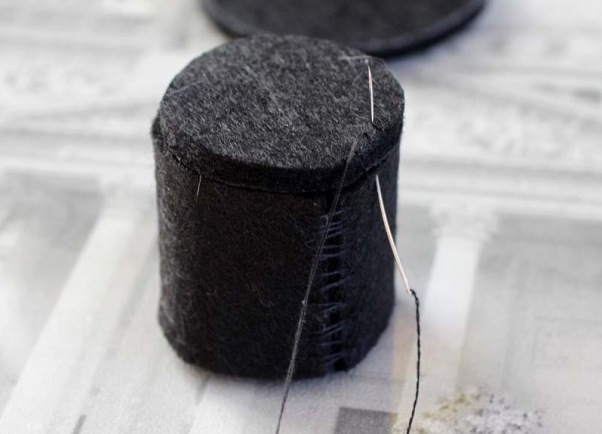
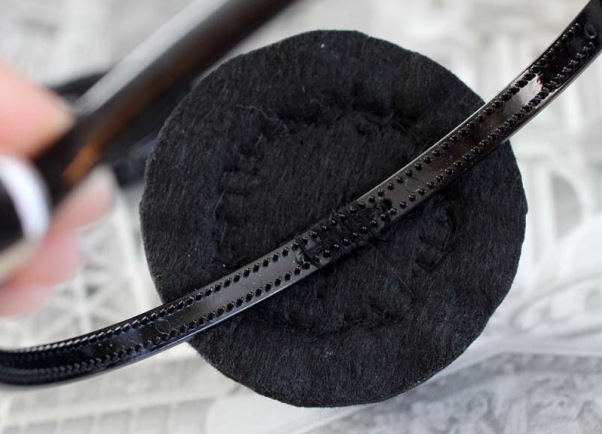
- We sew a small circle to the top of the resulting cylinder with simple stitches.
- The resulting workpiece is sewn accurately in the center to a large circle.
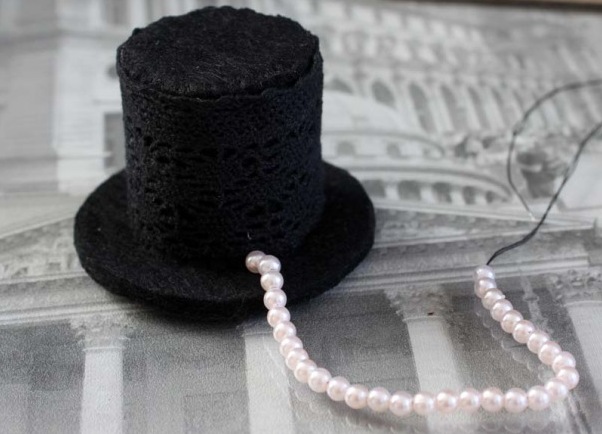
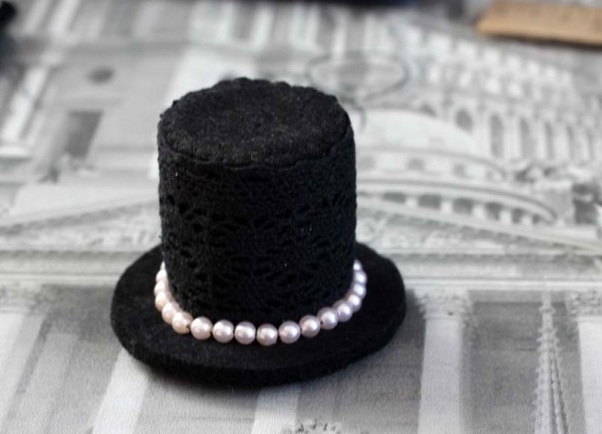
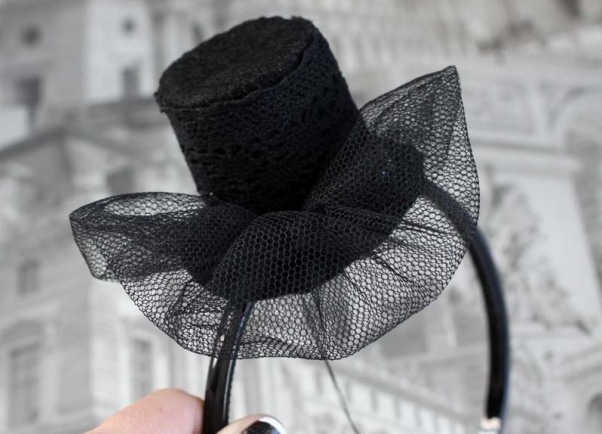
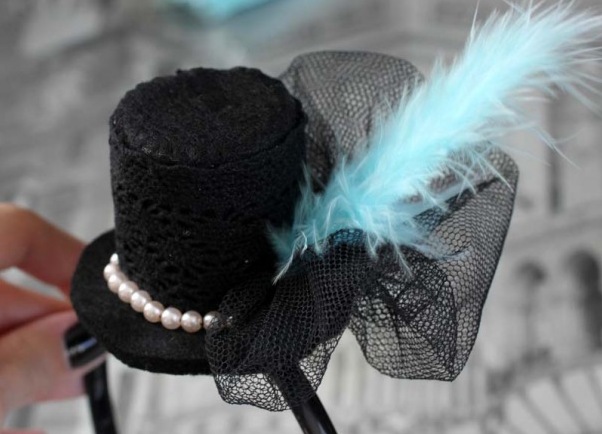
- Around the vertical part of the cylinder with a few stitches we fix the lace.
- String beads on the thread, along the length equal to the length of the circumference of the vertical part and sew to the bottom.
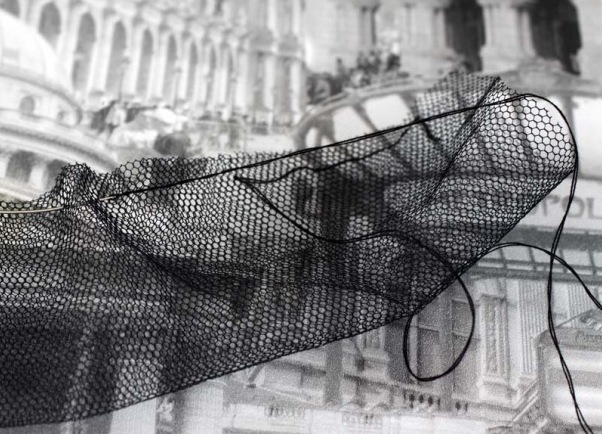
- To decorate the hat we take the net, fold it in half and with several stitches gently pull it together.
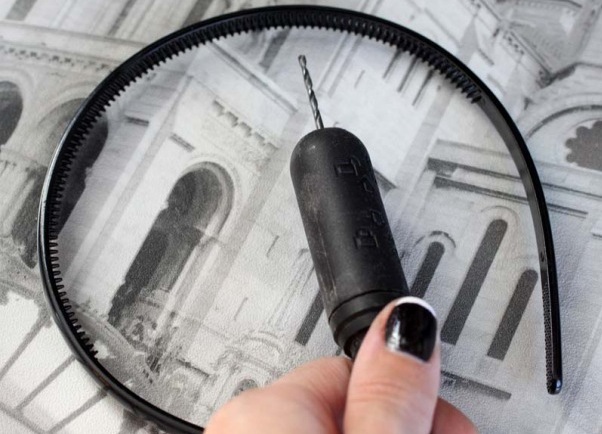
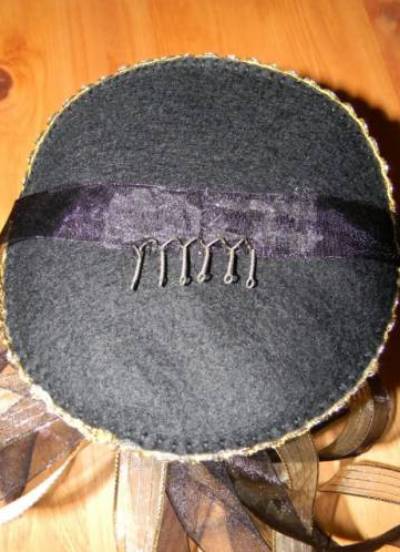
- Take the bezel and make a drill in it with two holes, with which we firmly sew the cylinder to the rim.
- On the one hand, we sew the prepared mesh and glue the colored feather. Our mini-cylinder is ready!
| | |
| | |
| | |
| | |
| | |
Option number 2
It will take:
- cardboard;
- dense fabric for the base and transparent for decoration;
- flowers;
- instruments.
Progress:
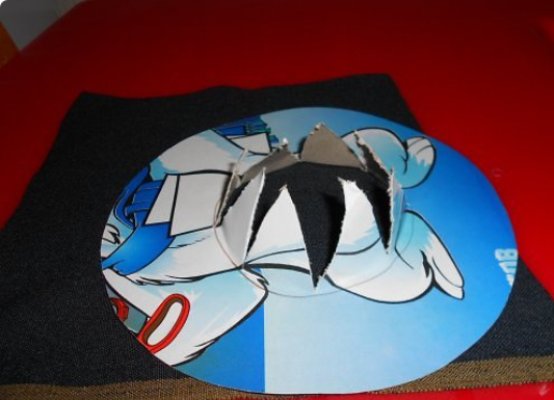
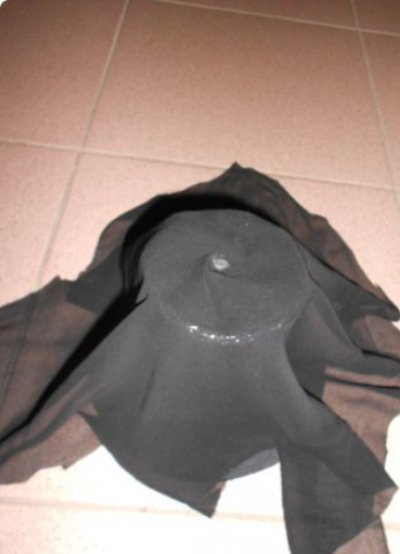
- Cut out a cardboard rectangle with sides 11 cm and 25.13 and circles with diameters of 8 cm and 18. Measurements can be taken any others depending on the desired size of the entire hat. A rectangle is connected with an adhesive tape to make a cylinder.
- A small circle and a cylinder are coated with glue and pasted with a black cloth
- On the big circle we designate the edge of the cylinder, and from the center we cut it to the line and bend it.
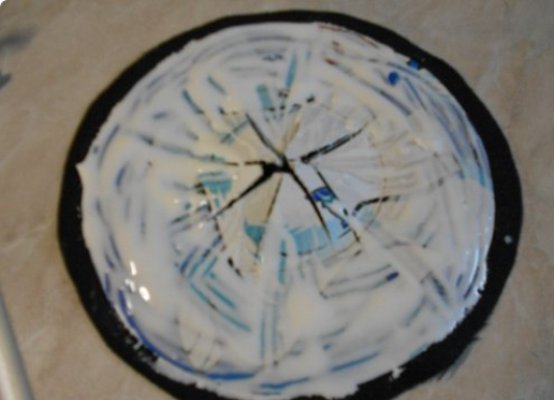
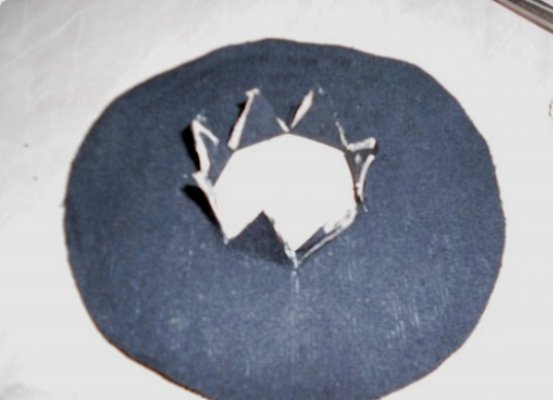
- Alternately, we glue both sides with glue and pasted with a black cloth (the middle should turn out to be cut).
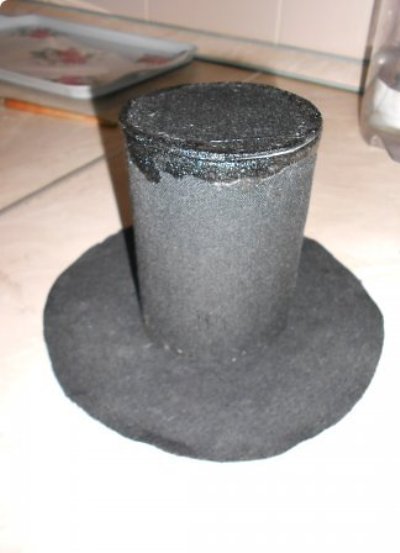
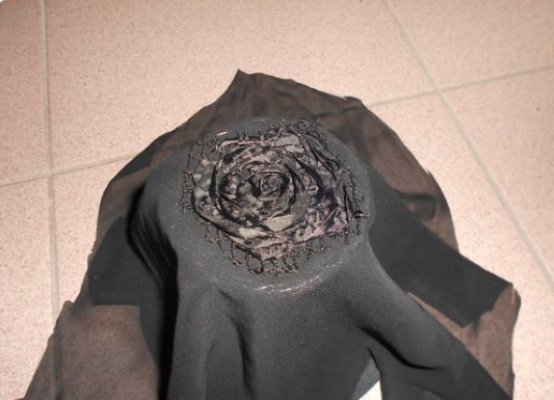
- Using slots, glue all the circles with the cylinder.
- We glue the transparent fabric to the top of the cylinder, and on top - the cut out flower.
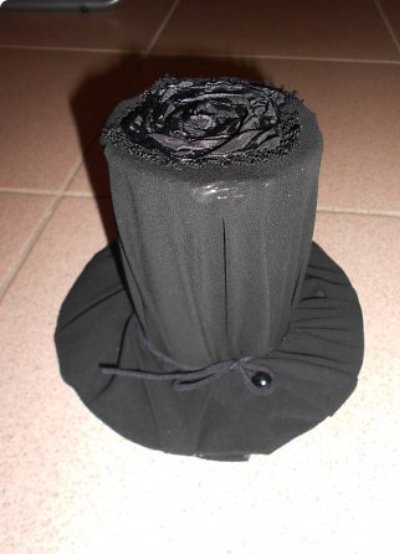
- At the base of the cylinder we tie the upper fabric with a string, and fix the edges of the fabric inside the cylinder.
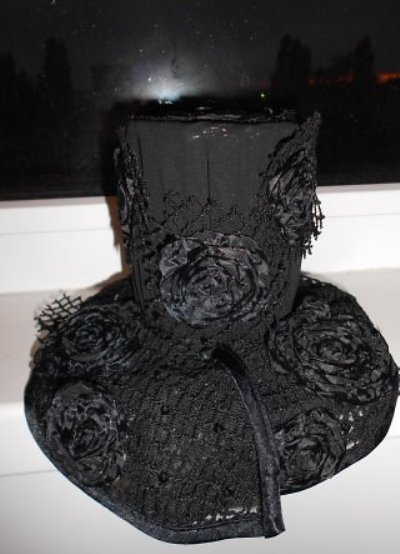
- We paste the remaining fabric with roses. Our hat is ready!
| | |
| | | |
| | |
| | |
Since the hairstyles of girls are varied, then you can strengthen mini-hats made with your own hands in different ways:
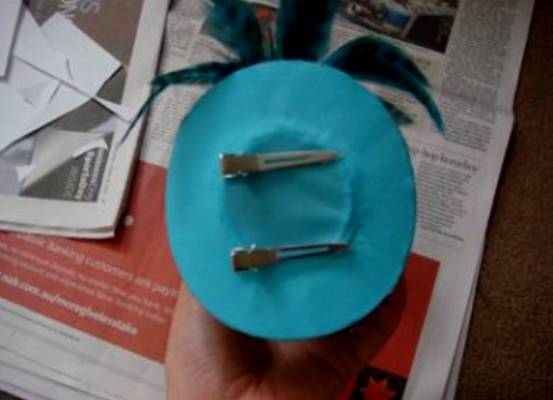
- with a belt, with attached fasteners for clamps;
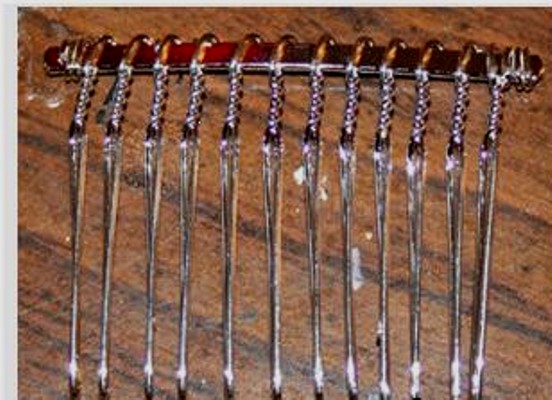
- glue the cardboard to the bottom of the cap with the hairpins inserted into it;
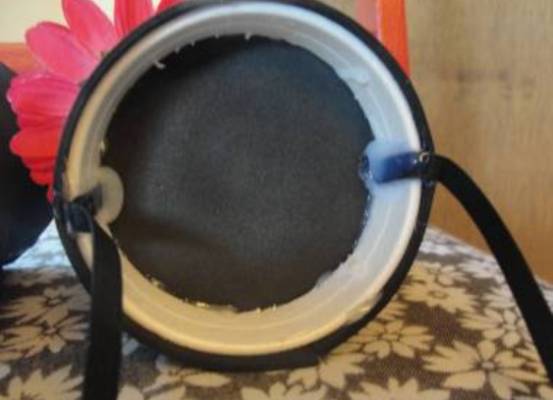
- with the help of ribbons;
- with the help of a rim (considered in option # 1).
| | |
You can make fashionable mini-hats with your own hands, both conventional and thematic, using not only traditional beads, feathers and a grid, but also other elements. And having issued a hat in white, you will get an elegant wedding accessory .