Perhaps all are familiar with plasticine since childhood. Due to the fact that this material is very plastic, does not dry and is produced in a wide range of colors, plasticine serves as an excellent object for the development of children's fine motor skills, fantasy, and also a way to entice them and channel energy into a more useful, creative channel. If you think that you have already forgotten how to make crafts from plasticine, do not worry, this article will give a few unique and simple ideas that your child will surely like.
Crafts made of plasticine and cones are the most popular in kindergarten and junior classes. All because of the availability of materials and almost ready base for creativity. Among other things, cones, being a natural material, can be used to decorate the interior, make beautiful pendants or fur-trees toys.
Before you start making fancy artifacts from fir cones, remember that after they are completely dry and the flakes open, your lump will lose its former shape, which can greatly spoil your product. Therefore, we advise you to lower it into a warm solution of joinery glue. After it dries in the sun, you can proceed to the very process of creativity.
Basically, children's crafts made of cones represent a variety of animals.
Piggy
Disassemble the lump on the scales. Roll the egg from the plasticine. Starting from the head, attach a lump of cones around the circle. As a tail, you can also use a wire or twig, and for the legs - sticks, greased with glue for fastening. Carefully fashion a triangle of ears from the plasticine and a snout with a pencil.
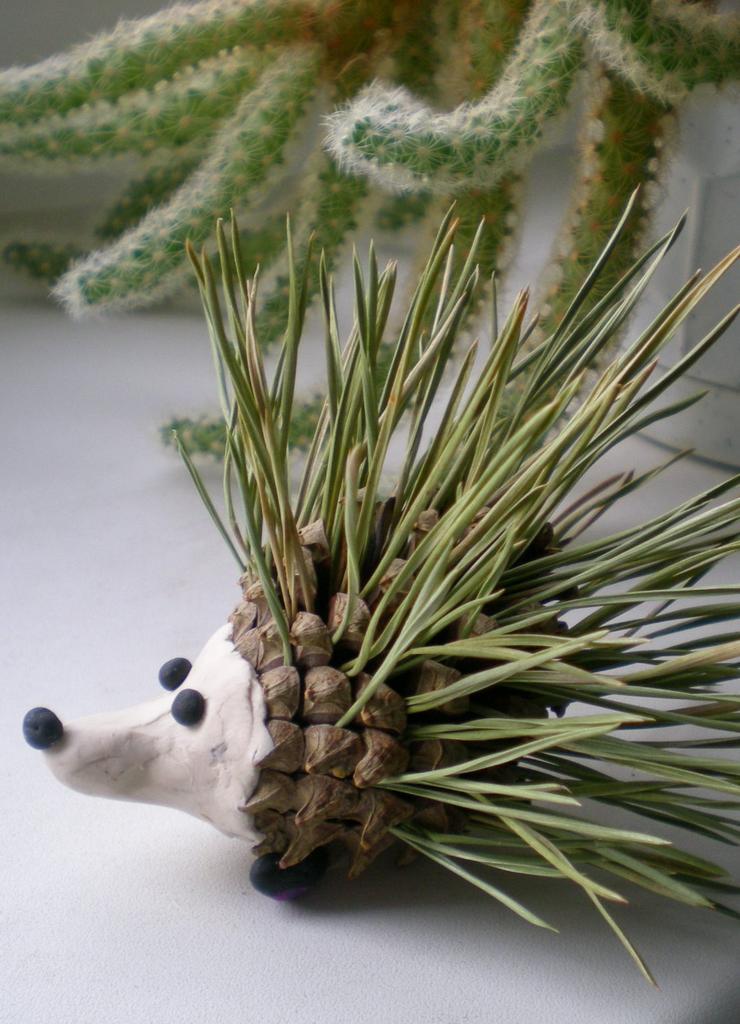
Hedgehog
The principle of creating an artifact made of cones in the shape of a hedgehog is no different from a guinea pig. As a basis, take a more voluminous cone, preferably with raised scales to simulate needles. For greater similarity, to scales, use a plasticine or a super-glue to attach pine needles. Make a plasticine muzzle and attach from one side of the cone. Use acorns, dried dogrose berries and fruits, or an apple, molded from plasticine, which you can attach to the bump that serves as a hedgehog body.
A fox
To create this craft, you need three bumps - for the body, head and tail. The smallest for the head, round for the body and more elongated upwards - for the tail. To the smallest, attach the muzzle and ears made of orange plasticine. For the cone-body you will need four legs. With superglue, fasten both bumps together, not forgetting about the tail.
Squirrel
If you learned how to make a fake odd-fox from a bump, then this one will not make you any difficulties. The only difference is that the head is best done entirely from plasticine, attaching the upper longer ears. For the tail, use a long bump, as an alternative - make a tail or clay plasticine.
Butterfly
For the manufacture of artifacts from plasticine in the form of a butterfly it will take very little time. The cone will serve as the body, and the rest is your imagination. Take a sheet of paper and fold it in half and using a knife, cut out the shape of the wing. So you get symmetrical details. Attach the wings to the base. From the wire or two twisted pieces of plasticine, make a mustache and attach it to the top of the cone.
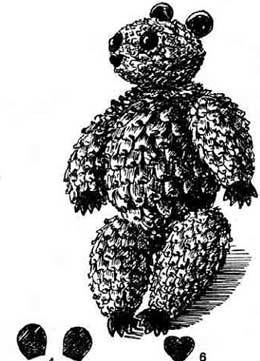
Bear cub
Children's crafts made of cones in the form of bears will look great in every corner of your apartment. All you need is one big cone and four small ones. As you may have guessed, the big one will serve as a trunk, to which we will attach four cone-legs. At the top end of the bump, with the help of clay, make your cub cubs, eyes and nose. That's all - your hack is ready!
Do you see how easy it is to make crafts out of cones? This is not only fun, but also a great way to spend time with your child. Follow the examples presented in the images and you will get a few more ideas for your crafts.