Fancy satin ribbons in women's clothes and everyday life are present for a long time: they decorated hair, framed curtains, bandaged gifts. But the new type of needlework that appeared not so long ago - embroidery with ribbons , allowed a new look at the usual accessory. For the most part, floral patterns are chosen for this type of embroidery. Extraordinarily beautiful voluminous compositions are decorated with fashionable dresses, elegant handbags, elegant cushions, and so on.
The most common motif of embroidery ribbons - roses. The proposed embroidery ribbons of roses and buds for beginners only at first glance looks very complicated. After practicing for a while in the twisting of flowers and their sewing, you can make unique voluminous embroidery roses with ribbons.
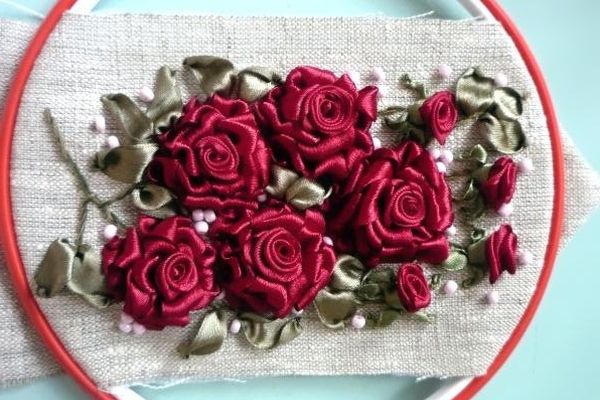
Master-class: embroideries with ribbons "Roses"
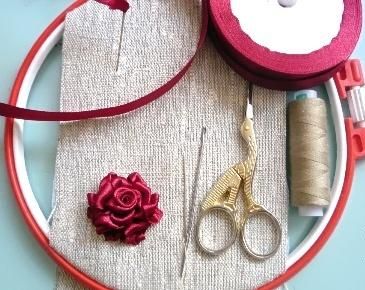
You will need:
- matter (in this case - flax);
- needle with a large eye;
- sewing needle;
- thick needle (for working with tape);
- a thin ribbon of burgundy, maroon, pale green and bright green flowers;
- beads of light green color;
- embroidery frame;
- scissors;
- Threads matched to the tone of the ribbons.
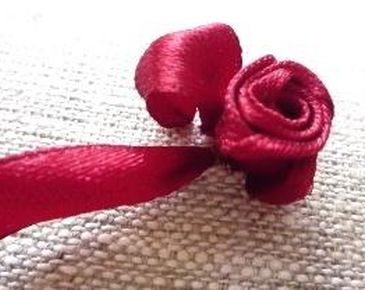
Embroidery of roses with satin ribbons
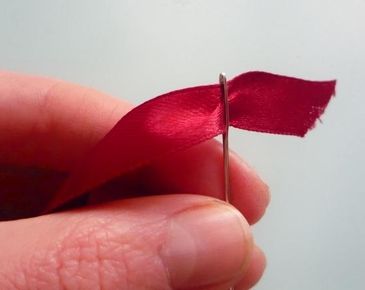
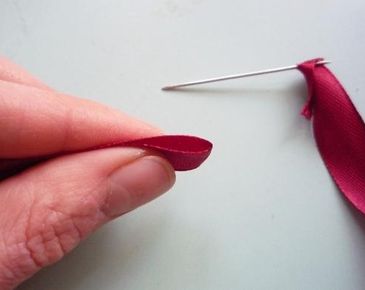
- We put a burgundy silk ribbon in the needle. To this end, cut off half a meter of tape, cutting obliquely to make it easier to put the ribbon. The tape is fully stretched and, retreating from the cut, we stick the sharp end of the needle.
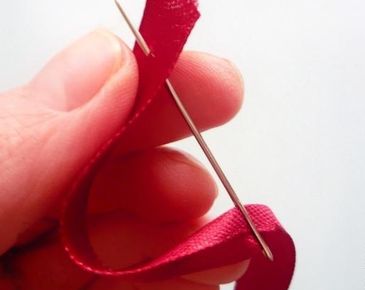
- We draw the ribbon, as if pulling a loop.
- We fix the ribbon in the eyelet.
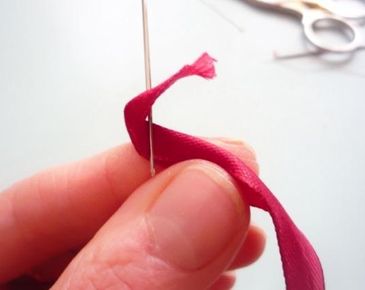
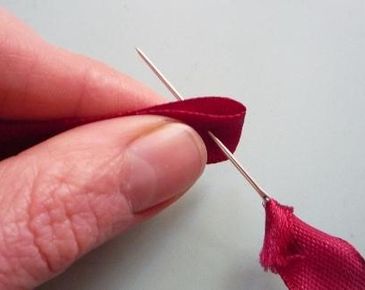
- The free end is bent and pierced.
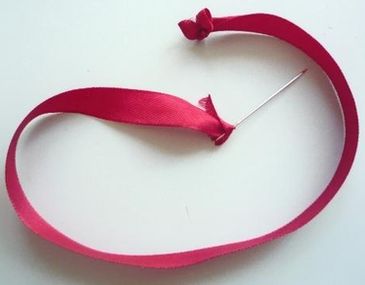
- We pass the needle along with the ribbon through the bent edge of the ribbon. Instead of the traditional knot at the end of the ribbon, we form a kind of bite. We lay the needle with the ribbon and proceed to the embroidery with thin ribbons of the rose.
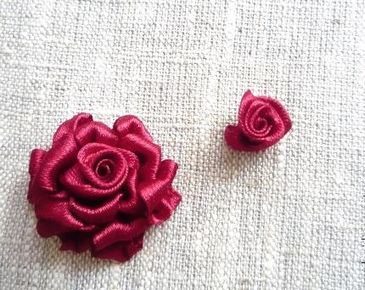
The scheme of embroidery roses ribbons
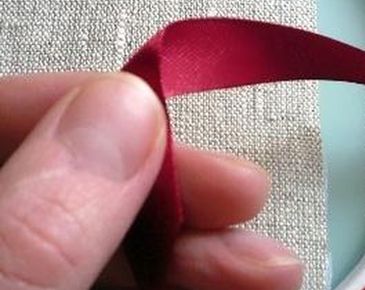
1st stage
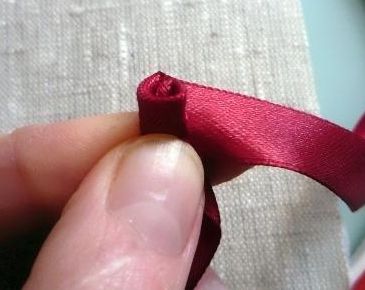
- We begin with the center of the flower. After measuring a short piece of maroon tape, wrap the left side of the ribbon at right angles to the bottom. The closed edge is turned into a "tube". The lower edge is carefully stitched with stitches, selecting the thread in the tone of the ribbon.
- We bend the ribbon from the bud outward, so that the upper edge is at the bottom, forming a turn around the core of the flower, fixing the turn at the bottom of the "tube".
- Similarly we perform the next coil. We do this in a few more turns, and each time fixing the newly created coil. We fix the thread, cutting it and the ribbon. We created an internal bud of roses.
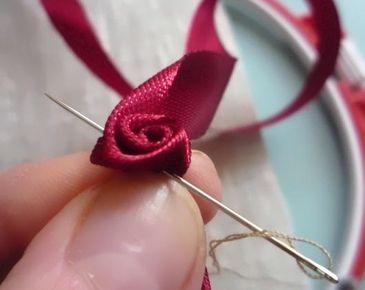
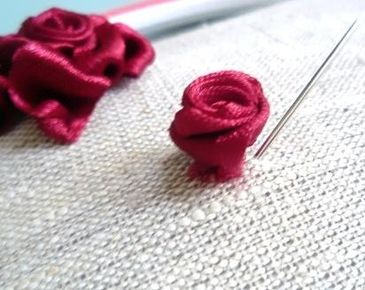
- Sew the resulting core of the flower to the matter.
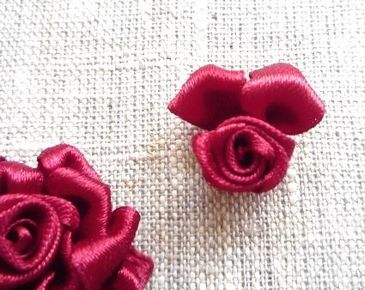
2 nd stage
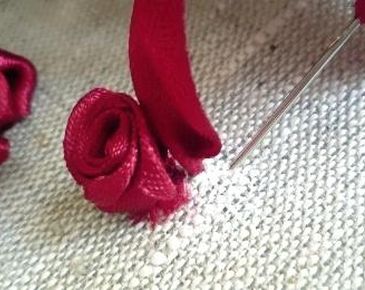
- We retreat from the core a few millimeters, piercing the matter from the inside with a needle with a satin ribbon tucked in, pulling out the entire tape is obvious. Then we pass the needle with the tape again inside out, slightly retreating.
- Using a thick needle, we form the rose petal.
- Similarly, embroider and form the rest of the petals of the flower around the core.
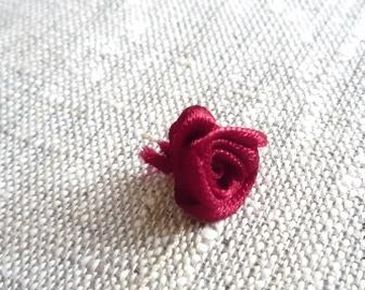
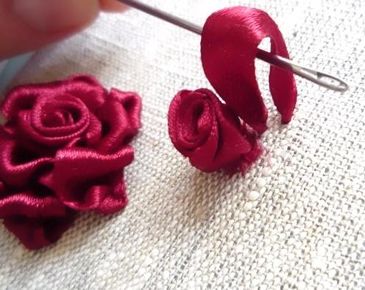
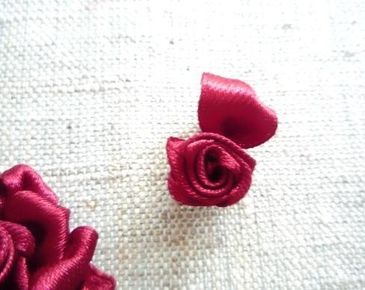
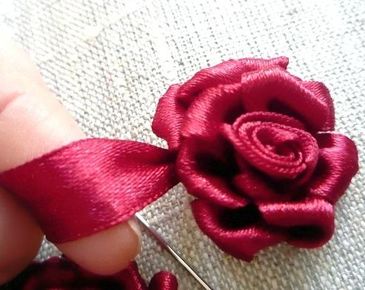
3rd stage
- We proceed to create the next series of petals. Matter is pierced from the wrong side, having receded from the previous row a few millimeters, we stretch the needle with the bandaged tape, so we form several petals.
- We need the flower to appear to be lying. To this end, pulling the tape open, form a loop and stick the needle on top of the ribbon, letting it down. We tighten the ribbon, creating a curl.
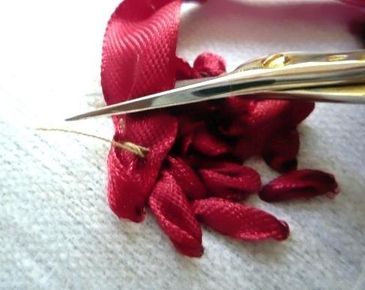
- We close a number of petals. We fasten the tape from the wrong side, cut both the thread and the tape.
- Important: The more loops are obtained, the more magnificent the rose. Petals should be laid more tightly.
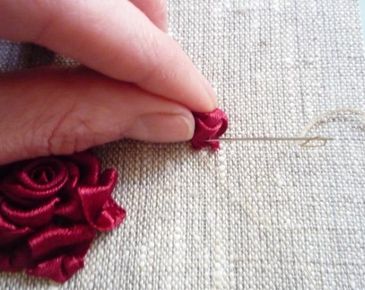
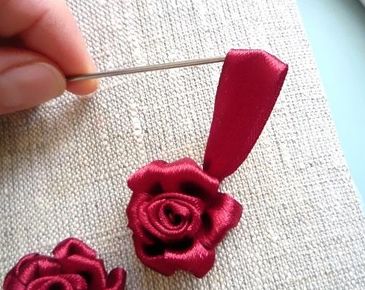
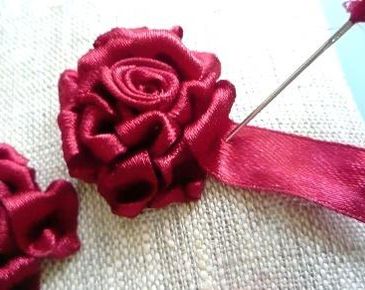
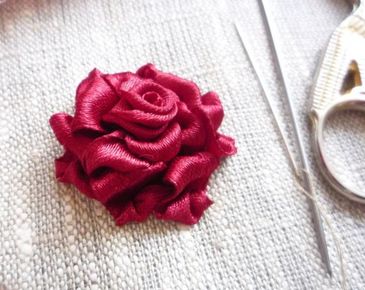
- We embroider the remaining elements of the pattern, placing them on the surface of the fabric. When embroidering ribbons, some of the roses are left small, not complementing them with lush petals. This technique gives a special charm to the finished work. We sew semi-transparent beads. Embroidery is ready!
Other colors can be embroidered with ribbons, for example, lilac .