Origami is a fascinating art of folding paper of various figures, paper crafts . And in this master class we will tell you how to make typewriters from paper in origami technique, and also show how to add a 3D 3D model of the car according to the scheme. This lesson will surely please children, and adults will bring a lot of pleasure. Therefore, stock up the sheets of colored paper and cardboard and create together with your kids a whole fleet of paper machines with their own hands.
Paper machines in origami technique
Required Tools
In order to fold the machines you will need:
- a square sheet of colored paper;
- scissors.
Instruction - Option 1
Let us consider in more detail how to make a machine made of paper:
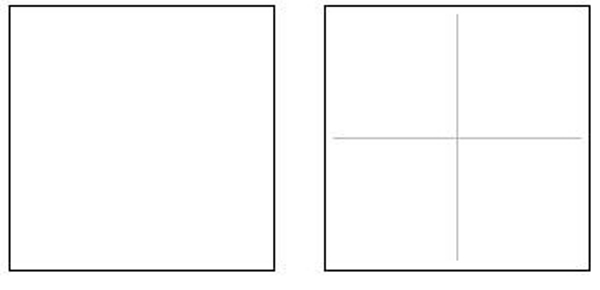
- Place a square sheet of paper into four parts, marking the auxiliary lines, and unfold it back.
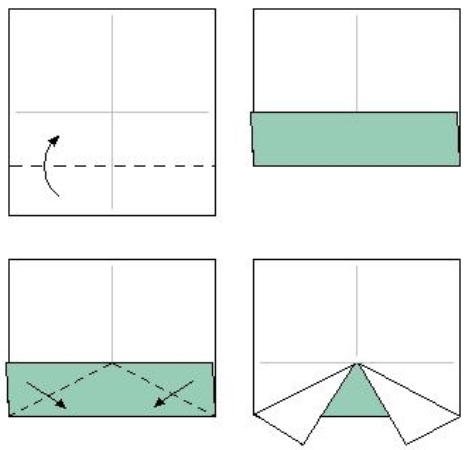
- Lower the bottom of the sheet, bend once more in half. Then bend the corners down, creating the wheels of the future machine.
- Fold the top of the sheet along the center line toward you.
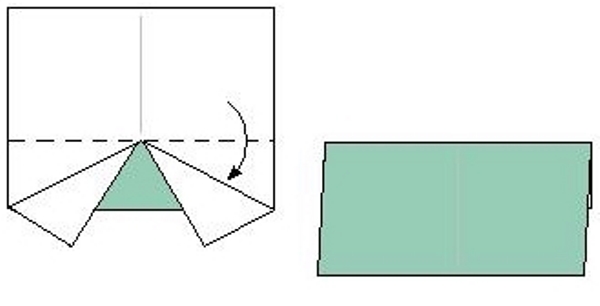
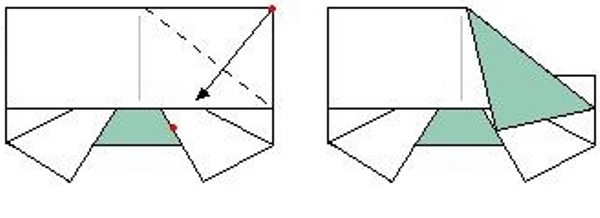
- Now bend the workpiece as shown.
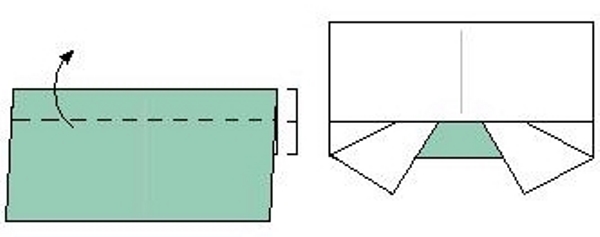
- Bend diagonally one of the corners of the top of the sheet, connecting the red dots indicated in the figure.
- Turn over the workpiece. A simple model of the machine is ready! (Photo_6)
- Instruction - Option 2
- Now consider how to do a three-dimensional typewriter made of paper in origami technique.
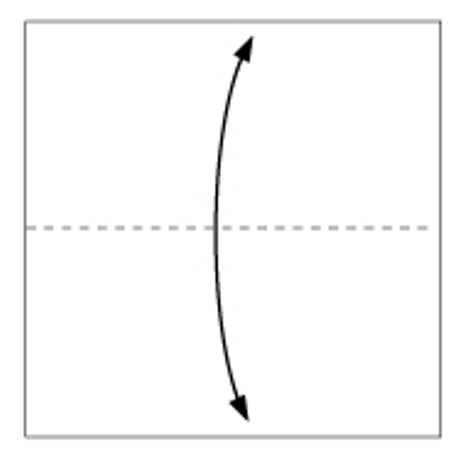
- First, select a sheet of paper of your favorite color, fold it in half and turn it back.
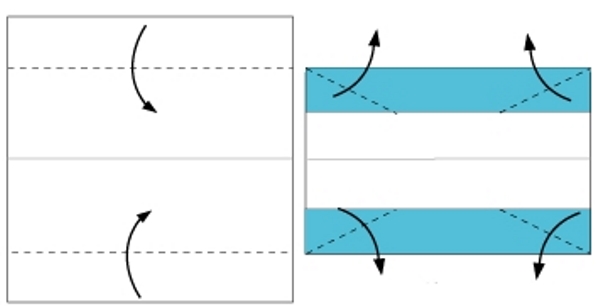
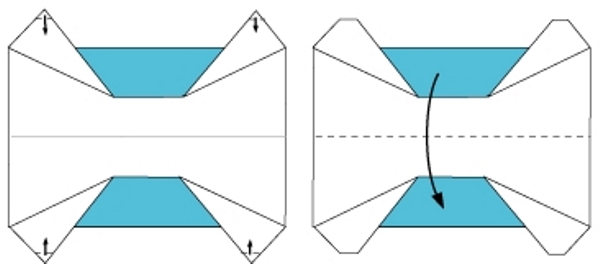
- Now each of the formed halves of the sheet is visually divided into three equal parts and bend one third from above and one third from the bottom to the inside of the workpiece.
- Unbend the corners from the four sides, as shown in the figure.
- Fold inside the small corners of the vertices of the triangles to give a more rounded shape to the wheels of our hand-made paper machine.
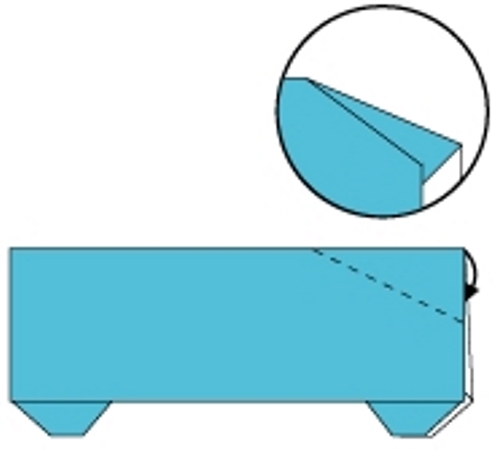
- Bend the workpiece in half and put it in front of you, placing the wheels down.
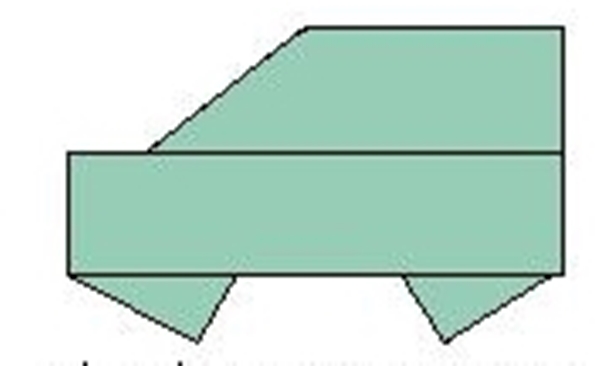
- Fold one of the corners of the workpiece inward, along the dotted line shown in the figure.
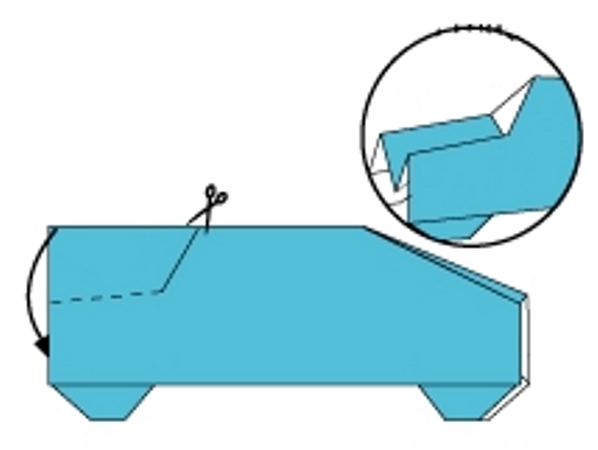
- The second angle is slightly incised and also bent inside. So we got the windshield and hood of our model of the car.
- The paper machine is ready! It remains only to draw on it the glass, doors, lights and other details at will.
3D typewriter from paper
Necessary materials
In order to make a three-dimensional typewriter from paper you will need:
- Printer;
- a sheet of office paper;
- scissors;
- cardboard;
- glue;
- color pencils, markers or paints.
Instructions
Let us consider step by step how to fold a typewriter out of paper:
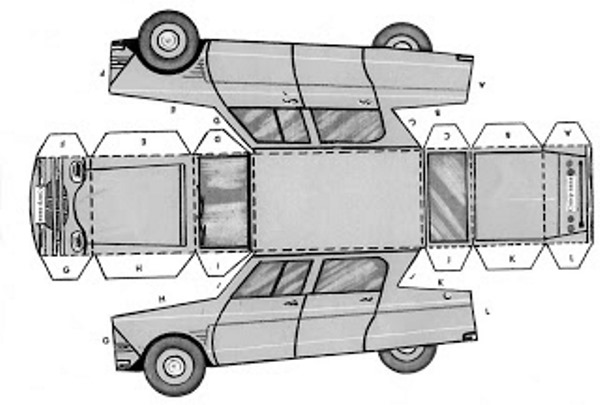
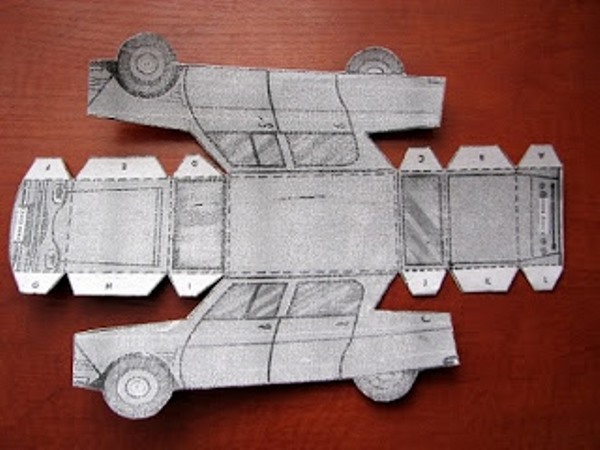
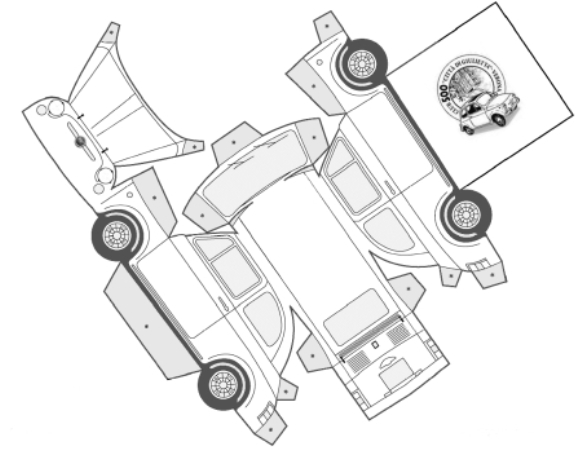
- Choose the model you like and print it on the printer.
- Then paste the printout on a sheet of cardboard so that the machine model is stronger, and carefully cut out the contour.
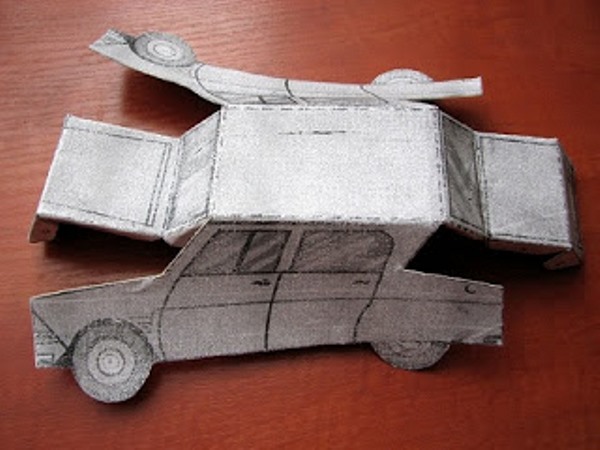
- Making a typewriter from paper according to the scheme is very simple also because all the auxiliary lines are already marked. Bend the model along the dashed lines and wrap the white parts of the workpiece inside.
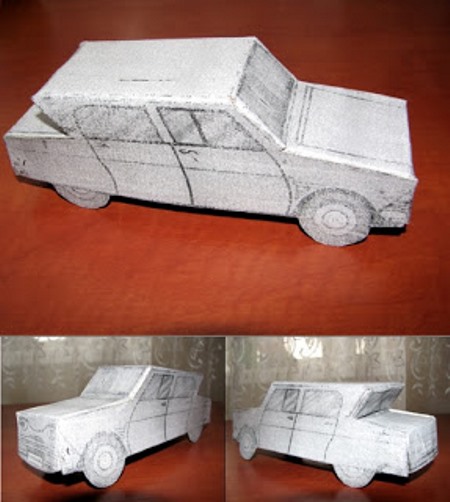
- Glue the paper car, connecting the white ends. If the cardboard that you have chosen is sufficiently dense, then it is probably better to use super glue, rather than PVA.
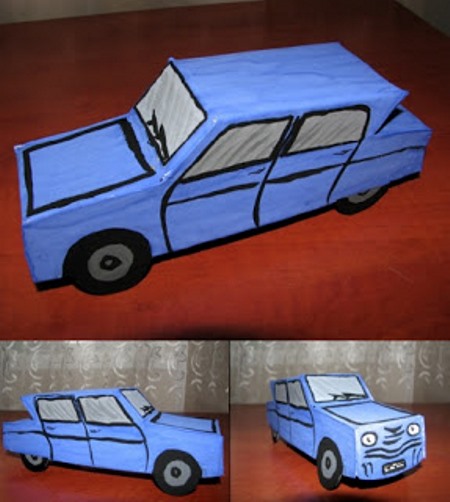
- Now it remains only to paint our car.
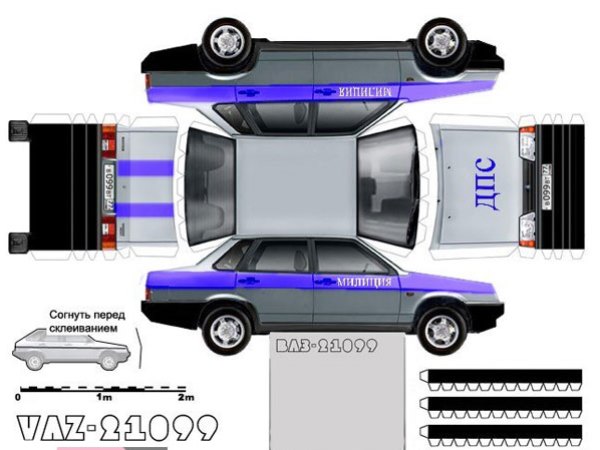
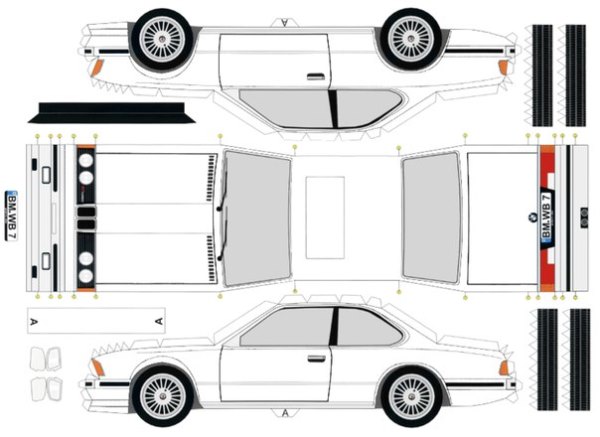
Schemes of paper machines are also colored. In this case, you do not need to paint anything. And to get a realistic miniature model of a car, it's enough just to print out the scheme in good resolution on a color printer and fold according to the instructions. But if the scheme of your car is black and white or there is no color printer at hand, then the model can be colored with pencils, markers or paints. Here you can give vent to your imagination and add an interesting pattern or make a car of unusual color.
| | | |