Recently, soft toys from socks have become quite popular. And this popularity, of course, is well-deserved, because homemade toys made from socks are very nice and interesting, and the material necessary for their creation has a very affordable price, so in this type of creativity you can not limit yourself, and sew so many funny toys from socks , as you want.
So, let's figure out how to make a toy from a sock, and also what it will take.
Toys from socks - a master class
In this master class, we'll figure out how to sew a sociable bear from socks, which is a kind of symbol of children's happy years. And since toys made from sock with their own hands are very easy to make, you can also acquire this chic symbol that will smile at you from the couch and warm your pillow for you in the evenings.
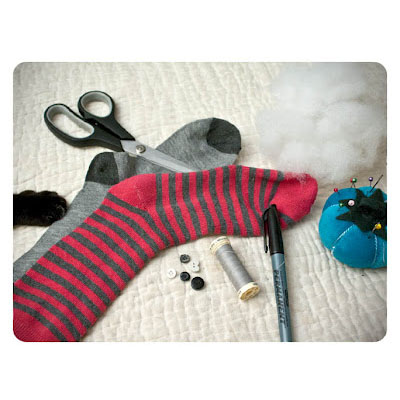
First, let's see what we need to sew this soft toy from the sock:
- two socks (one will be used for the trunk, in this case it is striped, and a piece of the second sock is necessary for the bear's nose and in this master class it is gray);
- thread;
- needle;
- pins;
- scissors;
- a marker or pencil for charting the details of the bear's torso on the toe;
- three small black buttons, one small white button, and also you can take some buttons to decorate your bear;
- "Filling" for the bear (sintepon and others like him).
With what we need we figured out, and now we'll go directly to the description of the process of how to sew a toy from a sock.
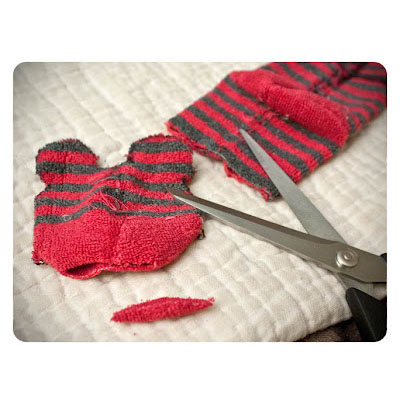
Step 1 : Turn the sock inside out and divide it first using a marker, and then with the scissors as shown in the photo, creating the basis for the torso of the bear. Cutting the head, cut off the small part from the bottom of the head (the tip of the nose). This will be the neck of the bears and the hole through which you will fill it. Next, cut out the remaining parts of the bear's body. In total, you must have four parts - a head, a trunk with legs and two arms.
| | | |
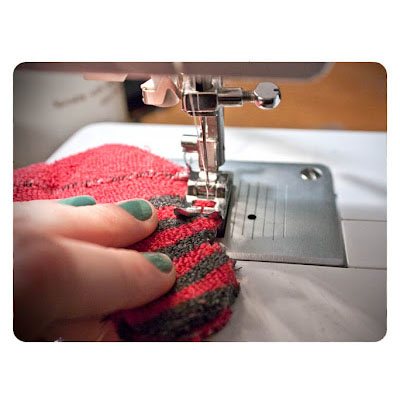
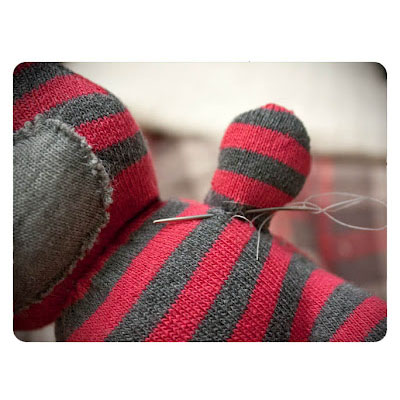
Step 2 : Now, sew all your details, still holding them to the wrong side so that the seams are hidden inside the bears. You can flash everything manually, or you can use a typewriter for this. Leave the neck not tied at the trunk and head, and also the bases of the hands, to fill them through these holes.
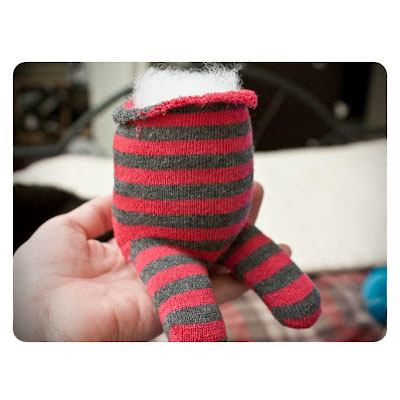
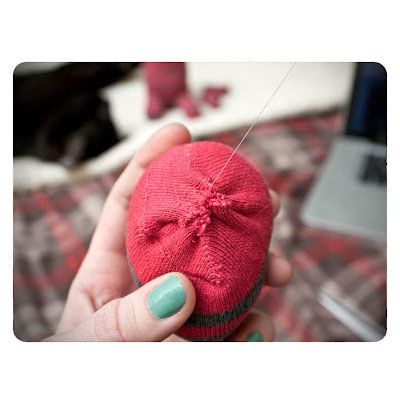
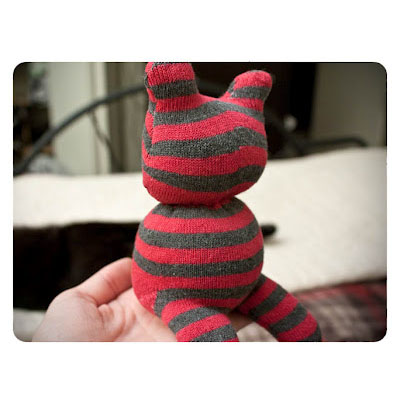
Step 3 : Unscrew all the parts now on the front side and fill them with a sintepon or other "stuffing" for the body of the bears. After stuffing a bear, manually sew the hole through which you stuffed it, on the trunk and on the head. And also manually sew the head to the body.
| | | |
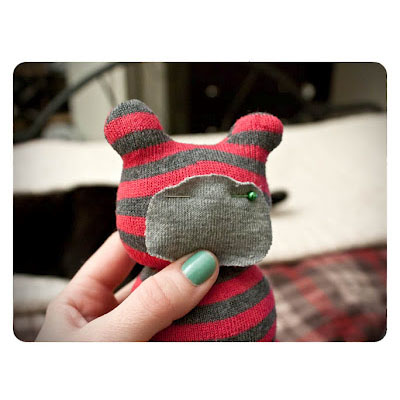
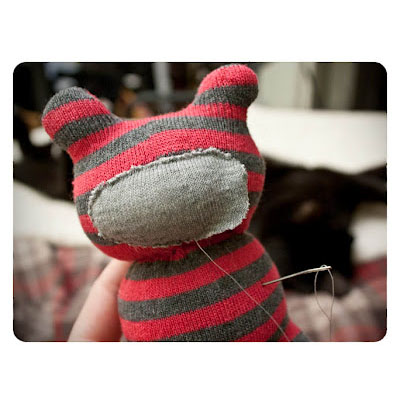
Step 4: Now from the other sock, cut out the muzzle for your bear. It should be oval in shape, and in size just a little less than his face. After cutting, attach it to the head of the bears with a pin, and then gently sew it. In this case, you do not need to rush to get the stitches neat, and the muzzle was well fixed.
| | |
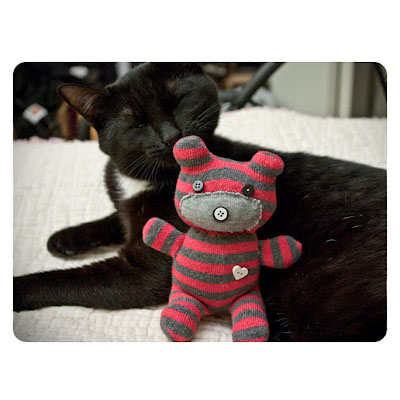
Step 5: It's time to revive our bear by creating a real face for him. Sew the bear two small black buttons on the eyes, and also make a spout. In this master class, two buttons were used to create the nose - black, as well as white, a little smaller, which was sewn over the black one.
Step 6: And the last step is to sew your little bear hands that have long been lying aside, waiting for their high point. That's all. Mishka is ready. You can sew him some pugovichku for decoration or something like that.
| | |
Toys of socks with their own hands - it's very simple, fun and interesting, you can also make a bunny , a doll or a snowman .