Repair of the ceiling often ends with the installation of decorative ceiling skirting, called professional fillet. These interior details are used not only for decorative purposes, but also carry a purely practical function: using skirting can hide the uneven joints between the ceiling and the wall. In addition, the appearance of the room without fillets will seem unfinished.
In any room there are internal corners, and also, if the ceiling is of complex shape, there are also external corners. Therefore, many owners who do repairs themselves, the question arises: how to make the angle of the ceiling skirting. Let's find out how to properly make the inner and outer corners of the ceiling skirting.
To trim the corners of the ceiling baguette we need the following materials:
- Miter saw;
- sharp knife;
- stool;
- ruler, square, pencil.
How to make the outer corner of the ceiling skirting board?
In an ordinary room without any protrusions, there are four internal corners. Consider how to properly cut the ceiling moldings for gluing them in such corners.
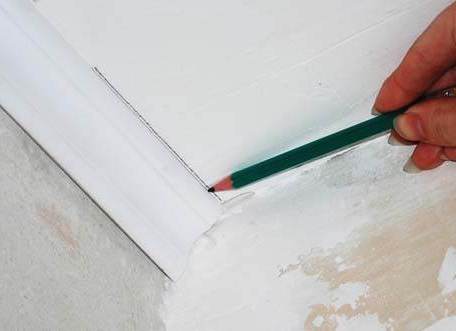
- Before proceeding to gluing the fillets, it is necessary to make the markings: measure the perimeter of the ceiling, determine the joints of the skirting. In addition, it is necessary to measure the angle between the ceiling and the wall: for flat surfaces, it should be equal to 90 °. In this case, adjacent skirting boards should be cut at an angle of 45 °.
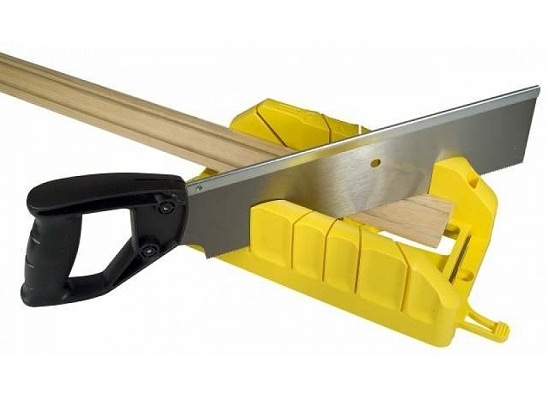
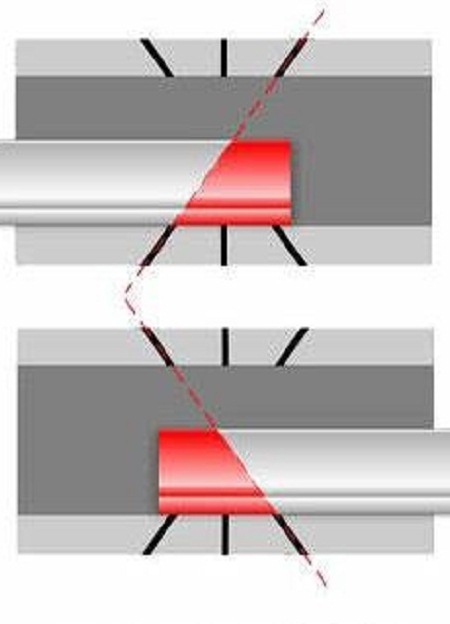
- Typically, to make an angle at the ceiling skirting from PVC, you can use a sharp clerical knife. Baguettes of more dense materials can be cut with a saw or a hacksaw, but it is best to use a special carpenter's tool - a chair, which is a groove with slits. The plinth is inserted into the stool and cut at an angle of 45 °. Similarly, the opposite skirting is cut off.
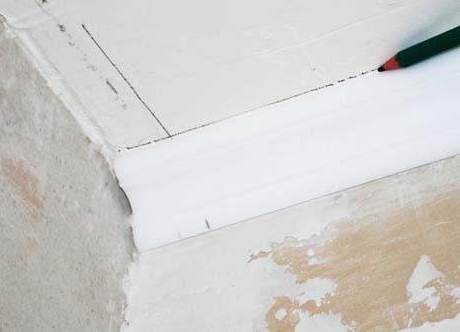
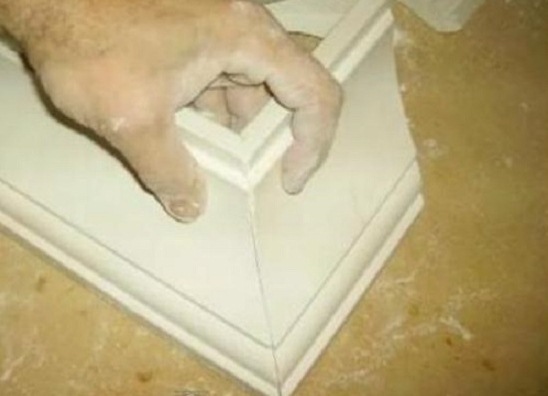
- After that, the cut pieces of baguettes should be tried on, attaching them to the inner corner. We check the smoothness of the trimming and the density of their connection. In the case where the angle between the ceiling and the wall is uneven, you should make the markings in place, and then use a sharp knife to fit some of the skirting boards. Now you can glue the skirting on the ceiling.
| | |
How to make the inner corner of the ceiling skirting board?
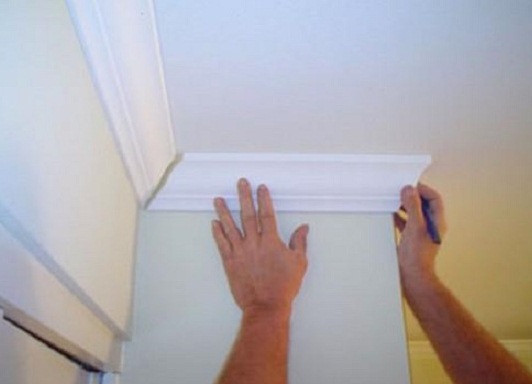
- As practice shows, to make a smooth outer corner of the ceiling skirting, you can also use the chair. This very convenient device will help to cut the baguettes evenly at the required angle. First, the plinth must be attached to the corner and make the markings. Then the bar is inserted into the side by the side, which will be glued to the wall, and the opposite edge should be on the bottom of the instrument. Cut the fillet at an angle of 45 °. In doing so, the plinth should be kept as even as possible, otherwise the cut will be uneven and an ugly slit will appear on the prominent outer corner, which will be difficult to seal up. Similarly, cut off the second bar.
- Now you need to bring both parts together and check the smoothness of their cut. With the correct cutting between the skirting, there is no gap, and their edges are closely adjacent to each other. If the angle between the ceiling and the wall is uneven, then the first plinth is cut off in the stool, and the second is manually adjusted until their slices coincide.
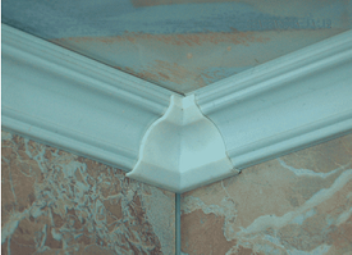
- Joints on the outer corners of the ceiling skirting can be decorated with special plastic corners.
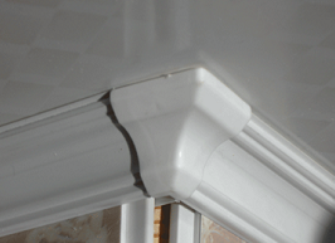
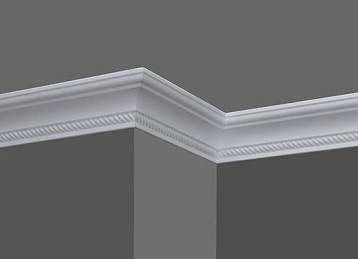
- Here is how the ceiling skirting glued to the inner and outer corners will look.
| | |
Before you start trimming skirting, it is better to practice on small pieces of baguette. When pruning, you can leave 1-2 mm in reserve, and when fitting these extra millimeters will grind off.