Probably, young mothers, like no one else, are waiting for spring and warmth. Over the winter, almost all the domestic "entertainment" for your baby was transferred. But it is growing and requires more and more difficult games. How to be, if at home it became completely boring? What's new to come up with in order for the joint pastime with the child to be productive and contribute to its development? The answer is simple - go in for handicrafts from plasticine and blind something unusual, for example, a transformer.
How to mold a transformer from plasticine?
So, you decided to make a plasticine transformer. Now, you need to collect the "arsenal" of the necessary materials and tools to carry out your plan. First, and most importantly - desire, you already have. In addition to it, you will need a wire, black and yellow (or any other color) plasticine, as well as several tools for working with plasticine - stacks, loops and knives. But, in the absence of those, use improvised tools, such as a paper knife, coins, a needle, an awl, a metal ruler, an unnecessary plastic card, or any other device that will make your work easier.
Collect your thoughts, prepare a "battlefield", put an oilcloth on the workplace so that your baby, at work, does not present you with "pleasant" surprises in the form of stains from plasticine.
Now that you are mentally and physically ready for work - let's get down to the detailed instructions.
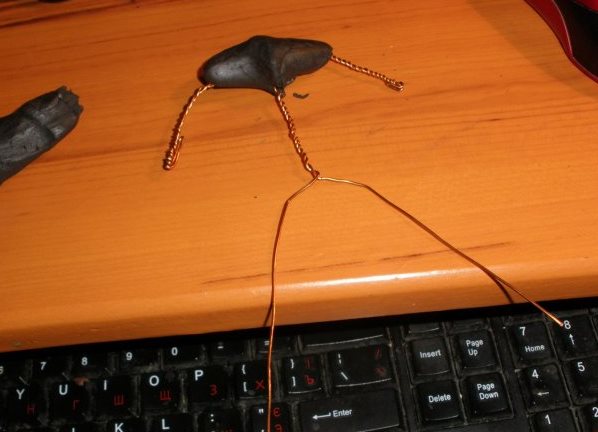
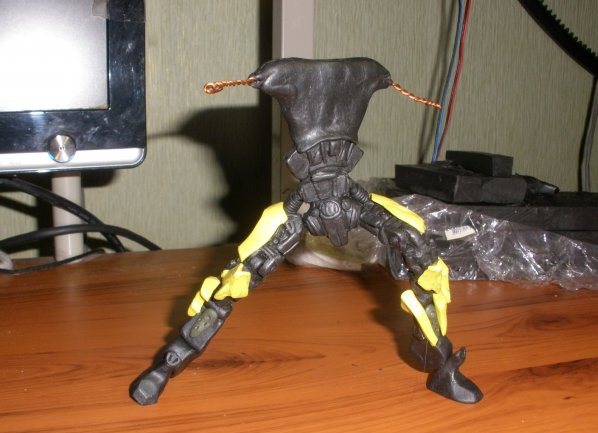
- In order for the plasticine transformer to look realistic, and as it was more durable, you need to make a wire frame. For this, we cut it into three parts. From one we make the upper limbs, from the other the body and one foot. The third wire spirally "offend" the future hands and torso. When we reach the lower part of the body, the second leg is made from the rest of the wire. The frame is ready! For reliability, strengthen the part where the hands and body join together with a thick layer of black plasticine.
- Since molding a transformer from plasticine is not an easy task, we advise you, for the greatest accuracy, to open a large picture with the original transformer. Thus, it will be easier for you to orient yourself in proportions and small details.
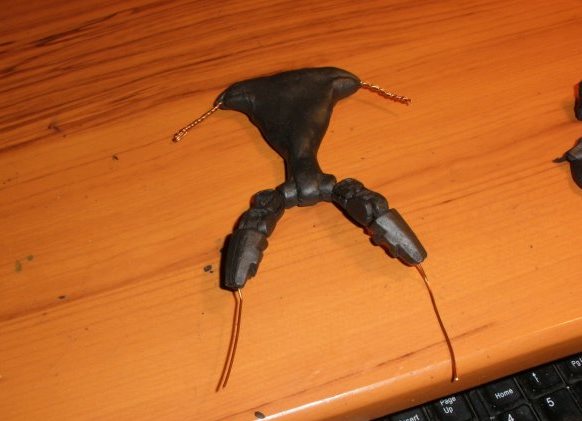
- So, we continue to do the trunk. Prepare the details of the desired shape that will form the basis of the legs. When they are ready - put them for a few minutes in the refrigerator, and cut the ends of the wire - their edges should be sharp. When the clay is cooled, start "stringing" the parts onto the wire.
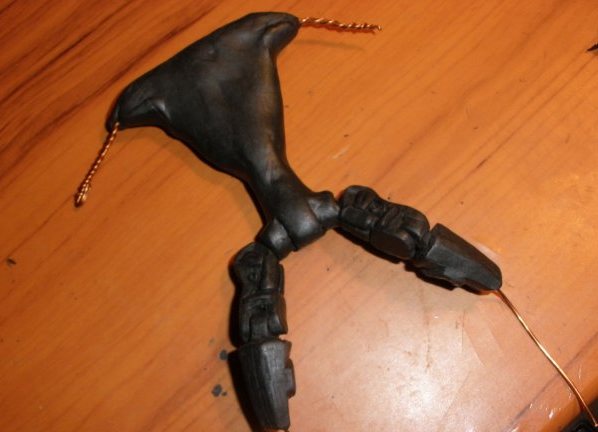
- Step by step, attach the part to the part. If suddenly during work you have crushed some part a little - do not be discouraged, you can correct a situation with the help of an acute tool. To do this, you do not need to remove the module from the wire, but simply correct it directly on the frame.
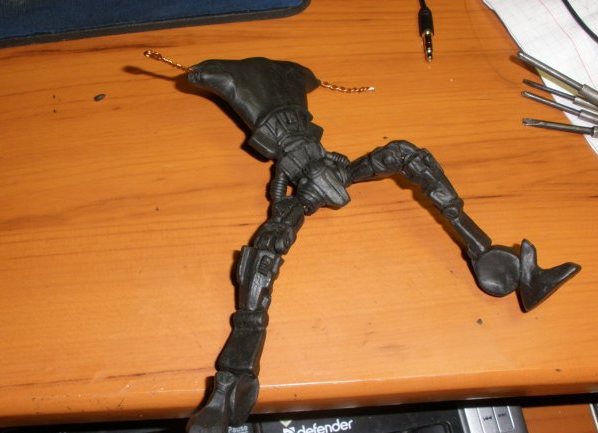
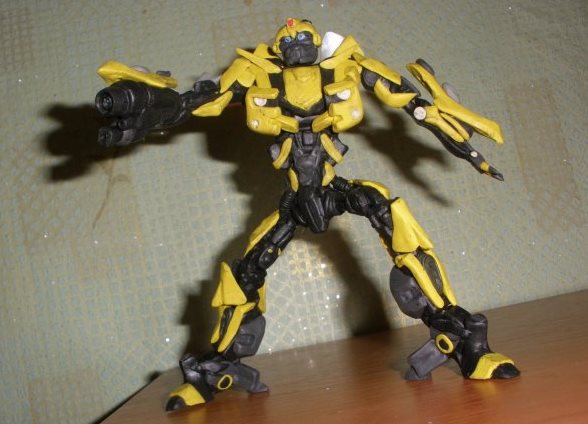
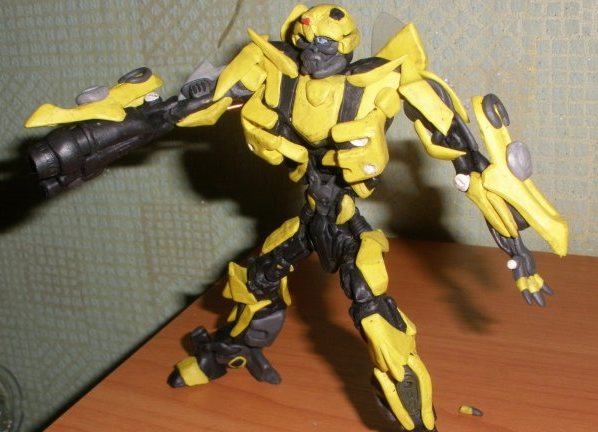
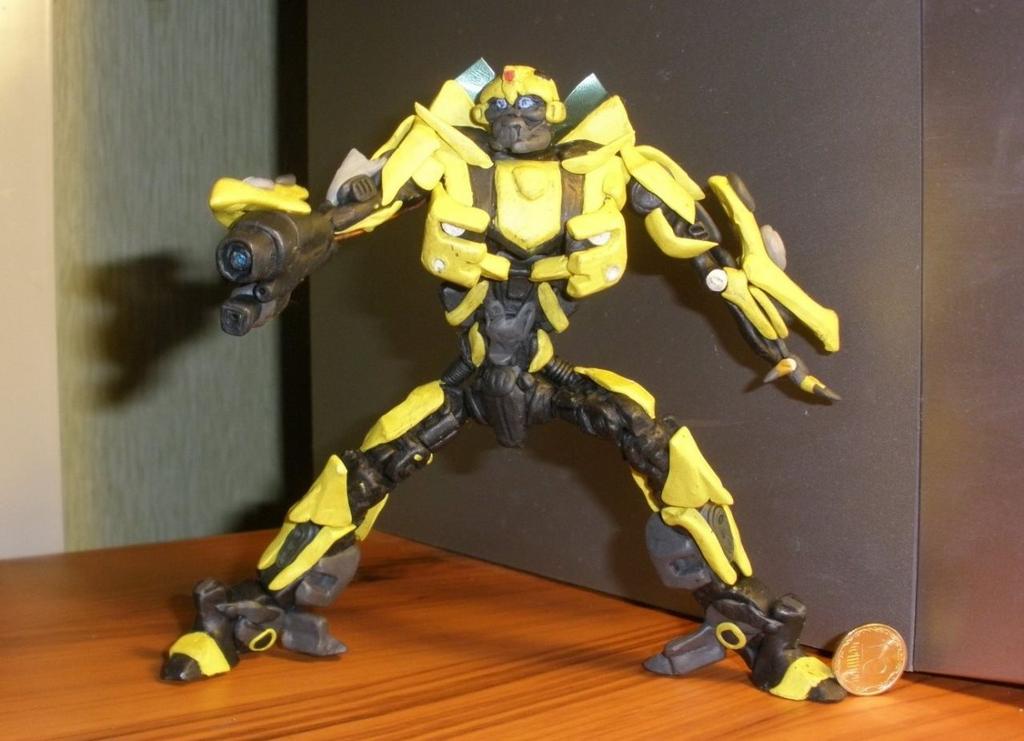
- Give a characteristic posture to your plasticine transformer.
- Now, take care of the details of the yellow (colored) plasticine. Before you start work - thoroughly wash your hands and the work surface, as the black plasticine strives to leave "traces" everywhere.
- Add the missing details - make a head, draw a "thin face" with a thin needle, from blue plasticine blind eyes, and from white - details of a suit.
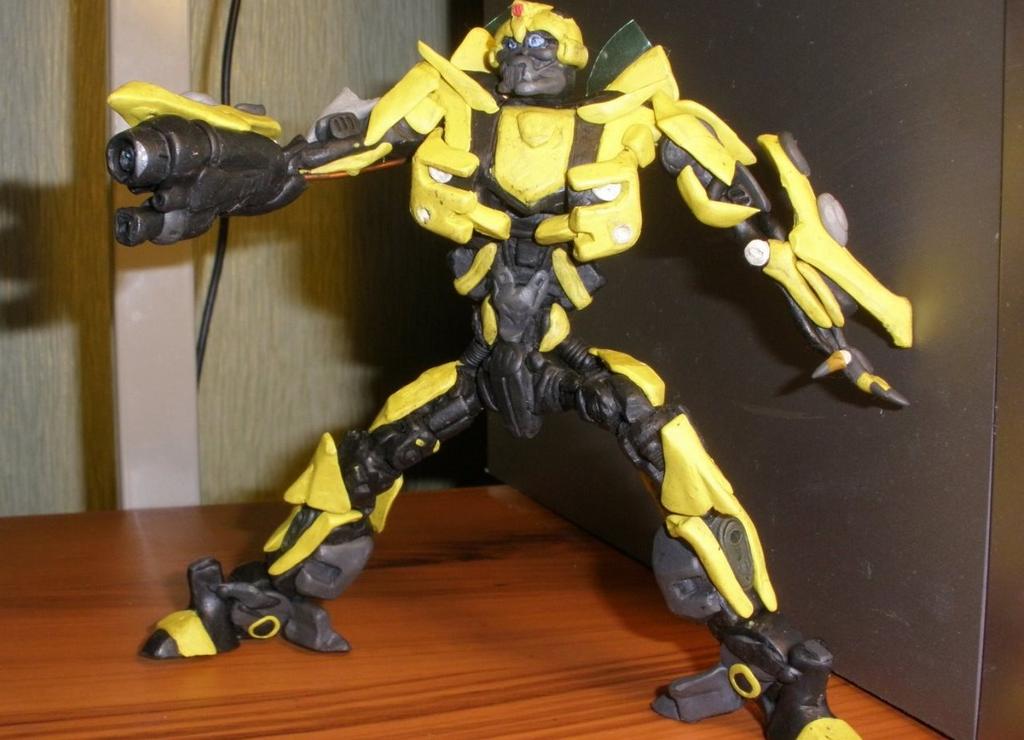
- Correct the elements of the costume with a thin sharp object. Voilà! The plasticine transformer is ready!
| | | |
| | | |
| | | |
Only recently you were wondering how to make a transformer from plasticine, and whether this is real, and now this handsome man is standing on your table and pleases the child! Just be careful, so that the fruit of your overwork and laborious work does not melt, we advise you to keep it in a cool place!