One of the good ways to spend time with children is to make a snowman yourself. It is not at all difficult to do this, as the materials for this will need the simplest ones, and now you can not be sure of it.
Before you make a skeleton of a snowman, prepare a detachment of fleece and a small piece of cotton cloth. If you have an old knitted sweater at home, which has been lying idle for a long time, and the hand does not rise to throw, we bravely sew a snowman from it.
How to make a snowman "Brr"?
So, here's a step-by-step master class on making a snowman from a fabric.
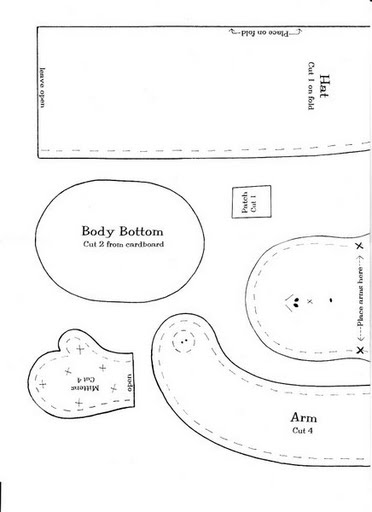
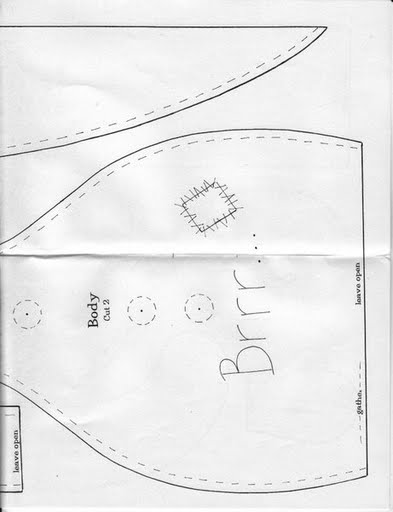
- To begin with, from the pattern of the snowman "Brr" we transfer all the details to the fabric. The body of the snowman will be made of fleece, and his clothes made of cotton fabric.
- We transfer the pattern to the fabric. We will make the bottom of the main fabric with a doublerine, for rigidity.
- The front part of the snowman toy body must be sewn with non-woven, as this will make the embroidery process more convenient, and in the future your snowman will not crawl.
- We put an inscription on the fabric. This can be done with a vanishing marker. If the size of the snowman allows, instead of a marker, use a piece of sewing chalk.
- For embroidery, it is better to use a string of floss. To the inscription was more voluminous, it is better in three strings. For the inscription, the seam "back needle" is suitable.
- Outwardly it will resemble a machine line.
- Embroider the muzzle with black and pink thread. But here it does not matter.
- From the cotton and well-stretched fabric we cut and sew a hat. We turn out. Now the cap is only sewn.
- Further we make gloves. Do not forget about the allowances.
- We make pens. Be sure to work on the concave lines with scissors "zig-zag" or just make a few cuts on the concave lines. All roundness must be cut off.
- We turn and stuff it. It is necessary to fill in not too tightly, because then the handle simply can not lie.
- Now we work the mittens with scissors, as well as for the handles.
- We turn out and stuff a little, but leave room for stretching.
- On the handle, tighten the mitten and fasten it all with a pin. Leave the allowance about 1 cm.
- We fasten the details to each other with a hidden seam.
- The first part of our snowman is ready. We put it aside.
- Now make the body of the snowman. Before stitching, sweep the parts. After the machine, treat the part with already familiar scissors.
- Fill the body with a snowman.
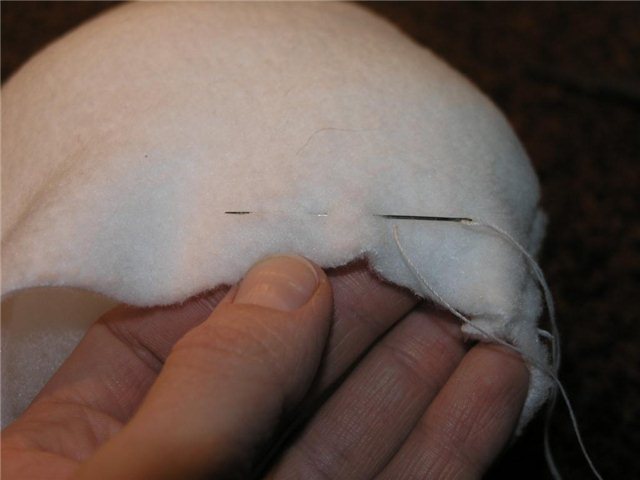
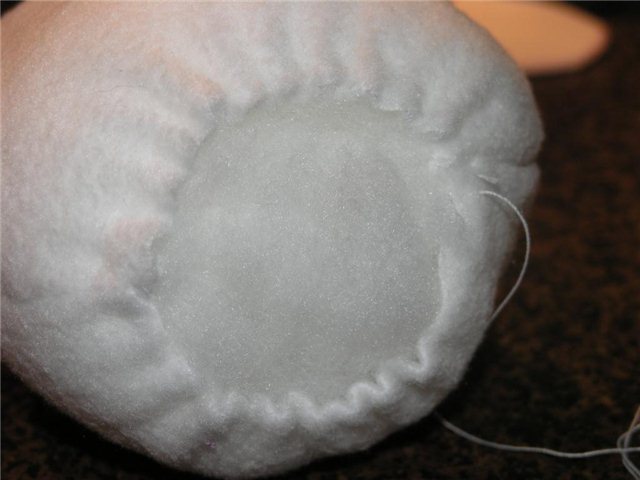
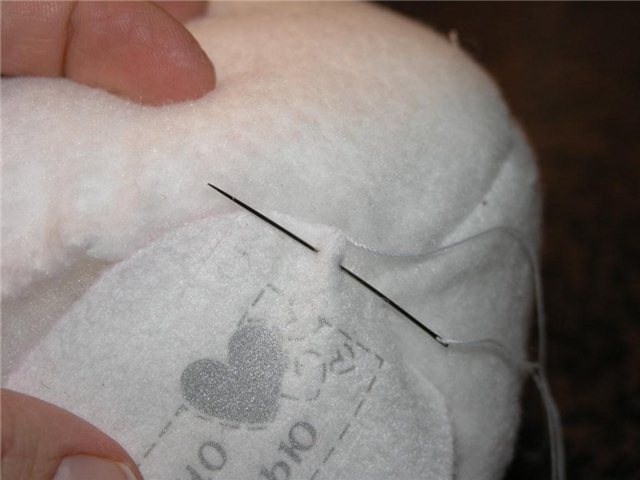
- We sew the bottom of the body with the seam "forward the needle". And we pull to the size of the bottom. Next, we sew the bottom and the body of the snowman.
- We put on the hat and gently sew it with a hidden seam. To make the snowman seem more realistic, we make folds on the cap and fix it with a few stitches.
- Now try on the knobs and sew them in several places, which are indicated by arrows.
- A more "cozy" snowman will make the decor in the form of a patch. For this, a linen-type fabric is suitable. Pattern is a small rectangle.
- We make a small fringe, pulling a few strings from each side.
- Sew a patch.
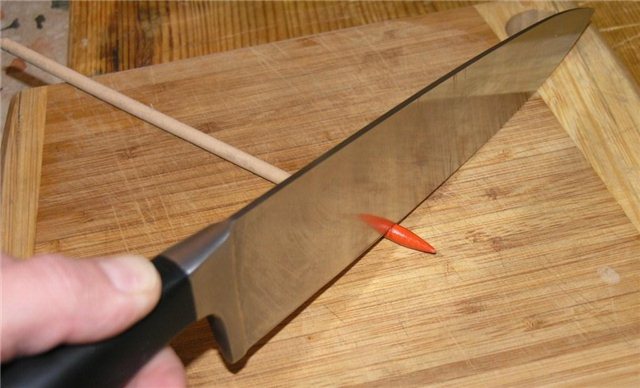
- Now you need to make a nose. To do this, you need acrylic paints, an orange stick for manicure or one-off for sushi.
- If necessary, we sharpen the wand a bit with a sharpener and process it with sandpaper.
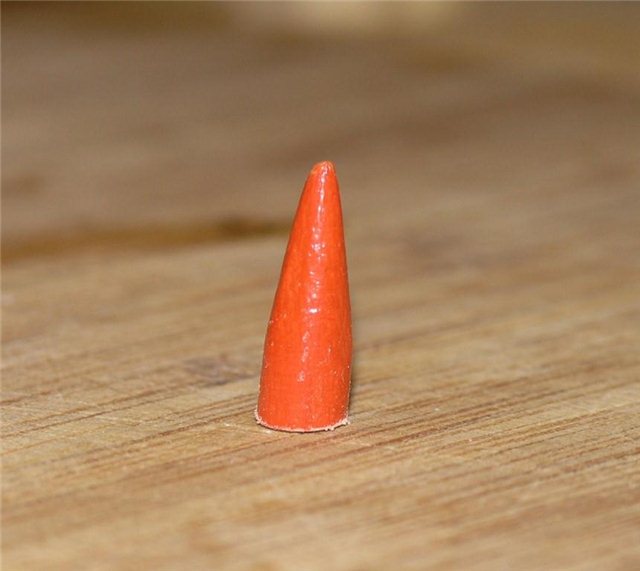
- We paint the nose in several layers. Each layer should dry well.
- Now, lightly rub the finished spout on the hard part of the sponge to remove any unevenness of the paint.
- We dip in an acrylic varnish and we impregnate with a nonwoven napkin.
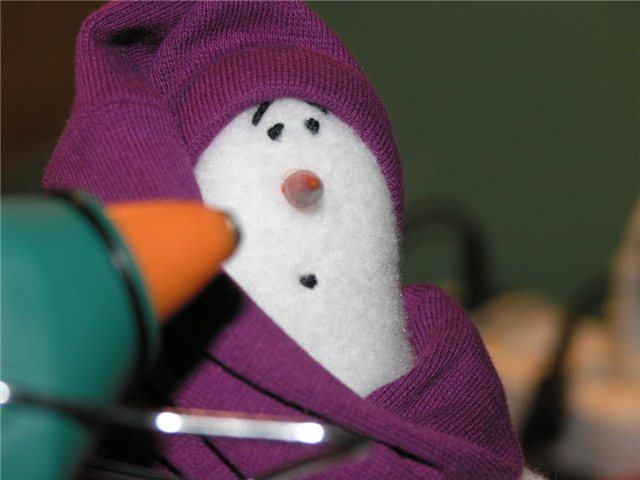
- Crop and work the cut with sandpaper. Now you can attach a spout to a feast with a glue gun.
| | |
| | | |
| | | |
As you can see, the master class is simple, and the snowman will get very warm and cozy.