Mood always creates little things. Decorate your desktop with the help of various cute and useful trifles can be hand-made. For example, a glass for pencils and pens can be made in various techniques. Looks beautiful in the technique of decoupage or from salted dough. A pencil glass in origami technique will also decorate your workplace.
How to make a glass for pencils?
It is very interesting to look at the decor of a glass for pencils made of seams from jeans. If you have an old pair of jeans, then you can make a very interesting thing from them.
1. Before making a glass for pencils, you need to prepare strips. Carefully cut all the seams from the clothes. The longer the seam, the more comfortable it will be to weave.
2. Then try on the length of the vertical bars. Do not forget to add a little to the allowances. Little trick: all short seams are better to put on vertical strips, and the longest to leave for braiding jars, then you do not have to constantly add stripes.
3. The number of such bands must be odd. This is how it looks from below:
4. To fix the strips and maintain the stability of the pencil cup, cut the strips in half and fix it with a hot-melt adhesive (the usual Might Crystal knead also fits perfectly).
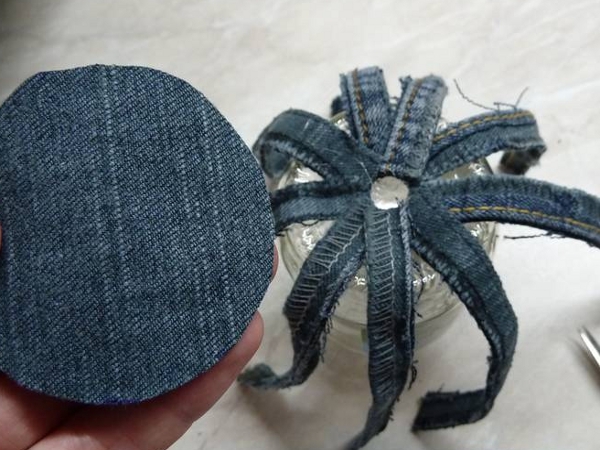
5. Place the joint zadekoriruem jeans fabric. Cut the circle according to the diameter of the bottom.
6. Then cut and fasten to the bottom on the glue.
| | |
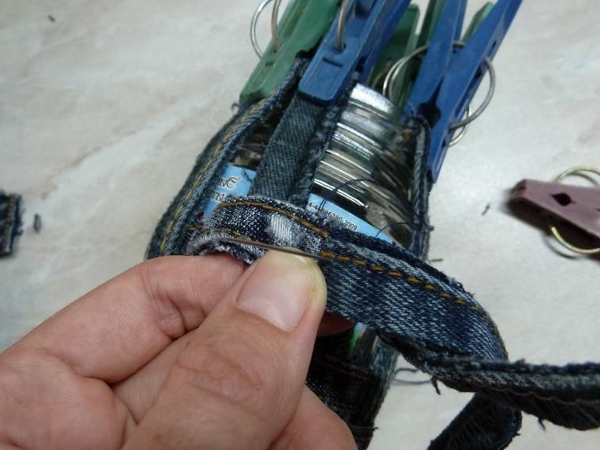
7. Now we begin to "weave" a glass for pencils with our own hands. We lift the strips and fix them with clothespins.
8. Using glue we fix the first horizontal strip under one of the vertical ones.
9. We will weave in the basket technique: we carry out a horizontal strip, then under the vertical one, then above it.
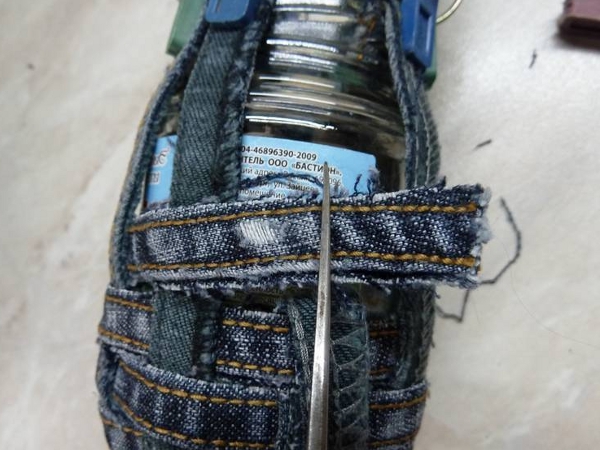
10. If necessary, lengthen the seam with a little trick. We cut off the remainders in such a way that the end can be fixed under one of the vertical strips. Then, in this place, attach the next strip with inconspicuous stitches and continue to weave.
| | | |
11. When working, try to tighten the seams very tightly so that no voids form. If necessary, you can at the end slightly tighten the seams with a thread.
12. In the end cut off the excess.
13. Next, decorate the edges with braid or lace. You can put it on the glue or gently sew it with secret stitches.
14. You can decorate the glass with different beads, flowers from ribbons or plant thermal pictures.
15. Our glass for pencils with our own hands is ready.