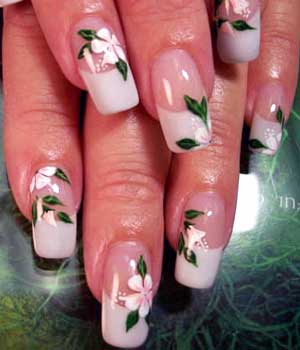
A neat and beautiful manicure today is an absolute must have every girl at any time of the day, night and year. Color trends vary from season to season, but the essence remains always the same - the state of the hands says a lot about the woman. For those women whose nails are far from ideal for various reasons and there is such a process as build-up.
The main types of nail extensions
Nail extensions can be performed by different technologies. But the two most basic and popular ones are gel and acrylic nail extensions.
- Acrylic nail extensions are made on the basis of a chemical reaction that occurs between the acrylic monomer, acrylic powder and oxygen.
- Gel extensions are performed using a special photopolymer material, the hardening of which occurs only after exposure to ultraviolet light with the help of an ultraviolet lamp, thus the master has enough time to execute the chosen design.
Lamps for gel build-up differ in power, manufacturers and price category. Careful selection of the lamp is very important and often directly depends on the brand of the gel used.
Types of gel nail extensions
Gel extensions can be performed on forms or tips. Forms are called special patterns, on which an artificial nail is formed. They can be of different shapes and lengths and removed after solidification of the material under the ultraviolet.
Tipsa is a plastic base for building up, glued to the tip of the native nail. For gel nail extensions in the so loved by many design of the jacket there are special tips and shapes and a special gel for the formation of tips.
How to make gel build-up yourself?
Even if you do gel build-up not at home but in the salon - there is always a sense to know about the stages of the procedure, especially if you are dealing with a master for the first time.
The first step is to purchase a gel-extension kit that includes a modeling gel (transparent, pink and white), tips and forms, a nylon brush for applying the gel, a gel bond, an adhesive for removing the adhesive layer and degreasing, a fixing coating and ultraviolet lamp. Stages of growth:
- Disinfection of hands.
- Cuticle and burr processing (hygienic manicure).
- Treatment of the nail plate with a saw blade - removing gloss from the nail. The layer to be removed must be quite thin, this is done to better bond the gel to the surface of the nail.
- Degreasing the plate with a special liquid.
- Handle the shape or tips to the desired design, gluing them to the nails and removing the tip of the tip to the nail. Perhaps filing tips and after gluing to the nail, but with home use the first option is more convenient.
- Application of gel in 1-3 layers with mandatory drying of each layer for the time specified in the instructions. The first layer of the gel should be thin, it serves as a primer for subsequent layers.
- Remove the upper adhesive layer with a special liquid.
- Nail lacquer on request.
Who invented the technology?
This procedure is somewhat similar to stapling the dentist. And in vain, because the very build-up of nails was invented by a dentist who modeled artificial nails to his wife more than 50 years ago. Although the first nails made of dental acrylic plastic were thick, but brittle enough, the technology developed further. After 10 years the methyl methacrylate substance contained in the plastic was even declared unacceptable, hazardous to health and prohibited for use.
| | | |
| | | |
| | | |