Dinosaur or dragon - perhaps the most common origami figure. There are many origami schemes for dinosaurs from paper - both for beginners, and for those who are seriously addicted to this art. In this article we will learn and learn how to make dinosaurs from paper by hand: one simple and one - more complex of triangular modules.
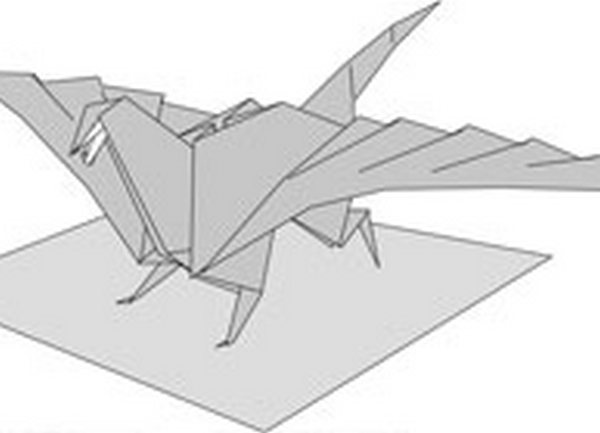
Dinosaur made of paper - master class №1
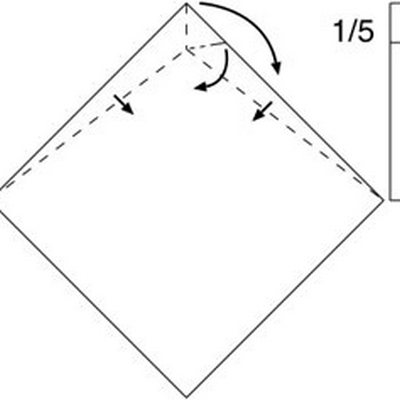
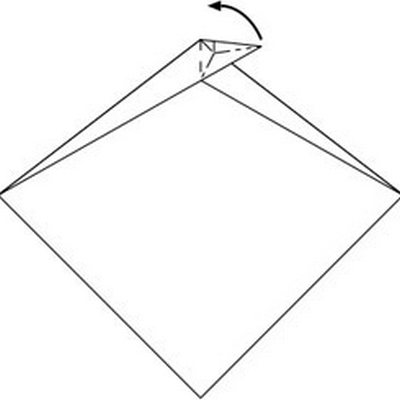
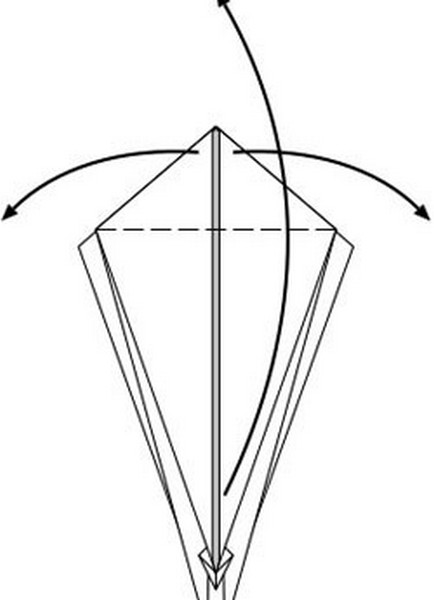
For this rather simple paper dragon-dinosaur you need a square sheet of paper. First just bend its corners inwards towards the middle. After that - turn it the other side and make a fold, called the "rabbit's ear."
| | | |
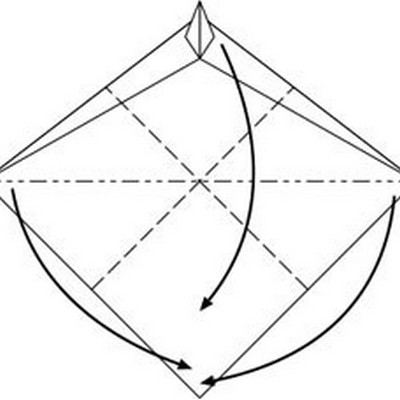
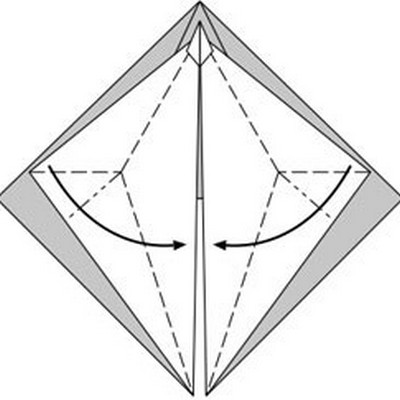
Fold the workpiece along the lines first up, then down. And then bend inward.
| | | |
Expand the corners of the workpiece behind and in front.
Fold the front and back rabbit ears.
Flip them behind and in front.
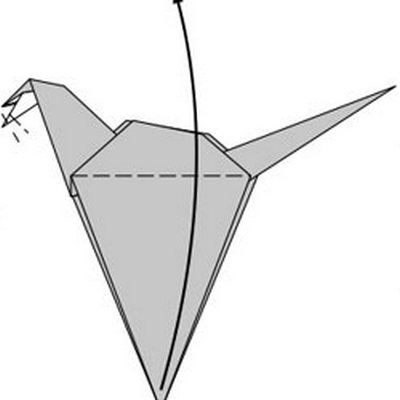
Now you need to make folds of lightning, incidentally shaping the neck and tail of our future dragon.
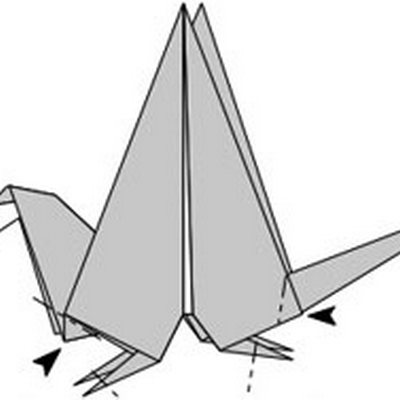
Then turn the head and crouch on the back of the ledge, bend the tail. Also bend the dragon's wings back and front.
| | |
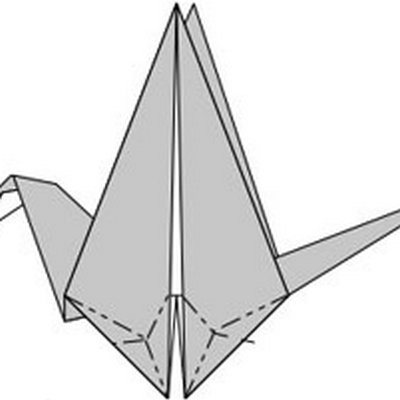
Remains quite a bit. We shape the legs, we bend the corners for the dragon's legs. We give the final shape to the tail and wings. So our wonderful dragon is ready!
| | | |
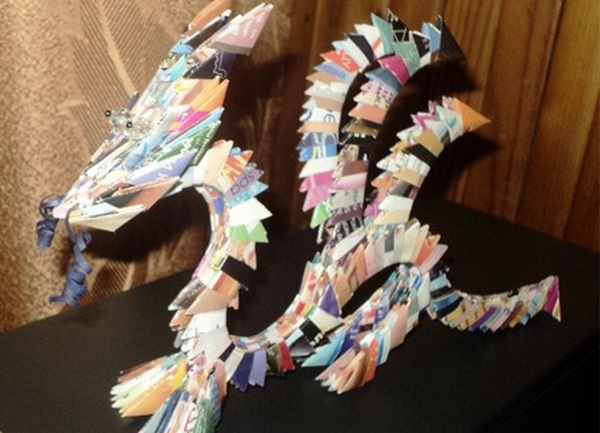
Dinosaur with his own hands - master class number 2
This dragon is a bit more complicated and takes more time to make. But it looks awesome and is a more solid model.
To make such a handsome man, we will need:
- many triangular modules (the amount of dragon will depend on their number);
- glue.
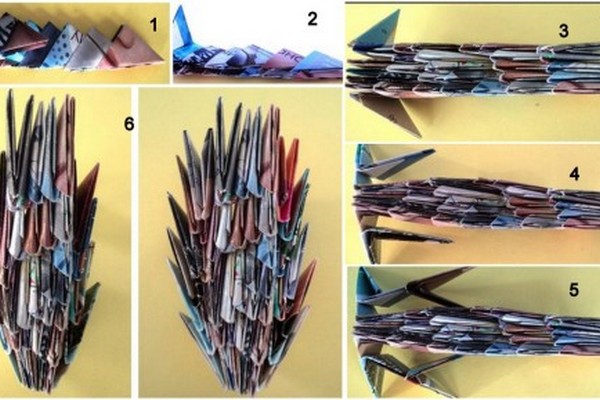
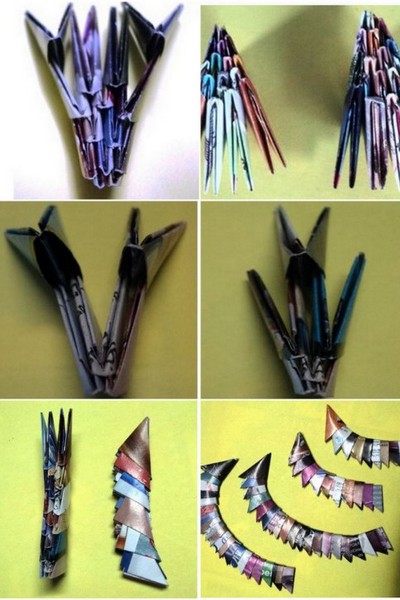
Depending on what size you want to get a dragon, you need to prepare in advance some or other number of triangular modules. It's not at all important, you can make a dragon even from a dozen modules.
In our case, we make a dragon, with a length of 30 triangular blanks. We stack the snake out of them so that its bends resemble the dragon's body. Such snakes need 3 pieces. They are glued together - so the dragon's body turns out solid and voluminous in appearance.
Next - we collect the head. Its thickness is 4 rows, and on the sides you need to add several more modules. They will imitate horns.
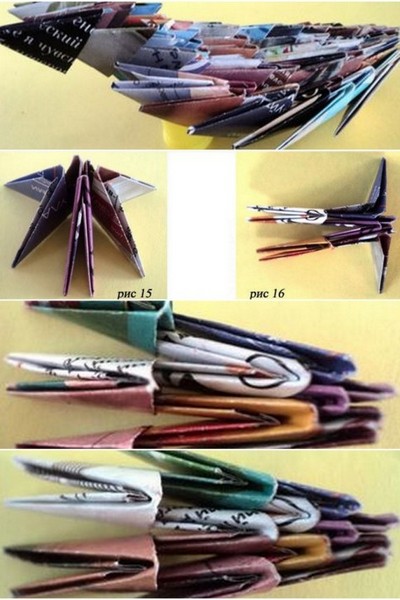
We begin to assemble the paws of the dragon, which is quite easy to do. Note that the front and back legs are slightly different.
It is not at all difficult to lay down the wings of our future dragon. To do this, just follow the step-by-step photo below.
When all the parts are ready, you can proceed with the final assembly. Using glue, we glue the head, paws and wings to the body. To narrow the tail at the end, you need to put two more modules on it and glue them together. To the head for a piercing entourage we glue our eyes and tendrils.
Our cute dragon from triangular modules is ready! Now you know how to make a dinosaur out of paper. Do not be afraid to experiment with different textures and colors of the source material and you will get bright and original origami.
About the usefulness and practicality of practicing origami
Such lessons are useful for children and their parents, as they develop dexterity of hands, perseverance, care and accuracy. Try first to do the craft yourself, to understand thoroughly, then involve in the joint employment of their children. For sure they will like to glue the dragon and other characters (horses, princesses, butterflies, snakes , etc.).
These figures can be later, when the glue dries up completely and the model becomes strong and strong, used in their games. For boys, a dragon is one of your favorite game characters. But even the girls will want to play with him, imagining that this evil dragon is guarding the princess imprisoned in the castle , which the brave knight is urgently to release.
However, you can just put the dragon on the shelf and admire it. And you can gradually learn new crafts and collect a collection.