Probably there are no such women who do not like beautiful and interesting things that adorn our interior. But they are often expensive. We offer you to save and make your own hands on topiary. You can make it from different materials: coffee , organza, satin ribbons and even pasta . We suggest you create a beautiful topiary made of napkins
What is a topiary?
Topiary, or as it is also called "European tree" or "Tree of Happiness" - decoration of the interior, which is very often used in European floristry. As you probably already understood from the title, it is a kind of tree, but instead of leaves on it something nice and original is attached. But how to make such a miracle from ordinary napkins, our master class on topiary will tell.
How to make a topiary from napkins?
Required:
- colored napkins;
- trunk (you can take a lucky branch or any suitable plastic stick);
- glue "moment";
- thread;
- potty;
- alabaster;
- various ribbons, strings, beads - for decoration.
Let's get to work:
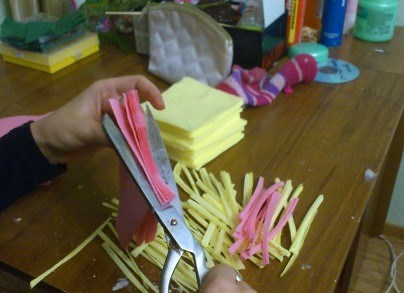
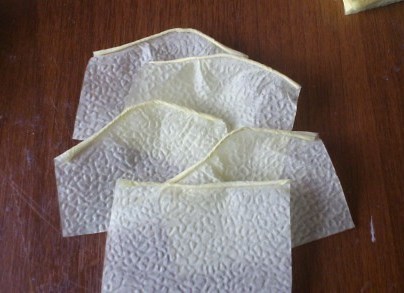
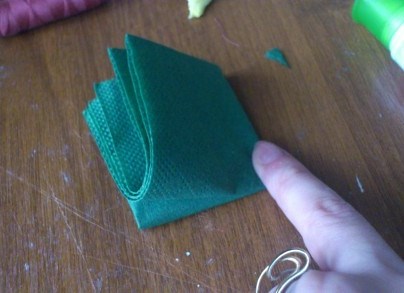
- We prepare napkins. Cut the folds from two sides. In order not to suffer, take piles at once as much as convenient. You need somewhere 50-60 wipes of the same color. As a result, you will get a little more than 200 squares. One flower from napkins for topiary will need somewhere 8-10 sliced squares.
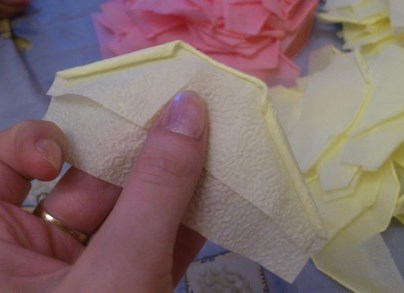
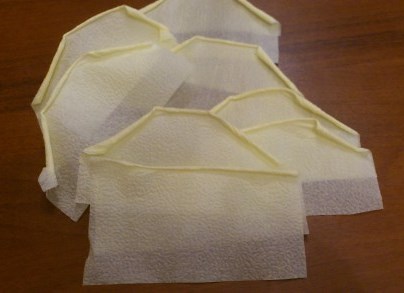
- Each napkin folds a little less than half and twist, if it turns out badly, then try to moisten your finger a little. Then do this procedure from each corner. The petal will turn out. We make such 6-7 workpieces.
- For the middle of the flower, we also twist one napkin, but only in the middle, without folding the sides.
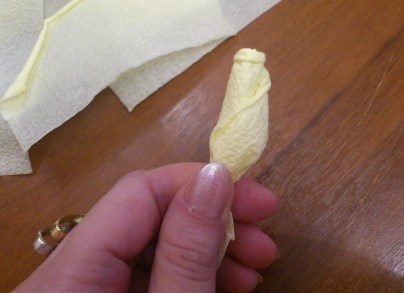
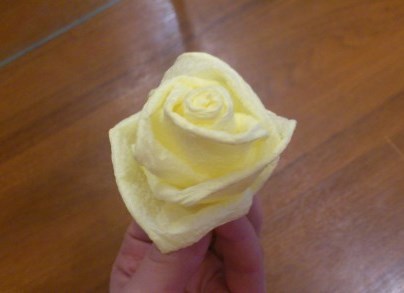
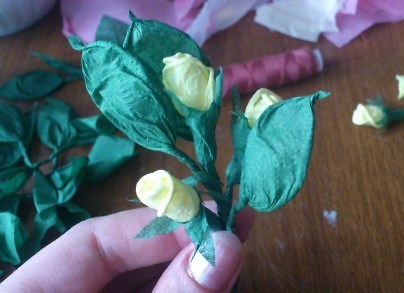
- We begin to collect the flower itself. We take the middle and twist it, but not tight. The tip is lowered down and pressed. Then start wrapping our bud in the harvested petals. Tack the thread. Then see for yourself what length you need. If you find it necessary, then cut the tip.
- In the manner described above, we make the remaining buds.
- In order to make flowers from napkins for topiary larger volume it is necessary to cut out napkins of a larger size, but they will need less than 3-4 petals, plus the middle. Although, we think that now, after learning this simple technique, you yourself can easily cope with and pick up flowers that you like.
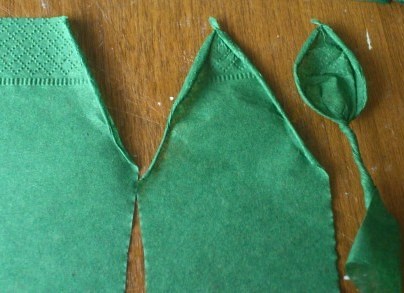
- Let's borrow the leaves. A green or blue napkin is cut in half and twisted, forming a leaf.
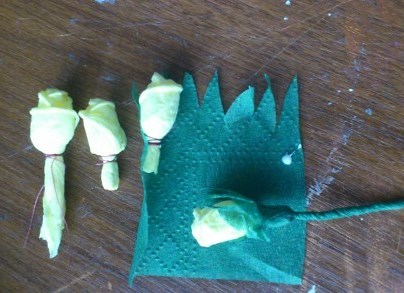
- In order to beautifully arrange small buds we take a green napkin and cut about ¼ of it with a fence. By the way, you can do this as well as in the beginning - a pile. We drip on a drop of glue from two sides and we twist into our "clothes" a bud. To make it more interesting, the edges of the denticles can also be slightly wrapped, as before the petals. But that's not all, we move on to the next point.
- On the finished leaves (from step 7), also drip a drop of glue and put a decorated bud in it (step8). Play with the amount, try to add one decorated bud in one leaf and one simple one. Get here are such nice little twigs.
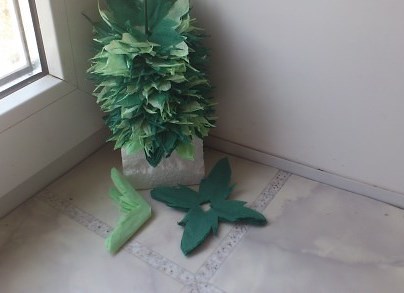
- We will borrow the leaves for large roses. Take a whole green, blue or salad napkin and fold it twice. Cut out the four leaf, remember how the snowflakes once cut. You can also twist the ends slightly. From one napkin you should get 8 pieces. Do not forget to play with color, the leaves can be of different shades.
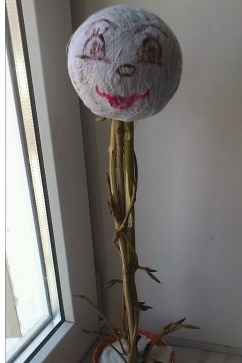
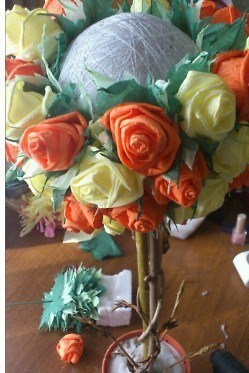
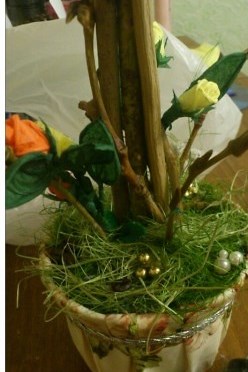
- Now let's deal with the skeleton of our topiary. From newspapers and toilet paper we turn off the ball, wrap it in threads and put it on the harvested barrel. All this construction is placed in a pot filled with alabaster. Now we wait, when all will dry up.
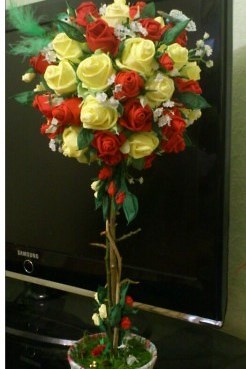
- It remains only to design our creation. On the roses put on the carved leaves, drip some glue and attach to the ball, which is waiting on the stick. In this way, we glue the whole ball with ready-made flowers.
- Fantasize and take care of the pot. Do not forget about the design of the "land". That's all, your "Tree of Happiness" is ready.
| | |
| | |
| | |
| | |