Since ancient times graceful cranes were revered by many peoples and cultures. They attributed the most beautiful human qualities - kindness, loyalty, friendliness. In Japan , for example, a bird is loved, because the Japanese believe that it brings people happiness and luck. In the world of beautiful Japanese cranes are considered the symbol of the country of the Rising Sun. We suggest that you learn how to make a crane of paper.
Japanese paper crane
Love for the graceful bird was reflected in the national Japanese art - origami, the essence of which is to create a variety of figures from paper without the use of glue or any other binding materials. By the way, a hand-made paper "crane" - one of the traditional figures in origami. There is even a Japanese legend, which says that the master of origami, who managed to make a thousand cranes from paper with his own hands, will find happiness, because his most cherished desire will certainly come true.
True, this legend is associated with a sad story about the girl Sadako Sasaki. The baby lived in the city of Hiroshima at a time when the US Air Force dropped atomic bombs in a settlement in 1945. Ten years later the girl had leukemia. Hearing the legend of the cranes, the little patient decided to add a thousand bird figures. Before her death, she managed to make only 664 figures, with which she was buried.
How to fold a crane of paper - a master class
To fold a beautiful figure of a bird of happiness, prepare a sheet of paper in the form of a square with a side of 15 cm.
- Fold the sheet in half so that a fold is formed diagonally. After that, unfold the paper.
- Then fold the sheet in half to form a rectangle.
- After this action, unfold the paper and fold it in half, but already in the opposite direction, again forming a rectangle.
- Again, unfold the paper, but already add it in the form of a triangle diagonally and unfold.
- Thanks to such manipulations, eight folds appear on the sheet of paper, which will later help us easily add the crane figure.
- Then the sheet needs to be folded so that the sides of the sides of the paper square are folded together.
- As a result, you should get a small diamond.
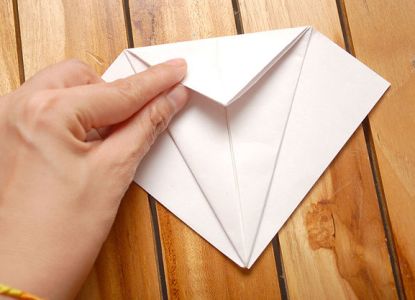
- Screw the right corner of the diamond to the center.
- Do the same with the left angle.
- Fold the top corner of the diamond to the center. Obvious lines will appear at the folds.
- Now fold the bottom corner of the diamond to the top and wrap it around the horizontal crease.
- Then fold the angle in the opposite direction until it stops.
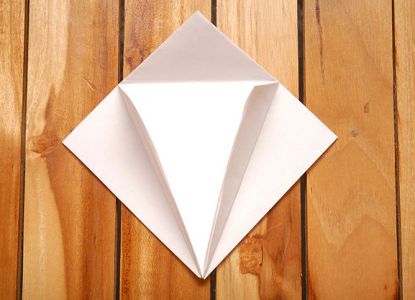
- The edges are folded into the middle of the rhombus and smooth out, so that as a result you have the same effect as in the photo.
- Turn the paper over to the other side and follow the steps described in step 6. You should get the next figure - a new rhombus.
- The edges of the figure fold to the middle. Also do on the other side of the diamond.
- One of the faces of the diamond is "scroll" from right to left.
- Also act on the second turn of the figure. Fold the bottom of the top layer to the top.
- Repeat the action on the other turn.
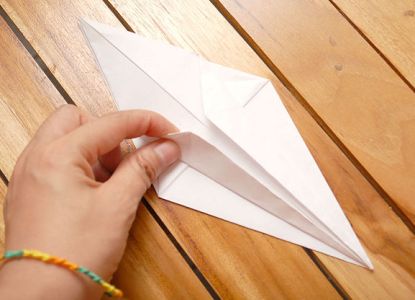
- The right side should be folded in this way, as if you are flipping through a book. Turn the figure up and do the same.
- Crane wings are lowered downwards, so that they are perpendicular to the tail and head of the bird.
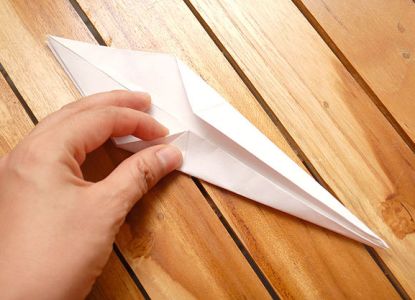
- Define the front and back of the figure. We put the tip of one of the "columns" sticking to the top - we get the head.
- Tail and neck of the bird spread apart.
- Stretch and press down the hump on the back of the crane.
- That's all! Your first origami from paper "The Crane of Happiness" with your own hands is ready! Now you can create not only figurines, but also other crafts in origami technique (by the way, modular origami is no less interesting variety of ancient Japanese art).
| | |
| | |
On the way to realization of desire it is necessary to add 999 more figures.