The technique of craquelure in decoupage is very popular with needlewomen and just lovers of beauty. First of all, for beginners, let us explain - what is this craquelure, and what does it "eat" with.
Craquelure is a cracks, an imitation of aging things. There is a craquelure "one-step", that is one-component. This is when the bottom layer of paint is visible through the cracks in the top paint. And there is a cracklure "two-step", or it is also called a two-component. This is the same craquelure, as in the first case, only the cracks are filled with something. For example - a silver or gold powder.
Craquelure in decoupage - MK
Today we will tell you how to make decoupage plates with craquelure. In this master class we will use a one-step decoupage with craquelure.
To create a masterpiece, we need this:
- maximally flat transparent dish;
- acetone or alcohol, vodka can be used;
- a napkin with a favorite pattern;
- acrylic paints of different colors (white, green);
- adhesive for decoupage, but you can, of course, and PVA;
- Crackles lacquer;
- brush - preferably synthetic;
- sponge;
- acrylic lacquer.
When you have prepared everything in advance, so as not to be distracted once more on trifles, you can start:
- We take a plate and wash it very well first, and then degrease it. For degreasing, alcohol, vodka or acetone is suitable. We wipe thoroughly - this is very important.
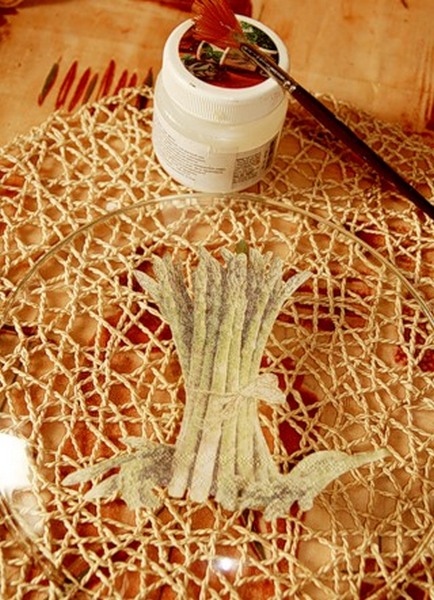
- From our napkin, we separate the top layer, cut out or cut off the beautifully pattern and attach it to our plate. Next on the drawing drip glue and from the center, we begin very carefully to smooth it to the edges, so that not a single bubble remains.
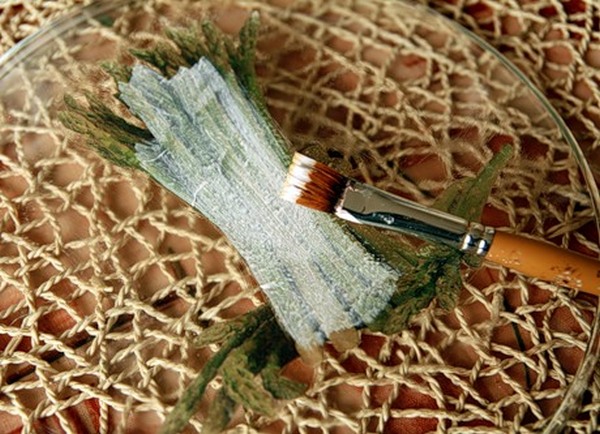
- We wait a while for the glue to dry. When this happens, cover our piece of napkin with white acrylic paint. And we cover with paint so that the picture on our plate becomes more bright and contrast. Leave the plate to dry out.
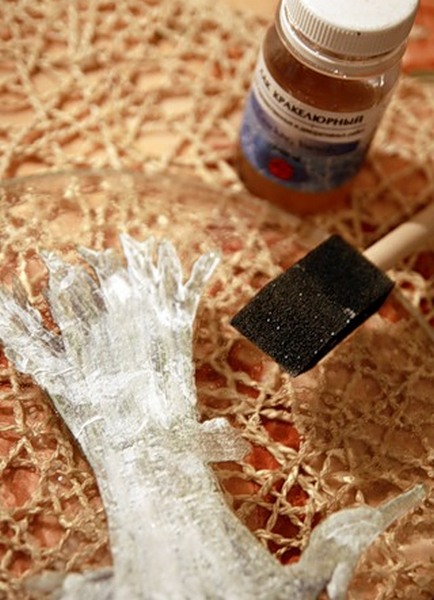
- Then we begin to make the background of our future masterpiece. As we already wrote above - the aging effect, i.e. craquelure, is very popular, and besides that, it also looks very impressive, especially in the decoupage of plates. Now we will do it. We take the varnish varnish and apply to the entire surface of the plate. It is necessary to apply in one direction.
- Leave to dry for 20 minutes. Then white and a drop of green paint carefully mix with each other and apply to the plate, only in the opposite direction to the varnish, not falling twice on the same place. Cracks begin to appear immediately, as they say - right before our eyes. But we leave our plate for 2-3 hours in peace, until it dries completely.
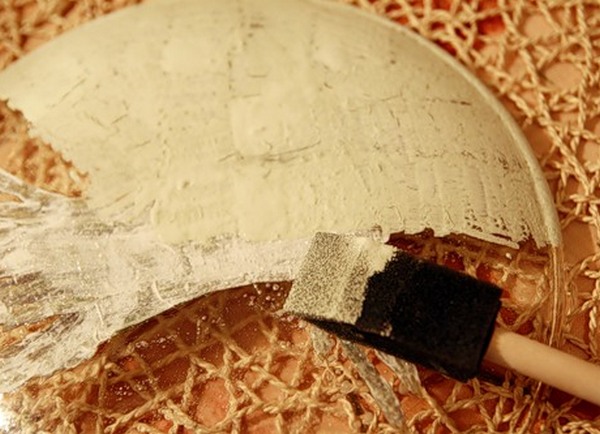
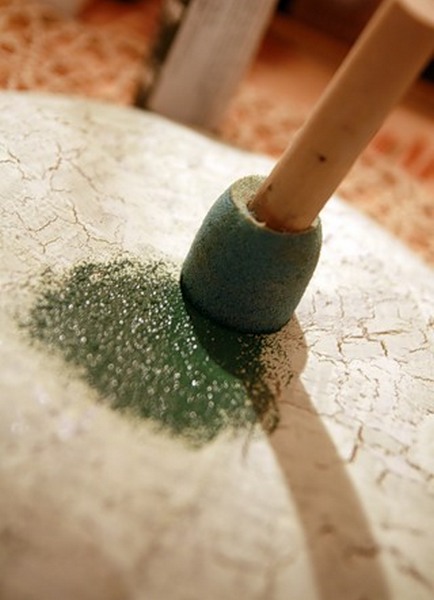
- Further, after our plate has dried, we take a contrasting color, in our case a dark green is very suitable. Using a sponge, we put it on the surface, "zachchkivaem" our plate. This is done in order to express our cracks well, which we tried so hard to do. We leave to dry.
- After another drying, we cover our already pretty curl with acrylic lacquer.
That's all - our masterpiece is ready. As it turned out, nothing complicated in the process of decoupage with craquelure is completely absent, the main thing is to follow the instructions of the master class and everything will turn out. Precisely in the same technique craftsmen decorate caskets , furniture and even flower pots .
A plate created with such love, and even with your own hands in the technique of decoupage with craquelure, looks simply amazing, rather put it in the most prominent place.
For the future we wish you creative inspiration, and, of course, great success in their embodiment. Let every thing made by your hands become a must-have masterpiece and pleases the views of your friends and relatives.