The art of paper making or quilling has appeared on the expanses of our country relatively recently, but has already become a mega-popular. And this is not surprising, because with the help of this technique, a small miracle is born from the ordinary strips of ordinary paper: figures of people and animals, flowers and paintings.
Paintings in quilling technique attract their non-standard and bright colors, and they can be created even by the most inexperienced masters. About how to make a picture-quilling and will be discussed in our article.
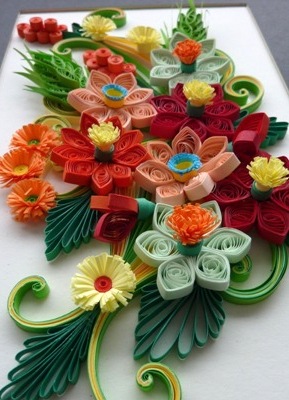
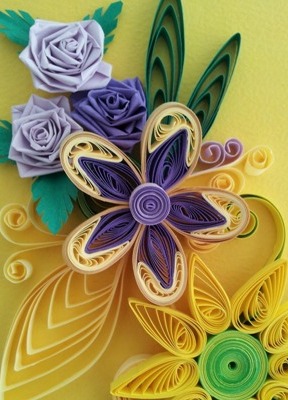
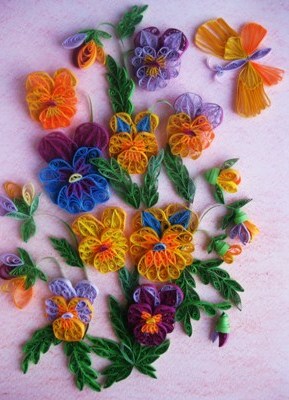
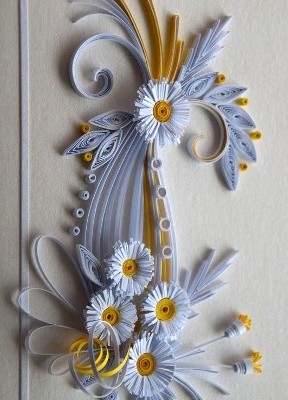
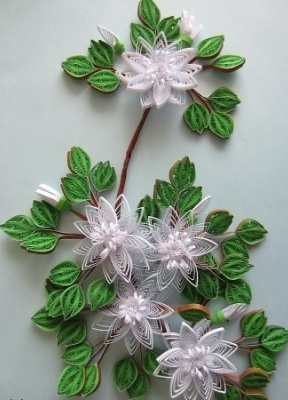
Quilling painting in the technique of "Flowers"
To create a small picture, we need the following set of tools and materials:
- a set of colorful quilling paper;
- stationery knife;
- scissors;
- glue;
- toothpicks;
- pencil;
- sheet of dense glossy paper for the substrate;
- a small piece of relief thick paper or wallpaper.
We will begin work on creating a kwiling picture with the twisting of all the main elements of a bouquet of flowers: leaves from green paper, petals of yellow, red and white paper. Screwing the necessary number of elements, we begin assembling flower buds and heads. In order to obtain three-dimensional multi-layered flower heads, use an auxiliary cone made of thick paper, which is then layered with base elements-petals.
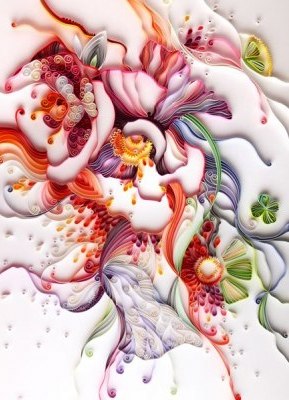
When the planned number of flower heads is ready, you can proceed to assemble the whole picture into a single whole. On the sheet of paper, we glue a rectangle of embossed paper, cutting it with a clerical knife to get a smooth and accurate cut. Then we mark out the place of gluing the main elements based on the base and start to work. When all the flowers are glued, and the desired result is achieved, the picture is set aside until it dries completely. Unusually and very impressive look quilling paintings, monochrome, on which all elements are twisted from paper of the same color. Such a picture easily fits into any interior and even becomes its highlight.
| | | |
| | | |
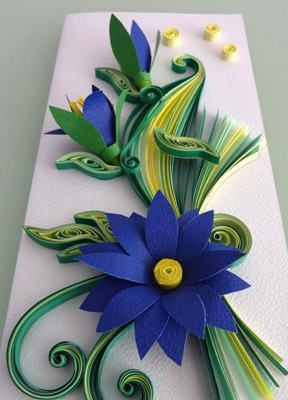
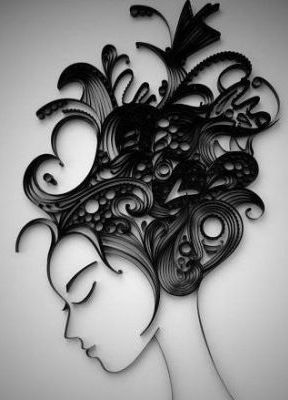
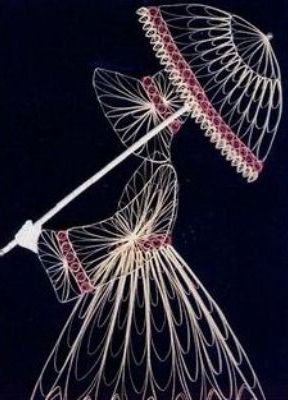
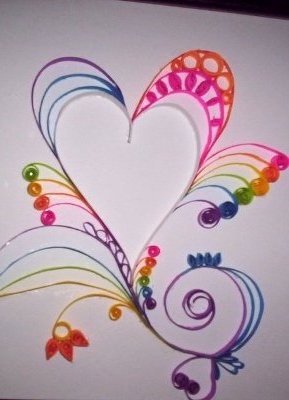
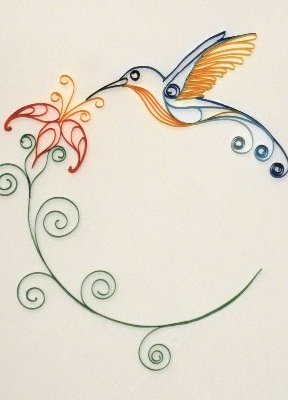
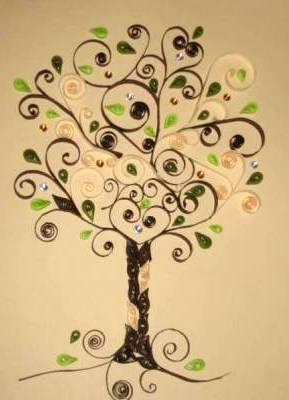
Painting in the technique of contour quilling
Another interesting type of paper art is contour quilling. From its classic fellow, it differs in that it does not use basic closed forms - droplets, rolls, etc. All contours of the elements of the picture in this technique are practically drawn by strips of quilling paper. Although initially this technique seems very complicated, but in fact, it is quite simple to perform.
To create a picture in the contour quilling technique, you will need the same set of materials and tools as for conventional quilling. The main difference is one - the paper for contour quilling should be taken as wide as 7 mm, since the 3 mm wide paper used for base elements is not sufficiently dense.
On the base of thick paper, we apply the contour of the drawing you like. It is better for beginners to take simple drawings that do not require the drawing of a large number of small details. Having decided with the picture, we begin work. More often, for contour quilling, open elements are used, one end of which is twisted, and the other is trimmed as necessary. Glue on the basis of the strip will be sideways, because the glue must be applied to the edge of the paper. When working, do not avoid the appearance of stains from the glue, but this should not be feared, as the PVA glue becomes transparent when dried.
Begin to "draw" all the details of the picture with paper strips from large elements to smaller ones, filling the interior space of large parts with miniature curls of paper strips, if necessary.
| | | |
| | | |